STRAWBERRIES – HOMEMADE JAM
If you are lucky enough to live in Southern California, you are probably aware that Strawberry Season lasts all year. I used to look forward to late January & February when the first Strawberries began to ripen. We don’t have to do that anymore as there is always one type of strawberry or another that is in season at any time of the year.
One of the largest growing areas is Oxnard which is just north of the San Fernando and Conejo Valleys. Growing up in the San Fernando Valley there were always plenty of places where you could purchase fresh strawberries, but unfortunately most of the fields are gone and replaced with buildings. Fortunately, Oxnard and surrounding countryside still have a reasonable amount of farmland.For fresh strawberries, you usually don’t have to go out to the fields to purchase them. You can still find a truck sitting on a street corner or in front of a busy place such as the post office from which you can purchase them. Also, fortunately, there are many farmers markets at which strawberries can also be purchased. While wandering through one of these markets, I came across a grower who was selling his berries for only $2.00 a basket. I couldn’t resist (and they were sweet too!), so I purchased a 3 pack. I love strawberry jam and I figured why not make some from the berries that I had purchased.
Jam can be made in two ways. One, you can purchase pectin and follow the directions in the package (using pectin requires double the sugar but produces more jam) or you make it the traditional way. Pectin is a starch found in fruit before it fully ripens. The starch turns to sugar as the fruit ripens. When making jams and jellies without pectin, it is best to use fruit that is not fully ripened as the pectin content will be higher and the jam or jelly will be more likely to set up.
The advantage of using commercial pectin products is that you can use fully ripened fruit thus getting more fruit flavor. The disadvantage is that you use twice the sugar, so the advantage of having more fruit flavor is offset by the fact that you have more sugar than fruit in your product.My preference is making jams and jellies the old-fashioned way without the use of commercial pectin. It does take longer and can be trickier to know when to stop cooking so that you have jam or jelly and not syrup or fruit leather. A thermometer helps in this case, although there are tests that you can do if you don’t have a thermometer. If you do have a jelly thermometer, the temperature for properly set jelly is 218 degrees if you are at or about 1000 feet above sea level. If you are at sea level the temperature would be 2 degrees higher. The higher you go above sea level, the lower the temperature would be. This is because air pressure is different at different altitudes. The higher the altitude the lower the air pressure. The lower the altitude, the greater the air pressure.
Another method for determining the gelling point of jam or jelly is called the sheeting test. Dip a clean metal spoon in the cooking jelly and hold it about 12 inches from the surface. If the jam or jelly runs off easily, it is not done. If two drops form, it is not done. If two drops form and then pull together before dripping off the spoon, then the jam or jelly is of the right consistency.
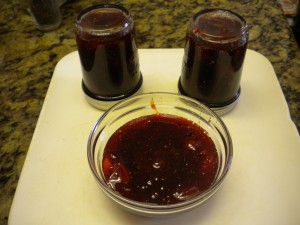
To make Strawberry Jam the rule of thumb directions follow. The first thing is to make sure you have clean containers to ladle the jam or jelly into. Wash your jars, lids and seals in hot soapy water and rinse thoroughly or run through the dishwasher. Place the jars in a kettle of water that covers them completely. Place a lid on the kettle and bring to a boil; boil for 10 minutes. Drain the jars, one at a time just before ladling the finished product into it. Place the rings and seals in a saucepan, cover with water, bring to a boil and boil for 3 minutes. Remove from the hot water with tongs, being sure to drip off all the excess water. (If the water is boiling as it should be, the water will actually evaporate off of the lids and seals). Place on the filled jar, making sure the top is clean and seal tightly. Turn the jar over until cool; tighten the lid, label and store in a cool, dry place. Refrigerate after opening. Filled Jars turned upside down to seal – dish of jam
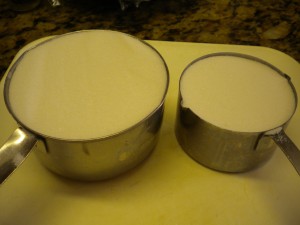
When making jam, you usually want to have equal amounts of fruit and sugar. I didn’t quite follow this rule though when making my jam. After cleaning the fruit (berries should never be washed, just wiped clean with a paper towel – however, I always wash them.) If you do feel like you have to wash them, be sure to blot them dry with a paper towel. I used 4 cups of sliced berries, the theory being that there are gaps between the slices of berries and unless you crush them, you are not going to have a full 3 cups if you only measure 3 cups. I used 3 cups of granulated sugar and the juice of half a lemon.
(Its always good to have some acid) To avoid having the jam foam ( which you would have to skim off), once the fruit mixture starts bubbling, put a teaspoon of butter into the pan with the berries and sugar.
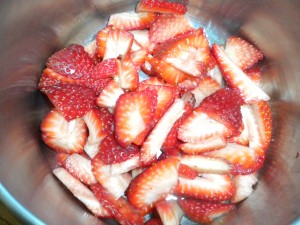
Combine your fruit, sugar, lemon juice in a large saucepan, or copper jam pot, if you have one.
Place over high heat and bring to a boil. You can crush the berries once they start cooking, using a potato masher or you can chop them in your food processor before you start cooking. If you like to have visible pieces of fruit in your jam, do it the first way.
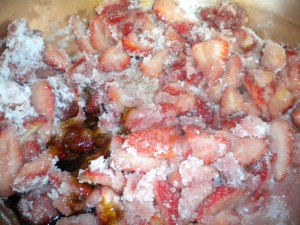
Once the mixture starts boiling, turn the heat down just enough to keep the mixture bubbling, but not burning and add the Butter.
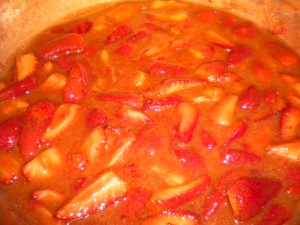
Berries and Sugar liquefy as they cook.
Cook, stirring constantly until the jam tests properly or your thermometer reads the correct temperature. (See the fourth and fifth paragraphs above), you can ladle the jam into the sterilized container and seal with the sterilized lids and rings. Turn upside down (the hot jam will ensure that the lids seal) until cool. Tighten the lids, label and store in a cool, dry place. Once a jar of jam is opened, store any unused portions in the refrigerator. Sugar is a common preservative and the jam will last indefinitely in the refrigerator. If it starts crystallizing, though, it is best to throw it out as it will not taste good. (You can tell if it is Crystallized by the formation of sugar crystals on the sides of the jar)
Other fruit jams can be made in the same way as the Strawberry Jam.
It is always best to make your jams and jellies in small amounts – it takes less time and is easier to handle.Try it some time and enjoy the flavor of homemade jam, jellies or preserves. Filled Jars turned upside down to seal – dish of jam
Jellies are made using the juice of fruit. The fruit first has to be crushed or pureed in the food processor and then strained through cheesecloth. You definitely get more fruit flavor by making jam rather than jelly.
