NATIONAL PEACH PIE DAY
Friday, August 24, 2012 is National Peach Pie Day. You can either go out and purchase one or you can have the fun of making one or more, especially if you still have ripe peaches on your tree. If you have never made a Peach Pie, follow the recipe at peach-pie/ and make one for yourself and your family.
Peaches are a stone fruit native to China. The name implies that there is stone inside, but it is indeed a pit, a rather strong hefty pit. Peaches are related to Almonds and if you closely at the Peach Pit you will see a resemblance to an Almond. Because of this, adding Almond Extract to your Peach dishes, will enhance the flavor thereof.
There are many types of peaches to choose from, but some are better than others for pie making. The best type of peaches for making pies and other baked goods are the Freestone. The freestone peach meat separates much more easily from the pit than the Cling Variety. Whereas the Freestone Variety is better for baking, the Cling variety is better for eating out of hand in that they are sweeter than the Freestones. While you are following the recipe for Peach Pie, you can refer to the photos below for additional help.
EQUIPMENT NEEDED FOR MAKING A PEACH PIE
Mixing Bowls
Pastry Blender or your 2 table knives or your fingers
Measuring Spoons and Cups
Rolling Pin & Stockinette (The Stockinette is not mandatory but is very helpful)

Pie Pan
Vegetable Peeler & Paring Knife
Cutting Board
Colander
Saute Pan
Crimping Tool or Fork

INGREDIENTS NEEDED:
All-Purpose or Pastry Flour
Butter or Shortening
Salt
Ice Water
Egg for Egg Wash
Coarse Sugar for the top of the Pie
PROCEDURE:
- Make your Pie Crust and chill it while you are preparing the filling. basic-pie-crust/
- After making your dough, flatten it as much as you can and then wrap it in plastic wrap and chill.
- The next step is to peel the peaches. If the peaches are firm, you can peel them with a serrated vegetable peeler. If they are not firm, follow the directions below:
a. Bring a 2 quart pot of water to a boil.
b. With a small paring knife, make a crosswise slit in the top and bottom of each peach.
c. Have a bowl of ice water at hand.
d. Using a slotted spoon or spider, lower each peach (two or three at a time) into
the boiling water and allow to stay in the water for at least 1 minutes – this will depend
on the ripeness of the peach – the riper the peach, the less time it will take for the skin
to be released.
e. Use a slotted spoon to remove the peach from the boiling water and carefully place in
the ice water – the remove and use your paring knife to slip the skin off the peach. If
this is done properly, the skin should come right off. (Don’t forget – the amount of time in the boiling water will depend on the ripeness of the peach – this is something you will have to determine by yourself – if the peach becomes mushy you will know that the time in the water is too long – if it doesn’t want to come if then it is too short. Do one peach at a time until yo determine the correct amount of time they will need to remove the skine easily.
- Once all the Peaches have been peeled, split them in half, remove the pits and then slice them. It may be easier to quarter them first and then slice the quarters in half.


- The next step is to put your sliced peaches into a large bowl and toss with the Flour, Cornstarch, Sugar, Spice mixture.

- If the peaches are very juicy let them sit awhile to drain and then put the drained liquid into a small saucepan and cook over medium/high heat until the liquid reduces by half. Return the reduced liquid to the peaches.
- Remove your Dough from the refrigerator and divide in half. Roll out the first half on a lightly floured board with a rolling pin covered with a stocikinette (See Illustration above) Rub Flour into the stockinette before rolling out your dough.
- When rolling out the Dough, only roll in one direction at a time, starting in the middle. Roll from the middle to the edge, and do this in all four directions.
- Once the Dough is large enough to fit into your pan, fold it in half, gently lift it up and place in the pan. Press down with your fingers to ease into the pan. Do not stretch or pull – it should just be eased in.

- Poke the bottom of the crust with a fork in several places to prevent it from breaking when baked.
- Place the prepared Peaches into the crust.

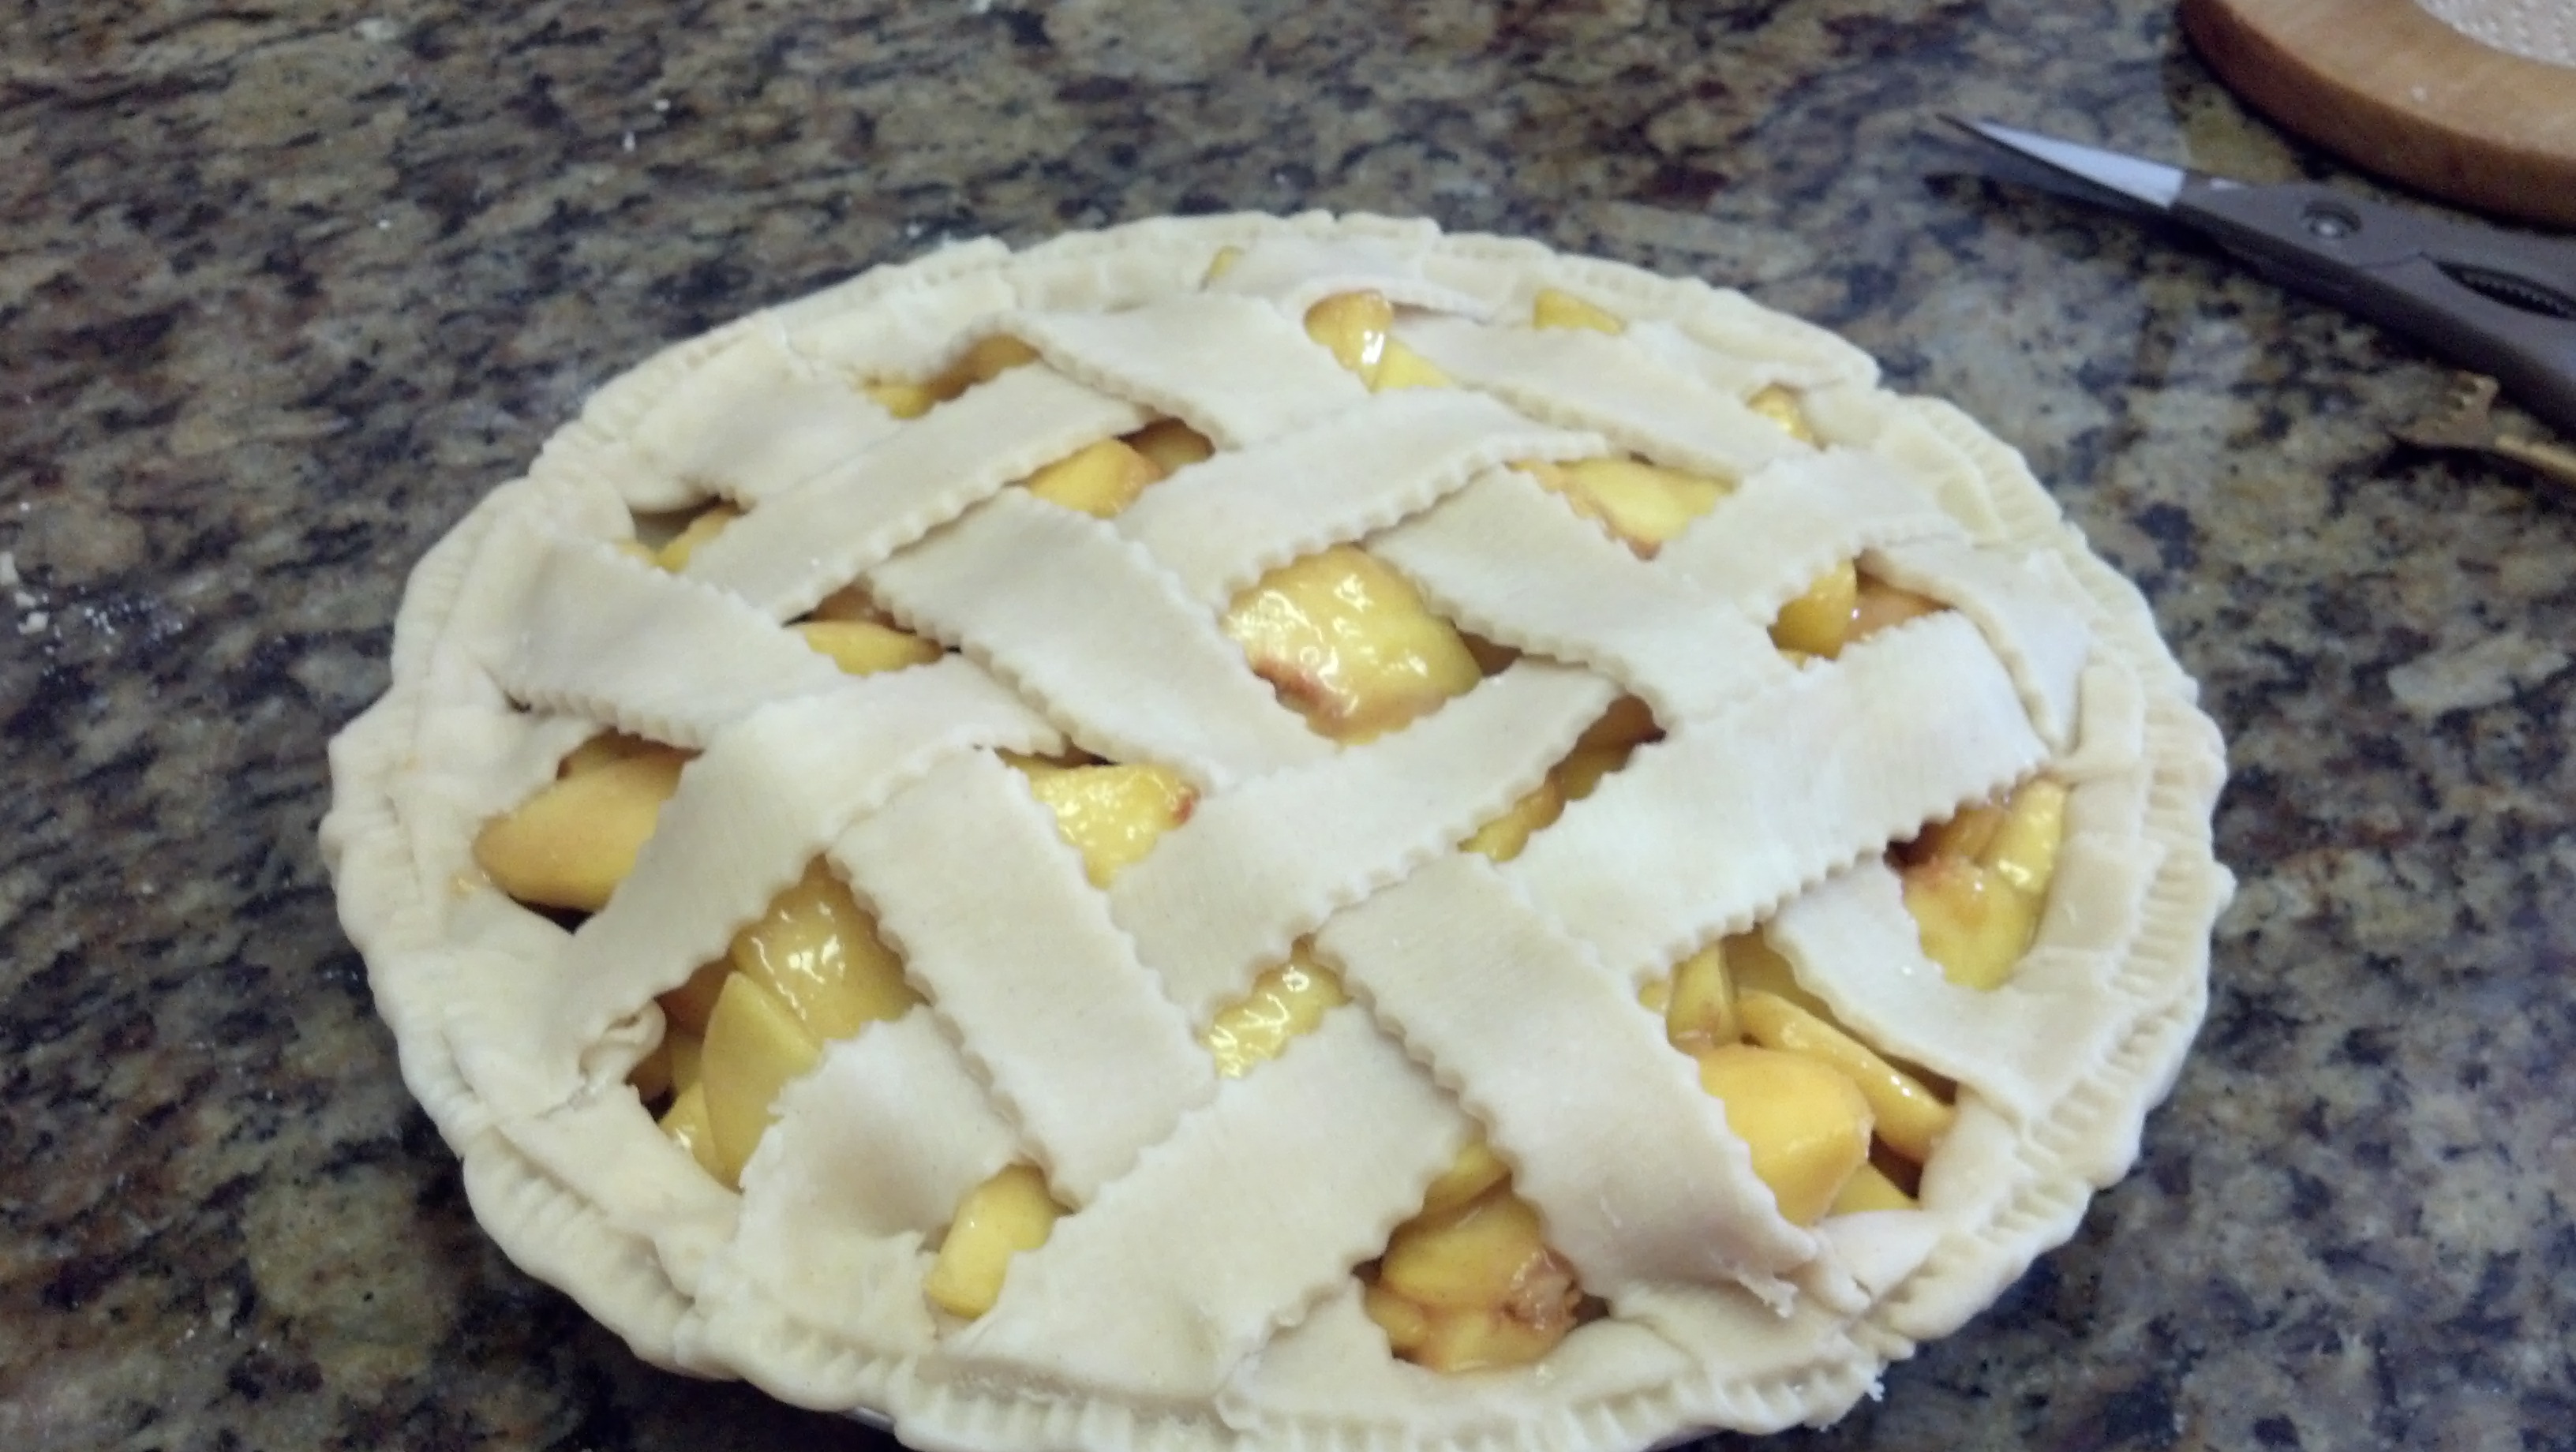
- Roll out the second piece of dough and fit onto the top of your peaches. If desired, you can make a lattice by cutting the dough into 1″ wide strips and weaving them over the Peaches.

")
The First Lattice Strip laid across the center. Lay the other ones down on either side equidistant from each other and the center stip.
")
")


The next step of course is to bake the pie. Unfortunately, I forgot to take picture of the baked pie. It was a Birthday Pie for my oldest son, and once everyone came over, I just forgot about taking more food pictures. For a photo of a baked pie with a complete top crust, see the peach-pie/ recipe.