MUSICAL DESSERTS
Musical Desserts! What are they? Desserts that play music? Alas no. These are desserts that were created to honor people or certain Arts in the musical world.
The Musical Desserts that I am familiar with are:
Pavlova – Both New Zealand and Australia lay claim to the creation of Pavlova and it is the National Dessert of both countries. This famous dessert was named after the Russian ballerina Anna Pavlova in honor of one of her visits to the above name countries. It consists of a meringue base topped with whipped cream and fruit such as strawberries, passion fruit or kiwi. Pavlova can either be rolled like a jelly roll or free formed in a ring shape.
Opera Cake – a multi-layered sponge type cake put together with calorie-laden, but delicious fillings such as Chocolate Butter Cream, Chocolate Ganache and topped with a Chocolate Glaze.
Peach Melba – a dessert named after the famous Australian Opera singer, Nellie Melba. The dessert was created by Escoffier at the Savoy Hotel in London, while Melba was doing a performance of Wagner’s. Lohengrin in London. Escoffier was the famous French Chef who set the standard for all French Cooking. Peach Melba consists of Poached Peaches on top of Vanilla Ice Cream and is topped with a Raspberry Sauce. For a recipe for this dessert go to deserts/peach-melba/
Crepes Suzette may be another Musical Dessert. There are several stories associated with the creation of this dessert which consists of Crepes (a very thin pancake) served with a flaming Orange Sauce. One of the stories circulating about Crepes Suzette is that it was named after a famous French Actress whose name was Suzette. Another story goes that it was named after a character in a play. Whatever the story, Crepes Suzette are delicious and fun to watch being made. Even though it is not exactly a ‘Musical Dessert’, there is some theater involved, allowing it to surreptiously fit into this category.
Charlotte Russe, although not created as a Musical Dessert, was nonetheless created for a famous person. There seem to be several different variations on the origin of Charlotte Russe. The first Charlotte was created during the 18th Century and named for the wife of King George III of England. It consisted of an apple compote baked in a round mold lined with toast slices.
A few decades later, the great French chef Careme adopted the name but altered the concept in response to a kitchen crisis. He was preparing a grand banquet for King Louis XVIII and discovered he did not have enough gelatin for the Bavarian Creams he was making. Careme used Lady Fingers to bolster the sides of his dessert. The result became known as Charlotte Russe. It is said that he called it Charlotte Russe, because at that time, anything Russian was very popular.
There are other sources that say the dessert was created for or named after, the Russian Czar, Alexander. At this point, it really matters not why or whom it was created for. Charlotte Russe was a very popular dessert during the early part of this century and is very good.
Desserts, whether they are named after Music, Musicians, or Vocalists or Actresses, or Royalty are delicious and usually enjoyed by most who indulge in them.
Categories: Baking, Dessert Ideas, Main, National Food Days, Pastry Tags: baking, Dessert Ideas, Fruit, Ganache, Lemon Curd, Meringue, Mocha Buttercream, National Food Days, Opera Cake, Peaches, Raspberries, Sponge Cake
NATIONAL PEACH PIE DAY
Friday, August 24, 2012 is National Peach Pie Day. You can either go out and purchase one or you can have the fun of making one or more, especially if you still have ripe peaches on your tree. If you have never made a Peach Pie, follow the recipe at peach-pie/ and make one for yourself and your family.
Peaches are a stone fruit native to China. The name implies that there is stone inside, but it is indeed a pit, a rather strong hefty pit. Peaches are related to Almonds and if you closely at the Peach Pit you will see a resemblance to an Almond. Because of this, adding Almond Extract to your Peach dishes, will enhance the flavor thereof.
There are many types of peaches to choose from, but some are better than others for pie making. The best type of peaches for making pies and other baked goods are the Freestone. The freestone peach meat separates much more easily from the pit than the Cling Variety. Whereas the Freestone Variety is better for baking, the Cling variety is better for eating out of hand in that they are sweeter than the Freestones. While you are following the recipe for Peach Pie, you can refer to the photos below for additional help.
EQUIPMENT NEEDED FOR MAKING A PEACH PIE
Mixing Bowls
Pastry Blender or your 2 table knives or your fingers
Measuring Spoons and Cups
Rolling Pin & Stockinette (The Stockinette is not mandatory but is very helpful)
Pie Pan
Vegetable Peeler & Paring Knife
Cutting Board
Colander
Saute Pan
Crimping Tool or Fork
INGREDIENTS NEEDED:
All-Purpose or Pastry Flour
Butter or Shortening
Salt
Ice Water
Egg for Egg Wash
Coarse Sugar for the top of the Pie
PROCEDURE:
- Make your Pie Crust and chill it while you are preparing the filling. basic-pie-crust/
- After making your dough, flatten it as much as you can and then wrap it in plastic wrap and chill.
- The next step is to peel the peaches. If the peaches are firm, you can peel them with a serrated vegetable peeler. If they are not firm, follow the directions below:
a. Bring a 2 quart pot of water to a boil.
b. With a small paring knife, make a crosswise slit in the top and bottom of each peach.
c. Have a bowl of ice water at hand.
d. Using a slotted spoon or spider, lower each peach (two or three at a time) into
the boiling water and allow to stay in the water for at least 1 minutes – this will depend
on the ripeness of the peach – the riper the peach, the less time it will take for the skin
to be released.
e. Use a slotted spoon to remove the peach from the boiling water and carefully place in
the ice water – the remove and use your paring knife to slip the skin off the peach. If
this is done properly, the skin should come right off. (Don’t forget – the amount of time in the boiling water will depend on the ripeness of the peach – this is something you will have to determine by yourself – if the peach becomes mushy you will know that the time in the water is too long – if it doesn’t want to come if then it is too short. Do one peach at a time until yo determine the correct amount of time they will need to remove the skine easily.
- Once all the Peaches have been peeled, split them in half, remove the pits and then slice them. It may be easier to quarter them first and then slice the quarters in half.

Peeled Peaches – these Peaches were firm enough to peel with a serrated peeler, thus avoiding the hot water bath.
- The next step is to put your sliced peaches into a large bowl and toss with the Flour, Cornstarch, Sugar, Spice mixture.
- If the peaches are very juicy let them sit awhile to drain and then put the drained liquid into a small saucepan and cook over medium/high heat until the liquid reduces by half. Return the reduced liquid to the peaches.
- Remove your Dough from the refrigerator and divide in half. Roll out the first half on a lightly floured board with a rolling pin covered with a stocikinette (See Illustration above) Rub Flour into the stockinette before rolling out your dough.
- When rolling out the Dough, only roll in one direction at a time, starting in the middle. Roll from the middle to the edge, and do this in all four directions.
- Once the Dough is large enough to fit into your pan, fold it in half, gently lift it up and place in the pan. Press down with your fingers to ease into the pan. Do not stretch or pull – it should just be eased in.
- Poke the bottom of the crust with a fork in several places to prevent it from breaking when baked.
- Place the prepared Peaches into the crust.
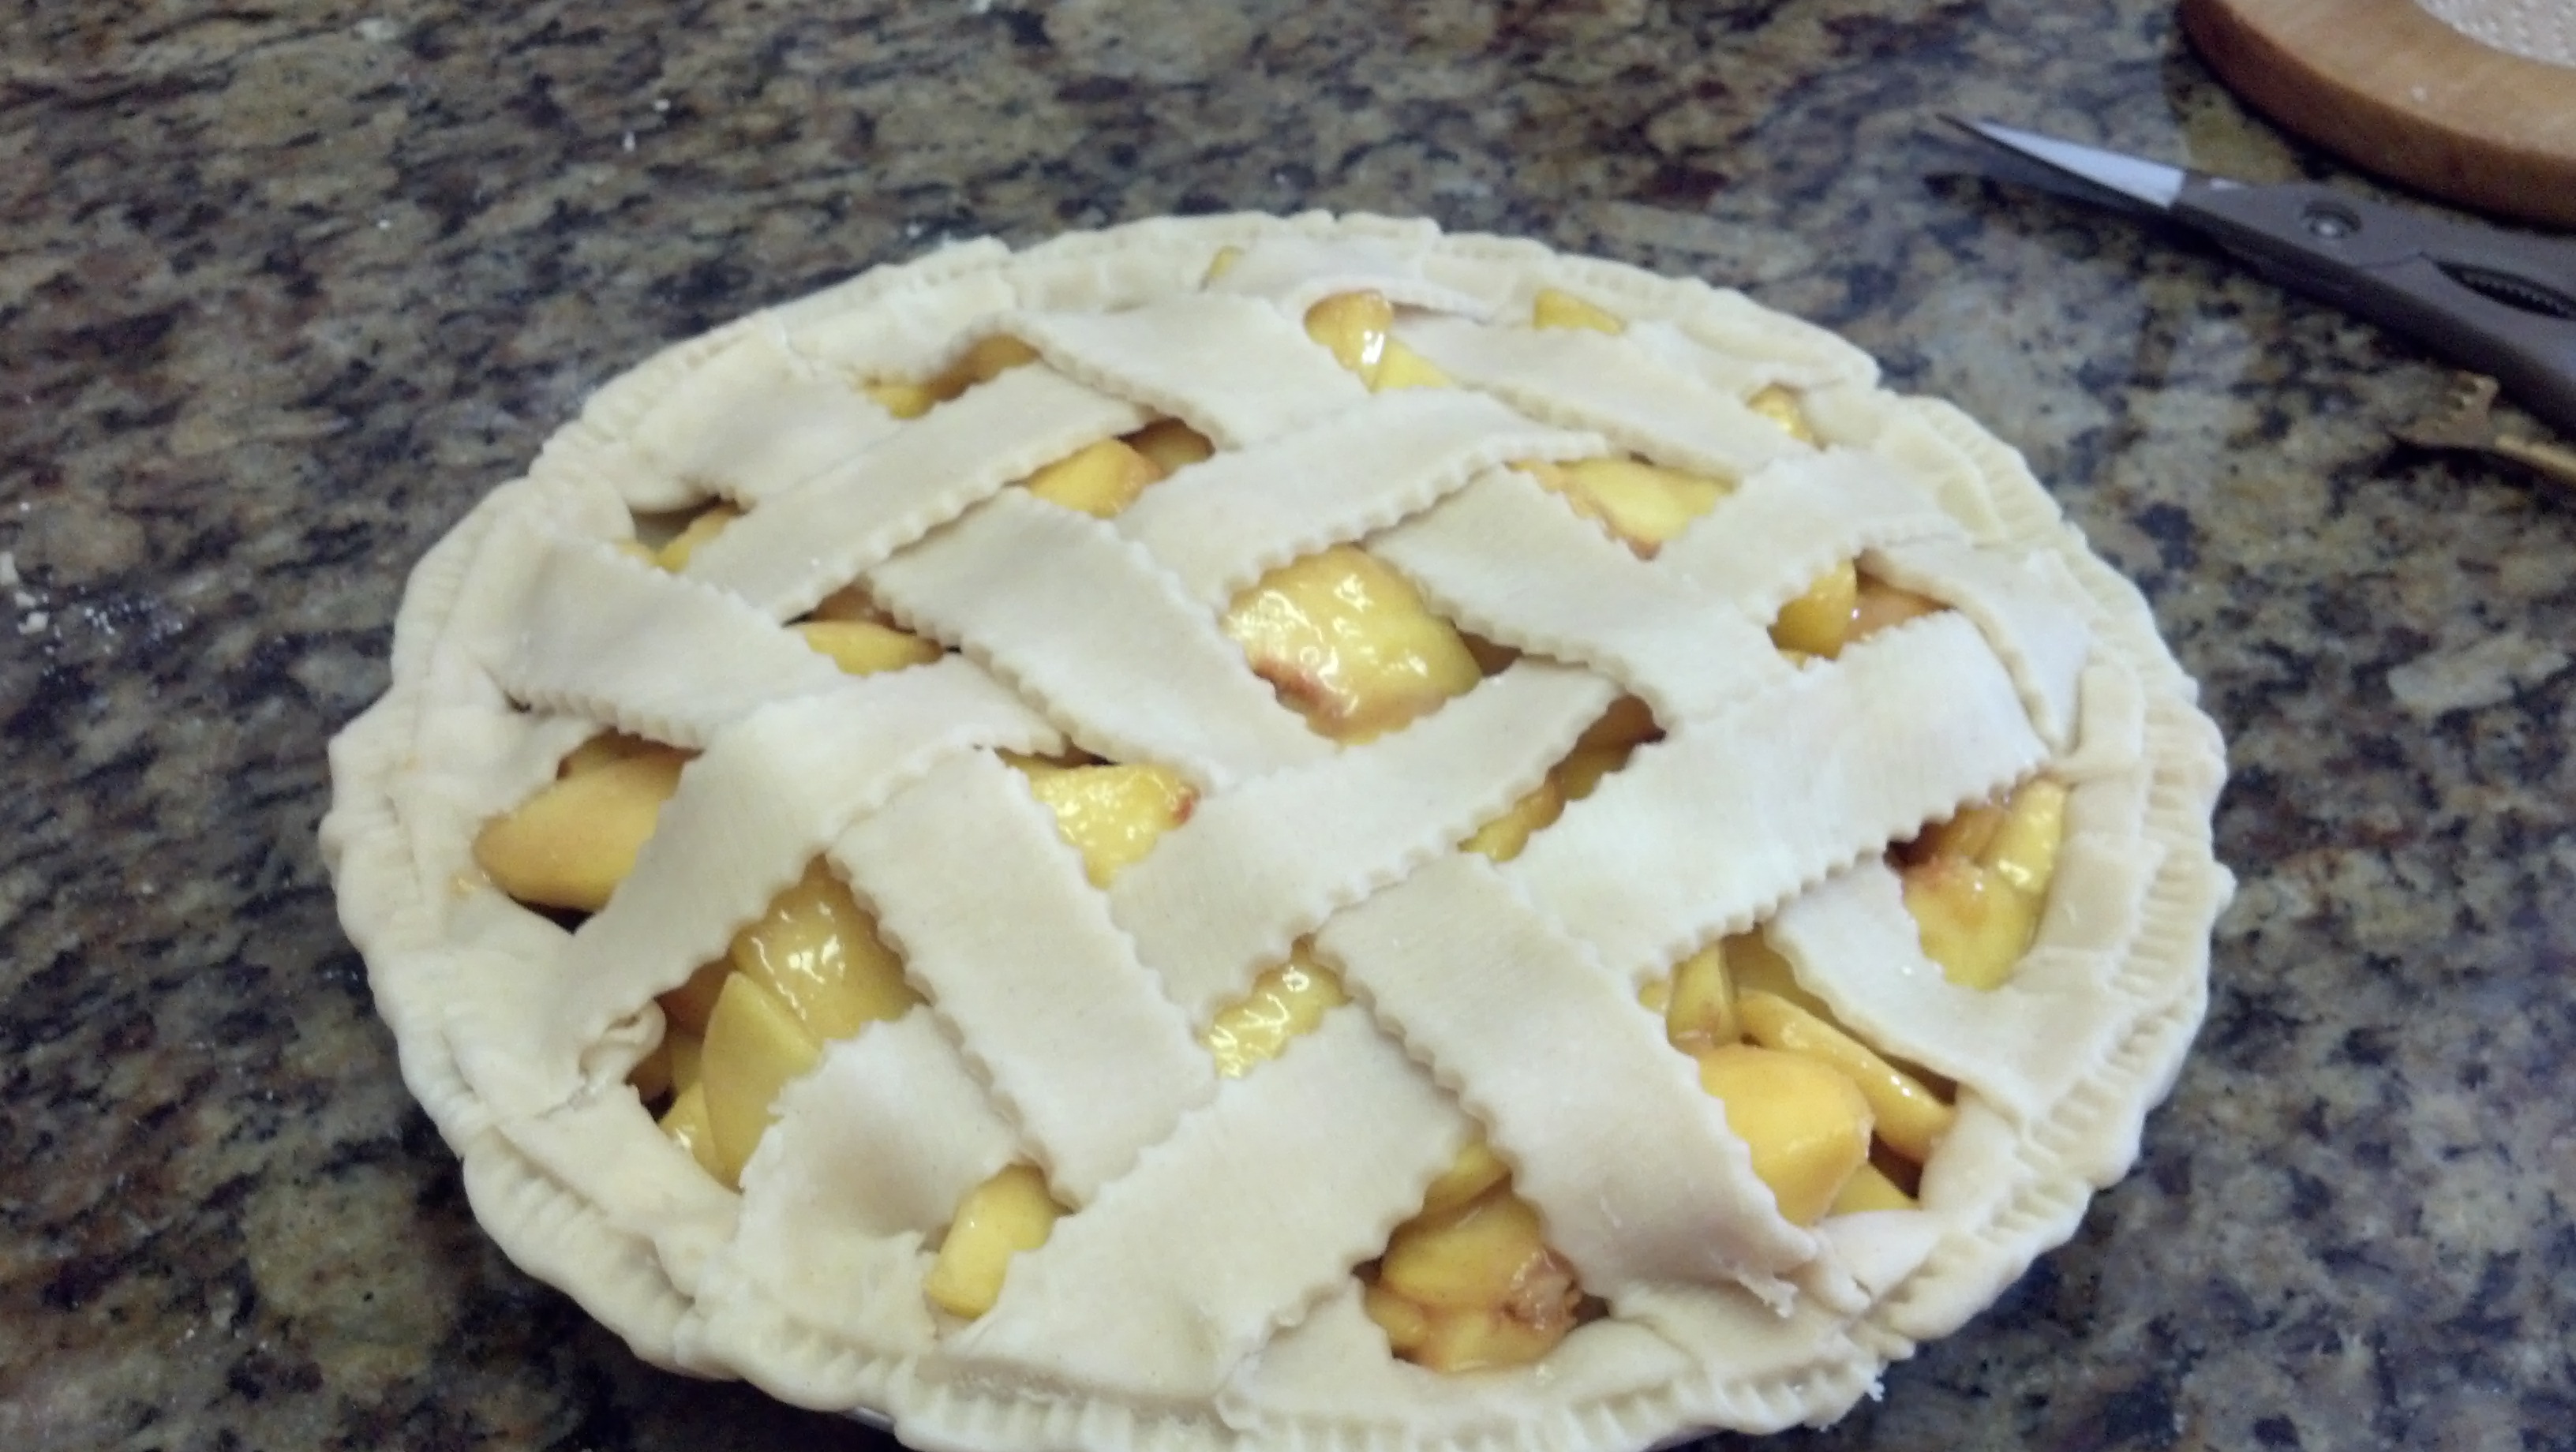
- Roll out the second piece of dough and fit onto the top of your peaches. If desired, you can make a lattice by cutting the dough into 1″ wide strips and weaving them over the Peaches.
The First Lattice Strip laid across the center. Lay the other ones down on either side equidistant from each other and the center stip.

Lattice Added & Crimped
The next step of course is to bake the pie. Unfortunately, I forgot to take picture of the baked pie. It was a Birthday Pie for my oldest son, and once everyone came over, I just forgot about taking more food pictures. For a photo of a baked pie with a complete top crust, see the peach-pie/ recipe.
Categories: Baking, Breakfast Ideas, Dessert Ideas, Main, National Food Days, Pastry Tags: baking, Cinnamon, Dessert Ideas, Fruit, Lattice Top, Peaches, Pie Crust, Pies
PEACH FRENZY
A week and a half ago, our peaches were too green to pick. Now they are falling off the tree and it is all I can do to keep up with them. Of course, the Squirrels and Birds are helping us do that, but they started even before the peaches were ripe enough for us to eat or to even cook with. Fortunately, there is an ample amount for all of us. Every morning I go out and pick the ripest peaches, (the ones that come off the tree easily) and then clean up the half-eaten ones on the ground. Would love to leave them there for the animals, squirrels, birds and rabbits, but unfortunately, they also attract fruit flies, so unless we get them picked up, we have a fruit fly infestation and that is not good.
The peaches are very good this year, but one can only eat so many peaches at one time, so the secret is to use them for items that can be frozen or canned. Tuesday, we gave a big bag to the cleaning people to take home and yesterday, I proceeded to use them to make peach jam, peach muffins and peach gelato. On Sunday, I made a fresh peach pie that we had for breakfast on Monday and Tuesday and even had some left over for snacking. It was a deep dish pie and used a lot of peaches. The more the better.
PEACH PIE:
To make the peach pie, the first thing you want to do is to make the crust. You can use a basic pie crust /pies-pastry/peach-pie/or a sweet tart crust. sweet-tart-and-pie-pastry/ It all depends on how you want to present your pie. I used the basic crust and instead of using all butter which is what I usually use, I used half Crisco®. Using Crisco® will give you a flakier crust whereas I think the all-butter crust tastes better. It is 6 of one and half a dozen of the other. Refrigerate the dough for the crust while you are preparing your pie filling.
The next step is to peel, pit and slice the peaches. If the peaches are not totally ripe, it may be possible to remove the skin with a serrated peeler. If that doesn’t work, then you need to boil a small pot of water and have a bowl of ice water handy. Make a cross – wise slit in the top and bottom of the peaches and then lower one or two at a time into the boiling water. (A slotted spoon or spider would be a handy tool to do this with so that you do not get burned by the hot water.) Leave the peaches in the boiling water for a minute or two, (this will depend on the ripeness of the peaches) and then remove them and place them in the ice water. When the peach is cool enough to handle, take a paring knife and starting at the top, peel off the skin. It should come off easily. If it doesn’t, then put it back in the boiling water for another minute or two.
I have found that the following procedure works well:
- Place the first two peaches in the boiling water for about two minutes, then transfer them to the ice water.
- After you have peeled the first peach, put another one or two in the boiling water and then peel the second one.
- Slit the tops and bottoms of the next two peaches, transfer the ones in the boiling water to the ice water, place the new ones in the boiling water and then repeat the procedure until all the peaches have been peeled.
Once all the peaches have been peeled, make a cut around the peach, lengthwise, and using your thumbs, pull them apart. Remove the pit from the half it remains in and then slice the peaches into the desired thickness.
Place the sliced peaches in a large bowl; mix a proportionate amount of thickener (usually cornstarch) together with sugar, (I use brown sugar), spices such as cinnamon, cloves and nutmeg. Add the peaches and gently toss to coat all the peaches. If your peaches are quite ripe, the sugar will extract a lot of liquid from the peaches. Let them sit in the bowl until the moisture has been extracted, then place a colander over a saucepan and pour the peaches into the colander. Place the saucepan with the peach liquid on the stove over medium heat and cook, stirring constantly until the sugar/liquid mixture has thickened. Return the peaches in the colander back into the bowl and add the thickened mixture.
Toss gently and then pour into the pie pan.
Add either a lattice top crust or a full top crust and then bake according to your recipes instructions.
PEACH JAM:
To make the Peach Jam, the first thing I did was to wash and sterilize the jars. Boil them in water for 5 minutes or run through the dishwasher. Place your lids and seals in a small saucepan and boil for 3 minutes.
I peeled the peaches (see above) and then removed the pits and placed the fruit in the food processor fitted with the chopping blade. I chopped the peaches, measured them and put them in the jam pot. A large 6-8 quart saucepan will do. I then measured the sugar and lemon juice and combined it all with the chopped peaches. I used commercial pectin for this jam. Just follow the directions on the package of pectin. If you do not want to use pectin, you use equal parts fruit and sugar and about ¼ cup lemon juice. You do have to know how to test the cooked fruit to see if it has reached the proper temperature for setting. It is easier just to use the pectin, especially if your fruit is very ripe.
Once the jam is made, ladle it into the sterilized jars, seal and then turn upside down. To be sure that no bacteria is alive inside the jars, process them for 5 minutes in a boiling water bath. The water must be at least one inch over the tops of the jars. Remove, turn upside down on a clean dish towel and allow to sit until cool and the jam is set.
While preparing the fruit for the jam, I prepared twice as much as I needed which gave me four more cups of chopped fruit to work with. I made Peach Muffins with half and Peach Ice Cream with the other half. Lots of peaches, but really good. If you can’t use all the muffins (or make it in a loaf pan) at once, freeze some for a later use. /fruit-muffins/
The remainder of the chopped peaches was used for Peach Ice Cream. /fresh-peach-ice-cream/
Categories: Baking, Dessert Ideas, Fruit, Main, Pastry Tags: butter, Dessert Ideas, Fruit, Peach Jam, Peach Muffins, Peach Pie, Peaches, Pie Crust, Shortening
Teen Basics Culinary – Day Five
Our last day of Camp was desserts which were chosen by the students on the first day of camp. There were some interesting requests, most of which we were able to do. Two students put down vegetables on the dessert list. Not knowing whether someone was just trying to be funny or really meant it, I decided to accommodate them. Two of the desserts that we made were Carrot Cookies and Zucchini Muffins with Cream Cheese frosting.
Two other requests were Cheesecake and Key Lime Pie. I combined the two and the students made Key Lime Cheesecake. These were made in mini-tart pans that the students were able to take home. Another request was for Pie; no particular kind of pie, but just pie. I provided Peaches and Apples for the Pies and we made half and half. Half were French Apple Pies with a streusel topping and the other half were Peach Pies with a double crust.
The two favorites of the day were the Chocolate Lava Cake and Strawberry Shortcake. The Chocolate Lava Cake had a molten interior and if you like chocolate, you certainly like these. These were made in individual disposable custard tins so that they could be brought home, if so desired. No one was able to wait long enough to take them home and they were all eaten in class. Of course, they are better when they are warm and the chocolate is molten, so the students made the right choice. Of course this way, they didn’t have to share the Chocolate Lava Cakes with eager siblings.
The Strawberry Shortcake was made with an actual ‘shortcake’. That is, sweetened biscuit dough. Some of the students had never made whipped cream before and they were amazed that you could whip up cream to that wonderful consistency that whipped cream is. The students did end up taking home their Apple or Peach Pie along with Carrot Cookies and their Zucchini Muffins. A few actually had not eaten the Key Lime Cheesecake and were able to take those home as well.
All in all, it was a very sweet ending to a wonderful week of learning the basics of cooking and of being able to apply their new skills. Each of the students ended up the week with a binder packed with recipes that were used in class along with a packet of Basic Information that included Safety Guidelines, Abbreviations and Equivalents, Cooking Terms and a list of Basic Equipment needed. Unfortunately, we didn’t manage to take any pictures for this class so none will be posted. For some photos of our baking camp though, you can go to our Flicker Link and there will be many up there.
Categories: Dessert Ideas, Fruit, Main, Pre-Teen Classes Tags: Apples, Carrots, Children's Cooking, Chocolate, Cream Cheese Frosting, Dessert Ideas, Fruit, kids cooking, kids recipes, Peaches, Strawberry Shortcake, Whipped Cream, Zucchini