Posts tagged "Flour"

WHAT MAKES A POPOVER ‘POP’


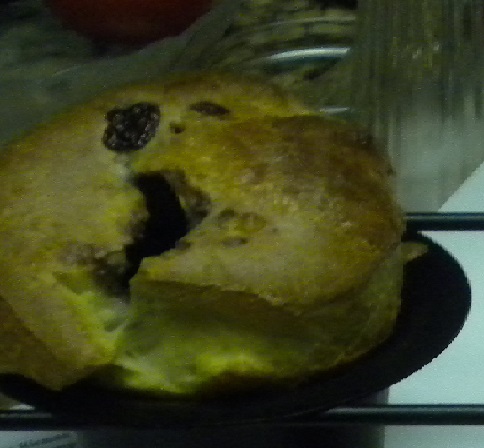
What exactly is a Popover and why is it called that?  A Popover is the American version of Yorkshire Pudding, a dish traditionally served with Roast Beef in England.  Yorkshire Pudding is usually made in the drippings from a roast and is baked right in the roasting pan usually after the roast has been taken out.


Popovers on the other hand, are usually made in Muffin Tins; however the best vehicle for baking Popovers is a Popover Pan which is made so that each muffin cup can be surrounded by heat, which is crucial to making a good Popover.


POPOVER PAN


Why a Popover is called a Popover?  Well, when it bakes, the batter rises over the edge of the tins and forms a dome, thus it can be said that it Pops Over the individual pans.

Popovers are fun to make and it is especially fun to watch them baking if you have an oven with a glass door and an inside light.  It is truly quite amazing to watch them as they blow up like a balloon.

What makes a Popover Pop?  What comes out of a kettle of water when you boil it?  Yes, that right!  You guessed it!  It is steam!  But what creates the steam?

The basic 3 ingredients in Popovers are Eggs, Milk and Flour.  Fresh or dried Herbs can be used for additional flavor and even cheese can be put into the batter.  The Flour provides Gluten, which is needed for the walls of the Popover.  The Eggs provide Protein which will hold in the Air and the Milk provides flavor and liquid to create the steam.

The key to making good Popovers that really ‘pop’ is to beat the batter like crazy.  The more you beat it, the more air that will be incorporated into the batter.  Since Popovers do not contain a chemical leavening agent or even yeast for that matter, the only thing that makes them rise is air.  This is also true of Pate Choux, the batter from which Éclairs and Cream Puffs are made.

It is important to use at least All-Purpose Flour; anything softer will not contain enough gluten to form the shell of the Popover.  Eggs, Milk and Flour are beaten together furiously, (it is best to use an electric mixer or you are going to have a very sore shoulder and arm when you finish) to get enough air into the product.  The eggs are a conduit for air, (without them you will not have popovers).

While you are making the Batter, the oven and Popover Pan should be preheating at 450 degrees.  If the pan is hot, the batter will start to rise immediately, thus preventing heavy, sodden non-Popovers.  Each cup should be well greased, either with butter or a vegetable spray.  If you put the pan in the oven at the same time you turn it on, by the time the oven is preheated and your batter is done, the pan should be hot enough.

Carefully, with potholders, remove the pan from the oven and either pour in a teaspoon of melted butter into each cup or carefully spray with the vegetable spray.  Pour the Batter into a cup with a pouring spout and then carefully fill each muffin cup halfway.  Immediately place in the hot oven and bake for 15 minutes.  After 15 minutes turn the oven to 350 degrees and continue baking for at least 15 minutes more.  The Popovers should be a medium-dark brown and should be firm on top.  DO NOT OPEN THE OVEN DURING THE BAKING TIME!

Once the Popovers are done to the desired color, you can use a sharp knife to slit the tops and then return them  to the oven for 2 minutes more.  This will insure that the inside of the Popover will not be too soggy. (I for one, love that eggy taste that is inside a popover or a cream puff.)

Remove from the oven and then from the pan and serve immediately!

Do you need a recipe?  Almost any standard Popover recipe will work, if you follow the instructions above.  Your general use Cookbook will probably have a recipe or you can get one from one of many sites on the Internet.


REMEMBER!

  • Beat the Ingredients well enough to incorporate a lot of air.
  • Make sure the oven is hot!  The Popovers need heat to start rising immediately or else   they will be a sodden lump when removed from the oven.
  • Grease the Pan before pouring in the batter.
Digg This
Reddit This
Stumble Now!
Buzz This
Vote on DZone
Share on Facebook
Bookmark this on Delicious
Kick It on DotNetKicks.com
Shout it
Share on LinkedIn
Bookmark this on Technorati
Post on Twitter
Google Buzz (aka. Google Reader)

Be the first to comment - What do you think?
Posted by sylveee - 2013/03/10 at 1:26 PM

Categories: Baking, Baking Tidbits, Bread, Main, National Food Days   Tags: , , , , , ,

‘National Yorkshire Pudding Day’

Octber 13th is ‘National Yorkshire Pudding Day’. Yorkshire Pudding is not a pudding in the sense that most people think of as pudding.  In other words Yorkshire Pudding is not a sweet dessert but rather a very eggy dish very similar to Popovers.  Traditionally Yorkshire Pudding baked in the drippings of a Roast Beef and served with the Beef as a starch dish.

Yorkshire Pudding is probably one of those dishes that you either love or intensely dislike.  I happen to love it.  Yorkshire Pudding has its origins in old England.  It is made with lots of Eggs, Milk and some flour and has to be beaten extremely well to incorporate the flour into the Eggs and Milk.  By beating really well, you are beating lots of air into the batter and this is what makes it puff up.  You do have to bake it in a very hot oven.

If you like Popovers, Cream Puffs or Eclairs, you will most likely like Yorkshire Pudding.  For a different use of the Pudding, try my recipe for ‘Toad in the Hole’ which is another traditional English Dish.  Toad in the Hole is usually made with cube steak or leftover roast beef which is placed in a dish of Yorkshire Pudding and then baked.  When it is baked, the batter rises up over and around the Beef, thus making the ‘toad in the hole’.

The version in the ‘Breakfast’ Recipe section on this site is for a Sausage Version of ‘Toad in the Hole’ and is a fun dish for breakfast, or brunch, or lunch or dinner.  It can be served with a fruit dish for breakfast or brunch and/or a salad for lunch or dinner.  Try it and let me know how your family likes it.

Digg This
Reddit This
Stumble Now!
Buzz This
Vote on DZone
Share on Facebook
Bookmark this on Delicious
Kick It on DotNetKicks.com
Shout it
Share on LinkedIn
Bookmark this on Technorati
Post on Twitter
Google Buzz (aka. Google Reader)

Be the first to comment - What do you think?
Posted by sylveee - 2012/10/12 at 11:17 PM

Categories: Baking, Breakfast Ideas, Dinner Ideas, Lunch Ideas, Main, National Food Days   Tags: , , , , , , ,

PRETEEN/TEEN INTERNATIONAL BAKING CAMP PHOTOS

DAY ONE –  French & Italian Bread

Country French Bread Team


COUNTRY FRENCH BREAD  ————–>


Italin Foccacia – with sun-dried tomatoes, basil & Fresh Mozarella


We also made French Baguettes, an Italian   Country Corn Loaf and a French Corn Loaf in addition to Quick Chocolate Bread from France.


Lunch – Cold Cuts were served with the Bread the Student made as well as Vegetable sides. The beverage was Italian Sodas.


DAY TWOScandinavian Cookies


Norwegian Cherry Cookies

Mary with Swedish Jam Cookies


Making Krumkake


J.J., Dean, Kevin & Tristan – on Cookie Day


Krumkake is a Norwegian Waffle-like Cookie similar to an Italian Pizzelle but the Iron is much thinner, thereby producing a thinner cookie.


Fatigman are also Norwegian in origin.  They are a fried cookie – the name translates to Poorman’s Cookie, but the ingredients are certainly not those of a poor man.  They are rich in butter, eggs and cream.


Danish Meringue Cookies


Grace & Tristan…

  Grace, Tristan & Jeanette


DAY THREEAustrian, Russian & German Pastries

Viennese Chocolate Nut Torte

Rugelah


Fruit Kuchen from Austria


DAY FOURSouth American Savories & Sweets

Panquecas Estufa with Tomato Sauce – (Stuffed Pancakes)


Cheese Empadhinas


Tristan, Jeanette, Megan & Grace with

 Empanadas they made


DAY FIVEUnited States


Strawberry Shortcake & Beignets


Kevin sugaring the Beignets —–>


Lunch Time


Additional Photos


Morgan


Morgan & Kendal


Jeanette & Grace

First at the Table


Anticipating Lunch

Digg This
Reddit This
Stumble Now!
Buzz This
Vote on DZone
Share on Facebook
Bookmark this on Delicious
Kick It on DotNetKicks.com
Shout it
Share on LinkedIn
Bookmark this on Technorati
Post on Twitter
Google Buzz (aka. Google Reader)

Be the first to comment - What do you think?
Posted by sylveee - 2012/08/13 at 5:37 PM

Categories: Baking, Bread, Cooking for Kids, Main, Pastry, Pre-Teen Classes   Tags: , , , , , , , , , , , , , ,

MACARONI DAY

July 14th is Bastille Day in France but in the United States it is Macaroni Day.  What better way to consume your macaroni than in the All American Favorite – Macaroni and Cheese.  There are many ways in which you can make this yummy dish and there is a whole range of pasta shapes that one can use.  One of the favorites of my family is Wagon Wheels, the shape that is reminiscent of the American Pioneer’s trek westward.

Macaroni and Cheese is traditionally made with Cheddar Cheese, but the addition of other cheese gives more depth of flavor and creaminess.  To make Mac & Cheese you will need:

½ lb. Pasta

½ lb. Cheddar Cheese

¼ lb. Gouda or Cream Cheese (for creaminess)

Diced Onion

4 Tbsps. unsalted Butter

4 Tbsps. All-Purpose Flour

2 cups Milk, Cream or Half & Half

1 tsp. Dijon Mustard

Dash Worcestershire Sauce

Salt & Pepper  (to taste)

Chives

Paprika


Bring at least 4 quarts of salted water to a rapid boil.  The salt adds flavor to the pasta and also increases the temperature point of the water, thus making the pasta cook faster.  Once the water comes to a rolling boil, add the Pasta, stir and continue boiling (uncovered) for anywhere from 8 – 12 minutes.  (This will depend on the pasta used)  It can be just a tad undercooked if the Mac & Cheese is to go into the oven.  All pasta should be cooked to ‘al dente’ which gives it just a little bite.

While the Pasta is cooking, begin making your Cheese Sauce.  Shred your Cheese if you purchased block cheese and set it aside.

Shredded Cheddar


In the photo above, the Cheese is sitll in the Food Processor but with the blade removed.


Dice your Onion (about ¼ cup will do); using the Onion is optional but it does give nice flavor to the cheese.

Use a large Saucepan and melt the Butter over low heat; add the Onion and cook until soft.  Next stir in the Flour and continue stirring until a paste is formed.  Slowly add the Milk, stirring continuously.  If the mixture seems to be a little lumpy, use your whisk to smooth it out.  Cook and stir until the mixture thickens (it should be able to coat the back of a metal spoon).  Once the White Sauce is of the desired consistency, add the Shredded Cheese and the Cream Cheese.  If Gouda is used instead of Cream Cheese, this should be shredded along with the Cheddar Cheese.


Adding the Cheese to the White Sauce


Shut the heat off and continue stirring until all the Cheese is melted.  Add the Mustard, Worcestershire and Salt and White Pepper to taste.  (Approximately 1 tsp. Salt and ½ tsp. White Pepper)

Pour the cooked Pasta into a colander and shake out all the water.

Cooked & Draied Pasta


If you don’t add the Cheese Sauce immediately, rinse the Pasta with warm water to keep it from sticking together.  Return the Pasta to its cooking pot and slowly add the Cheese Sauce.  Gently mix, over and under, to coat all the macaroni.


Adding the Cheese Sauce to the Pasta


Transfer the Cheese coated Pasta to a baking dish.  About ½ hour before serving time, place the dish in the oven and heat until the Mac & Cheese is thoroughly heated through.  (This will take about 20 minutes)  Mac & Cheese can be made early in the day or the night before, but be sure to refrigerate it until ready to use.  If you do refrigerate it, allow the dish to warm up before baking or place it uncovered, in a cold oven and then turn the oven on.  This will allow the dish to warm up slowly without being stressed to the point of breaking.

This is just one way to enjoy Macaroni.  You can use any shape pasta you desired and any combination of cheeses.  So enjoy Macaroni Day with your own creation of Mac & Cheese or a Macaroni Salad.


Digg This
Reddit This
Stumble Now!
Buzz This
Vote on DZone
Share on Facebook
Bookmark this on Delicious
Kick It on DotNetKicks.com
Shout it
Share on LinkedIn
Bookmark this on Technorati
Post on Twitter
Google Buzz (aka. Google Reader)

Be the first to comment - What do you think?
Posted by sylveee - 2012/06/23 at 11:49 PM

Categories: Dinner Ideas, Lunch Ideas, National Food Days   Tags: , , , , , , , ,

CANDIED ORANGE PEEL – A NATIONAL DAY

NATIONAL FOOD DAYS

CANDIED ORANGE PEEL

Friday, Mary 4th is National Candied Orange Peel Day.  Candied Orange & Lemon Peel is often used in baked goods, especially around the winter holidays when it is often used in fruit cake.  But there is no need to wait for Christmas or Chanukah to add the Candied Peel to everyday foods.  If you would like to make your own Candied Orange Peel you can find any number of recipes on the Internet.  If however, you do not want to take the time or effort ( it would take about 4 hours total to make the fisnished product) you can purchase Candied Orange Peel at establishments that specialize in nuts and dried fruit or on-line.

The featured photo shows an Orange, an Orange Slice, Candied Orange Peel and Chocolate Covered Orange Peel.  There has been a long tradition of combining Chocolate with Orange and there are many ways in which you can do it.  A Chocolate Fudge Cake or Chocolate Brownies with Orange Peel would make very tasty and elegant dessert.

Other ways in which Candied Orange Peel can be used are:

Cookies

Cakes

Muffins

Brownies

Fudge

Quick Bread

Cornbread

Pancakes or Waffles

Oatmeal or Cream of Wheat

Jello or Pudding

For a Muffin Recipe please see the recipe section of this blog. /muffins-with-candied-orange-peel/

Unbaked Muffins with Demarara Sugar on Top


Unbaked Muffins with Pearl Sugar

In the photo on the left, Demarara Sugar has been sprinkled on top.  (Demarara Sugar is sometimes sold as Sugar in the Raw, although it is not really raw sugar – just one step on the way to being granulated.)
The Photo on the right has been sprinkled with Swedish Pearl Sugar.  The idea of putting sugar on the top of the unbaked Muffins is to give a caramelized effect and taste on the top of the muffin.

Muffin Batter portioned into baking cups

Digg This
Reddit This
Stumble Now!
Buzz This
Vote on DZone
Share on Facebook
Bookmark this on Delicious
Kick It on DotNetKicks.com
Shout it
Share on LinkedIn
Bookmark this on Technorati
Post on Twitter
Google Buzz (aka. Google Reader)

Be the first to comment - What do you think?
Posted by sylveee - 2012/05/03 at 10:58 PM

Categories: Baking, Bread, Breakfast Ideas, Dessert Ideas, Fruit, Holiday Ideas, Holiday Meals, Main, National Food Days   Tags: , , , , , , , ,