HAVE APPLES? MAKE APPLE KUCHEN
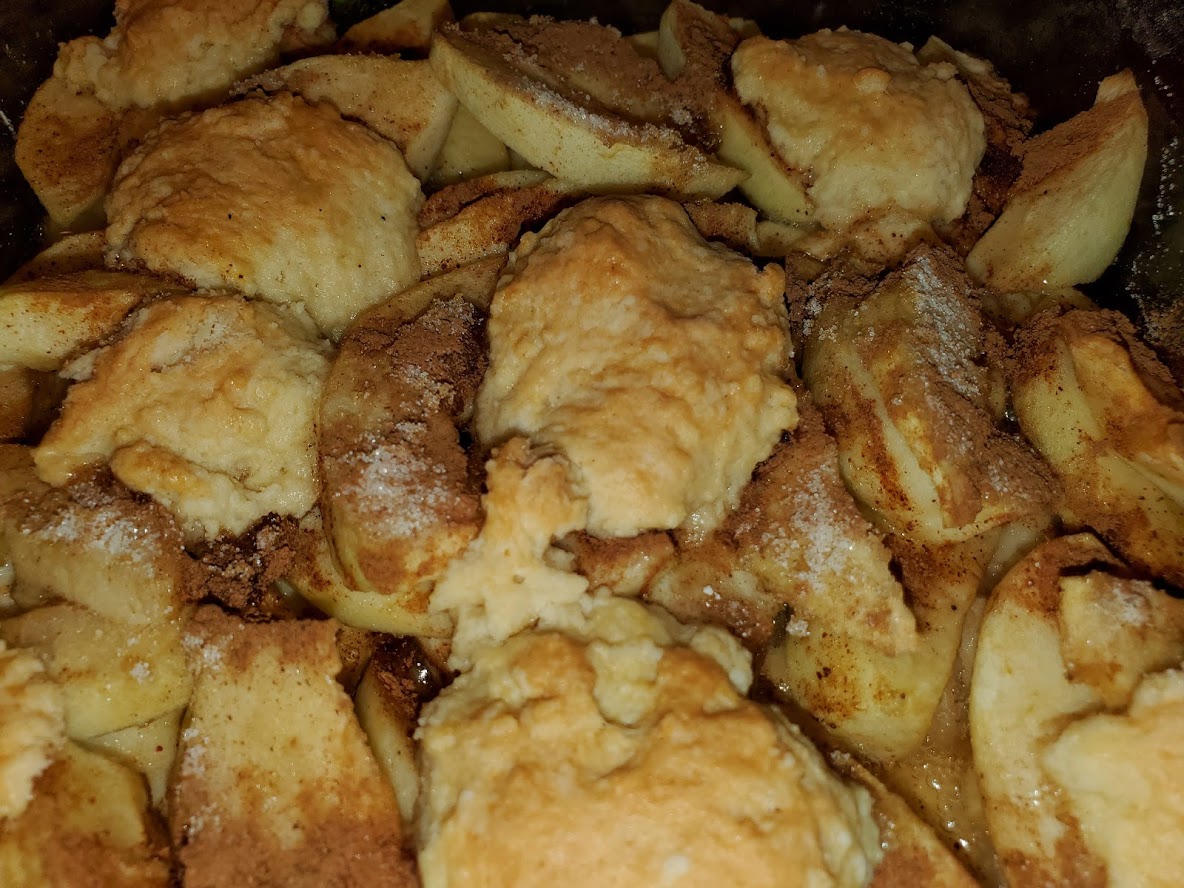
One way to use up some of your Apples (if you have too many) is to make Apple Kuchen. Kuchen is a great breakfast item or dressed up with whipped cream or Ice Cream, it makes a great dessert for any meal. Kuchen is simple to make and delicious to eat. You will find the recipe by using the link above. Just click on Apple Kuchen and you will be taken to the recipe. Continue here and you will see some step by step photos to help you with your baking.
The Dough is simple to make and can easily be made by hand in a medium-size mixing bowl. When making the Kuchen divide the Dough in half and either roll out half (on floured surface – as the recipe says) or just press half the Dough into your greased baking dish. (8 x 8 or 9 x 9 is best)
Peel and slice your Apples (don’t worry if they start to turn a little brown – this will disappear when baked)
You can either toss the Apples with the Cinnamon and Sugar in a separate bowl or just arrange the Apples on the Dough and then sprinkle with the Cinnamon and Sugar. Either way will work.
Cinnamon and Sugar Added
Next, either roll out the remaining Dough or just scoop dabs and place on top of the Apples. ( didn’t have quite enough dough to roll out so I scooped the Dough with a #60 Scoop or you can just used a spoon) I lightly pressed the dabs of dough onto the Apples. This method worked quite fine.
Bake for the time stated in the recipe at 350 degrees. Kuchen is best served warm and is quite good with Vanilla Sauce as stated in the recipe. I reheated the Kuchen the next morning with some Cheddar on top and we ate it for breakfast. Kuchen can also be served with whipped Cream and/or Vanilla Ice Cream.
Either way you serve it, it will be delicious!
THANKSGIVING FAVORITES – DISHES TO CREATE FOR YOUR FAMILY DINNER
Here we are in November and Thanksgiving is right around the corner. If you haven’t planned your complete Thanksgiving Dinner Menu yet here are some suggestions. For the Stuffing, your Side Dishes, Desserts and leftovers for the days following Thanksgiving.
Thanksgiving is on the horizon and many families will be busy preparing food and enjoying it with their loved ones. If you love to cook and even if you don’t but are going to be cooking listed below are the links to some delicious recipes that you may enjoy for your Thanksgiving Meal. Take a look at them and then try out one or two or three or all. When you do, please let me know how you, your family and friends enjoyed them.
CURRIED FRUIT STUFFING – a little different twist on Thanksgiving Stuffing – the Curry and Fruit give your stuffing additional flavor in a delicious way. This recipe uses Traditional Stuffing Ingredients with the addition of Apple, Apricots and Golden Raisins or whatever you wish to use plus Curry Powder. It is delicious and quite tasty with the addition of the fruit.
Juilienned Apples
Dried Apricots
Golden Raisins
GOLDEN SQUASH JUBILEE – is a simple Vegetable Dish made with only 4 ingredients:
2 lbs. Banana Squash – shredded
1 cup dried Apricots – chopped
½ Cup firmly packed Brown Sugar
¼ cup Butter
This dish can be cooked in the Microwave or baked in the Oven.
CREAMED SPINACH – Spinach is one of my favorite Vegetables and this version is delicious, even for non-Spinach lovers. It is also versatile and can be turned into a Creamed Spinach Soup just by adding some Vegetable Stock and a little more Cream or Milk. A great recipe for Thanksgiving and the days beyond.
Creamed Spinach
MASHED POTATOES – be sure to use Russet Potatoes, the baking variety. (you need to use a Potato that will crumble when baked so that they will mash easily) DO NOT USE WAXY POTATOES as they will not mash properly.
Mashed Potatoes
Green Asparagus
TURKEY FRITTATA – this is a great dish to use with most any kind of leftover – it is an omelet made with Onions, Potatoes, Tomatoes and Cheese as well as the leftover Turkey. A Frittata is good for Breakfast, Lunch or Dinner.
TURKEY CROQUETTES – these are made with leftover Turkey, Onions and a smattering of other Vegetables – they are breaded and then fried and served with Remoulade Sauce.
TURKEY POT PIE – made with leftover Turkey, Vegetables and a Rough Puff Pastry or purchased Puff Pastry if you prefer. Great for leftover Turkey, Chicken or whatever else you have. Serve with a Salad and you have a complete meal.
So, here we have a variety of recipes, some of which you can use for your Thanksgiving Dinner and beyond with the leftovers.
Categories: Culinary Makeovers, Dinner Ideas, Holiday Ideas, Holiday Meals, Leftovers, Main Tags: family dinner, Fruit, holiday recipes, Leftovers, Potatoes, Thanksgiving, turkey, Vegetables
SUNDAY BAKING PROJECT #7 – CHERRY/CORNMEAL UPSIDE DOWN CAKE
Since Cherry Season is in full swing in Southern California it was decided that a second week of baking products with Cherries was in order. So this weeks project was Cherry/Cornmeal Upside Down Cake. The title implies that there is a lot of Cornmeal in the batter, but there was not. However, the Cornmeal was prominent in feel and in taste. Many of the participants like or loved the Cornmeal but I did not. Maybe I was the only one who didn’t like – no one else said anything negative about it. Of course, I am not a Cornbread Lover, so it figures that I would not be too found of the Cornmeal in this recipe. All that being said, it does give a little different feel and taste to the texture of the cake.
One thing that I did like about this recipe was the addition of Balsamic Vinegar. i do love the taste of Balsamic and I for one think that even a little more than the recipe called for could have been used. I do use Balsamic a lot with fruit, especially summer fruits such as berries and melon.
By the way, just because I am not fond of the Cornmeal in the recipe does not mean that I didn’t like it – I did like it – in fact I loved it, probably because of the Cherries which I can’t stop eating when they are in season. They are my ‘All-Time Favorite Fruit’ and there are many fruits which I absolutely love, especially Summer Fruit. My Husband loved the Cake – in fact we ate it for Breakfast at least two times. This cake is a 10″ cake and offers up quite a few pieces. One of my Sons had it for Dessert one night and one of my Stepdaughters also had it for Dessert one night – both on a different night. The Cake keeps well and needles to say everyone who ate it loved it!
With all that Hyperbole out of the way let’s get to the recipe and finished product itself.
The recipe can be found at the web site of Epicurious
The Ingredients that you may not have on hand are 3 cups of Cherries (most of us used Bing), Balsamic Vinegar and Cornmeal. Everything else in the recipe is pretty common in most kitchens. The recipe does say to use an ‘oven-proof skillet’ but if you don’t have one that can be used as a baking pan, just use a 10″ layer pan or other similar container which is what I did.
You will need to wash and pit your Cherries before starting the recipe but everything else in the recipe is pretty straight forward. Below are some photos of the different steps in the process:

3 Cups Cherries
Measure and Wash your Cherries, then remove the pits with either a Hand Cherry Pitter or a Multiple Pitter. (See last Weeks’ Post – Cherry Clafoutis)
Pitters can be found at your local Culinary Store or at Amazon.com.
Or you can do as one of our members did and use chopsticks. You can also do it the very ‘old-fashioned’ way and use a darning needle to push out the pits.
The next thing to do is to melt the Butter with the Brown Sugar and then add the Cherries and bring them to a boil. Shut off the heat after about a minute or so – just to give the Brown Sugar a chance to melt.

Melting the Butter and Brown Sugar

Bringing Cherry Mixture to a boil
Now make your Batter – it is easiest to do this in a Food Processor but if you don’t have one then use whatever would be easiest for you. Then whip the Whites in a Standing Mixer or with a portable mixer. DO NOT TRY TO WHIP THE WHITES IN THE FOOD PROCESSOR – They will just get overheated and not whip properly.

Making the Batter

Whipping the Whites
Next gently fold the Whites into the Batter. You can do this in the Food Processor but only use the Pulse Button so that you do not over-mix.

Adding Whites to Batter
After the Whites are folded into the Batter it is time to pour the Batter over the Cherries and finally to bake the cake.

Adding Batter to Pan
The Cake is baked when a toothpick or cake tester is inserted into the cake and comes out clean.

Baked and Cooling

Baked and Plattered

With Ice Cream
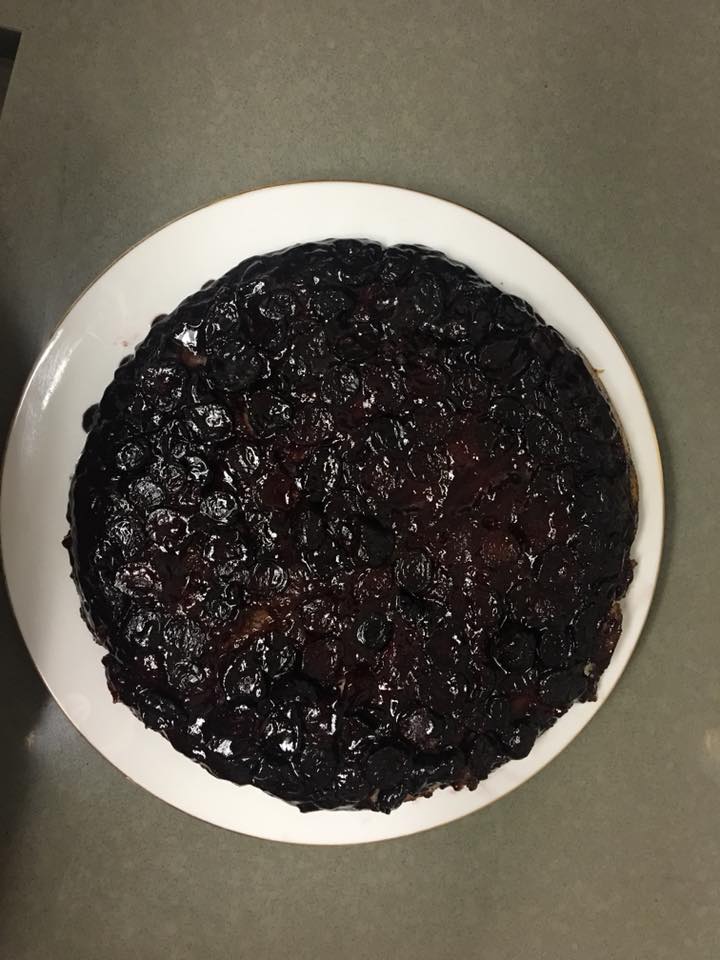
Allow the Baked Cake to cool for at least 5 minutes before inverting onto a large plate. In the Photo above right, you can see that the Cherries gravitated towards the edges, but it still tasted good and when sliced and served with Ice Crema or Whipped Cream one cannot see that the Cherries are not completely covering the cake.
Serve warm with Ice Cream or Whipped Cream. The Cake also tastes good cold or at room temperature.
MEMBERS PHOTOS – Featured Photo this week belongs to Kristy Gobright

Christine Rola Biskaduros.
Cherries are a relatively expensive fruit but when you consider that their season is so short you may be a little more inclined to spend the money on them if you can. I can remember when the price was way lower than they are now but things have changed and Farm Workers are now making more of a ‘living wage’ when they were decades ago. And if you think you are paying a lot of money for Cherries just look at what Christine Rola Biskaduros had to pay for them. (Photo above right) Christine lives in Shanghai and I guess the Cherries were imported although I did think that Cherries do grow in China but I may be wrong.

Kristy Gobright
Elizabeth Bernhardt Mockapetris

Terrie Cooper
Categories: Baking, Baking Tidbits, Cakes, Cales, Eggs, Farm Markets, Fruit, Main, Sunday Baking Project Tags: baking, Cherries, Dessert Ideas, Eggs, Fruit
SUNDAY BAKING PROJECT #6 – CHERRY CLAFOUTIS
June is Cherry Season in California and they are plentiful indeed! All the Markets are featuring them and they are readily available at your local Farmer’s Market where you know they have recently been picked – no shipping, no mishandling – just great fresh Cherries. Both Bing and Ranier are available but for today’s recipe we are using Bing. Bing provide much more color and flavor and are perfect for baking.
If you are lucky enough to be close to Cherry Orchards (we used to go to Cherry Valley in Beaumont) to pick Cherries when I was growing up and I won’t tell you what the price was then – you would flip as you compare it to what we are paying today. When my sons were young we went to Leona Valley which is North of the Conjeo – prices were still good then as compared to today. One of the great things about taking your children to pick Cherries is that (at least when we did it) the owners said you could eat what you want as you were picking them. Don’t worry – it didn’t hurt the farmers as you can only eat so many as you are picking.
To make the Cherry Clafoutis, you have to pit the Cherries. When I was growing my Mother and I used to use a darning needle to push the pits out of the Cherries. You can imagine how long that took. Today you can buy Cherry Pitters to help you do the job. I have one that pits the Cherries one at a time and one that does it in multiples. The one that does it in multiples is from Germany and does a great job, but you do have to sort through the pitted Cherries to make sure that all the pits were removed. it is easy for one or two to get through the chute without having their pits removed. There are multiple Cherry Pitters available at Amazon – enough to confuse you about which one to buy.

Hand Cherry Pitter

Multiple Cherry Pitter
The recipe for the Cherry Clafoutis is available at ‘Bake from Scratch’. Just click on the previous ‘Cherry Clafoutis’ and you will get there.
I used to teach this recipe to my International Food Classes – there are a few differences between the one I used and this one. I think that I prefer this one more because I love Cream and this is what this one uses. My old recipe used Milk and this one uses Cream. In addition, my old recipe just had you putting the Cherries on the bottom of the pan and this one has you baking a thin layer of the Custard before adding the Cherries. This makes it much easier to serve and get those luscious cherries on each serving.
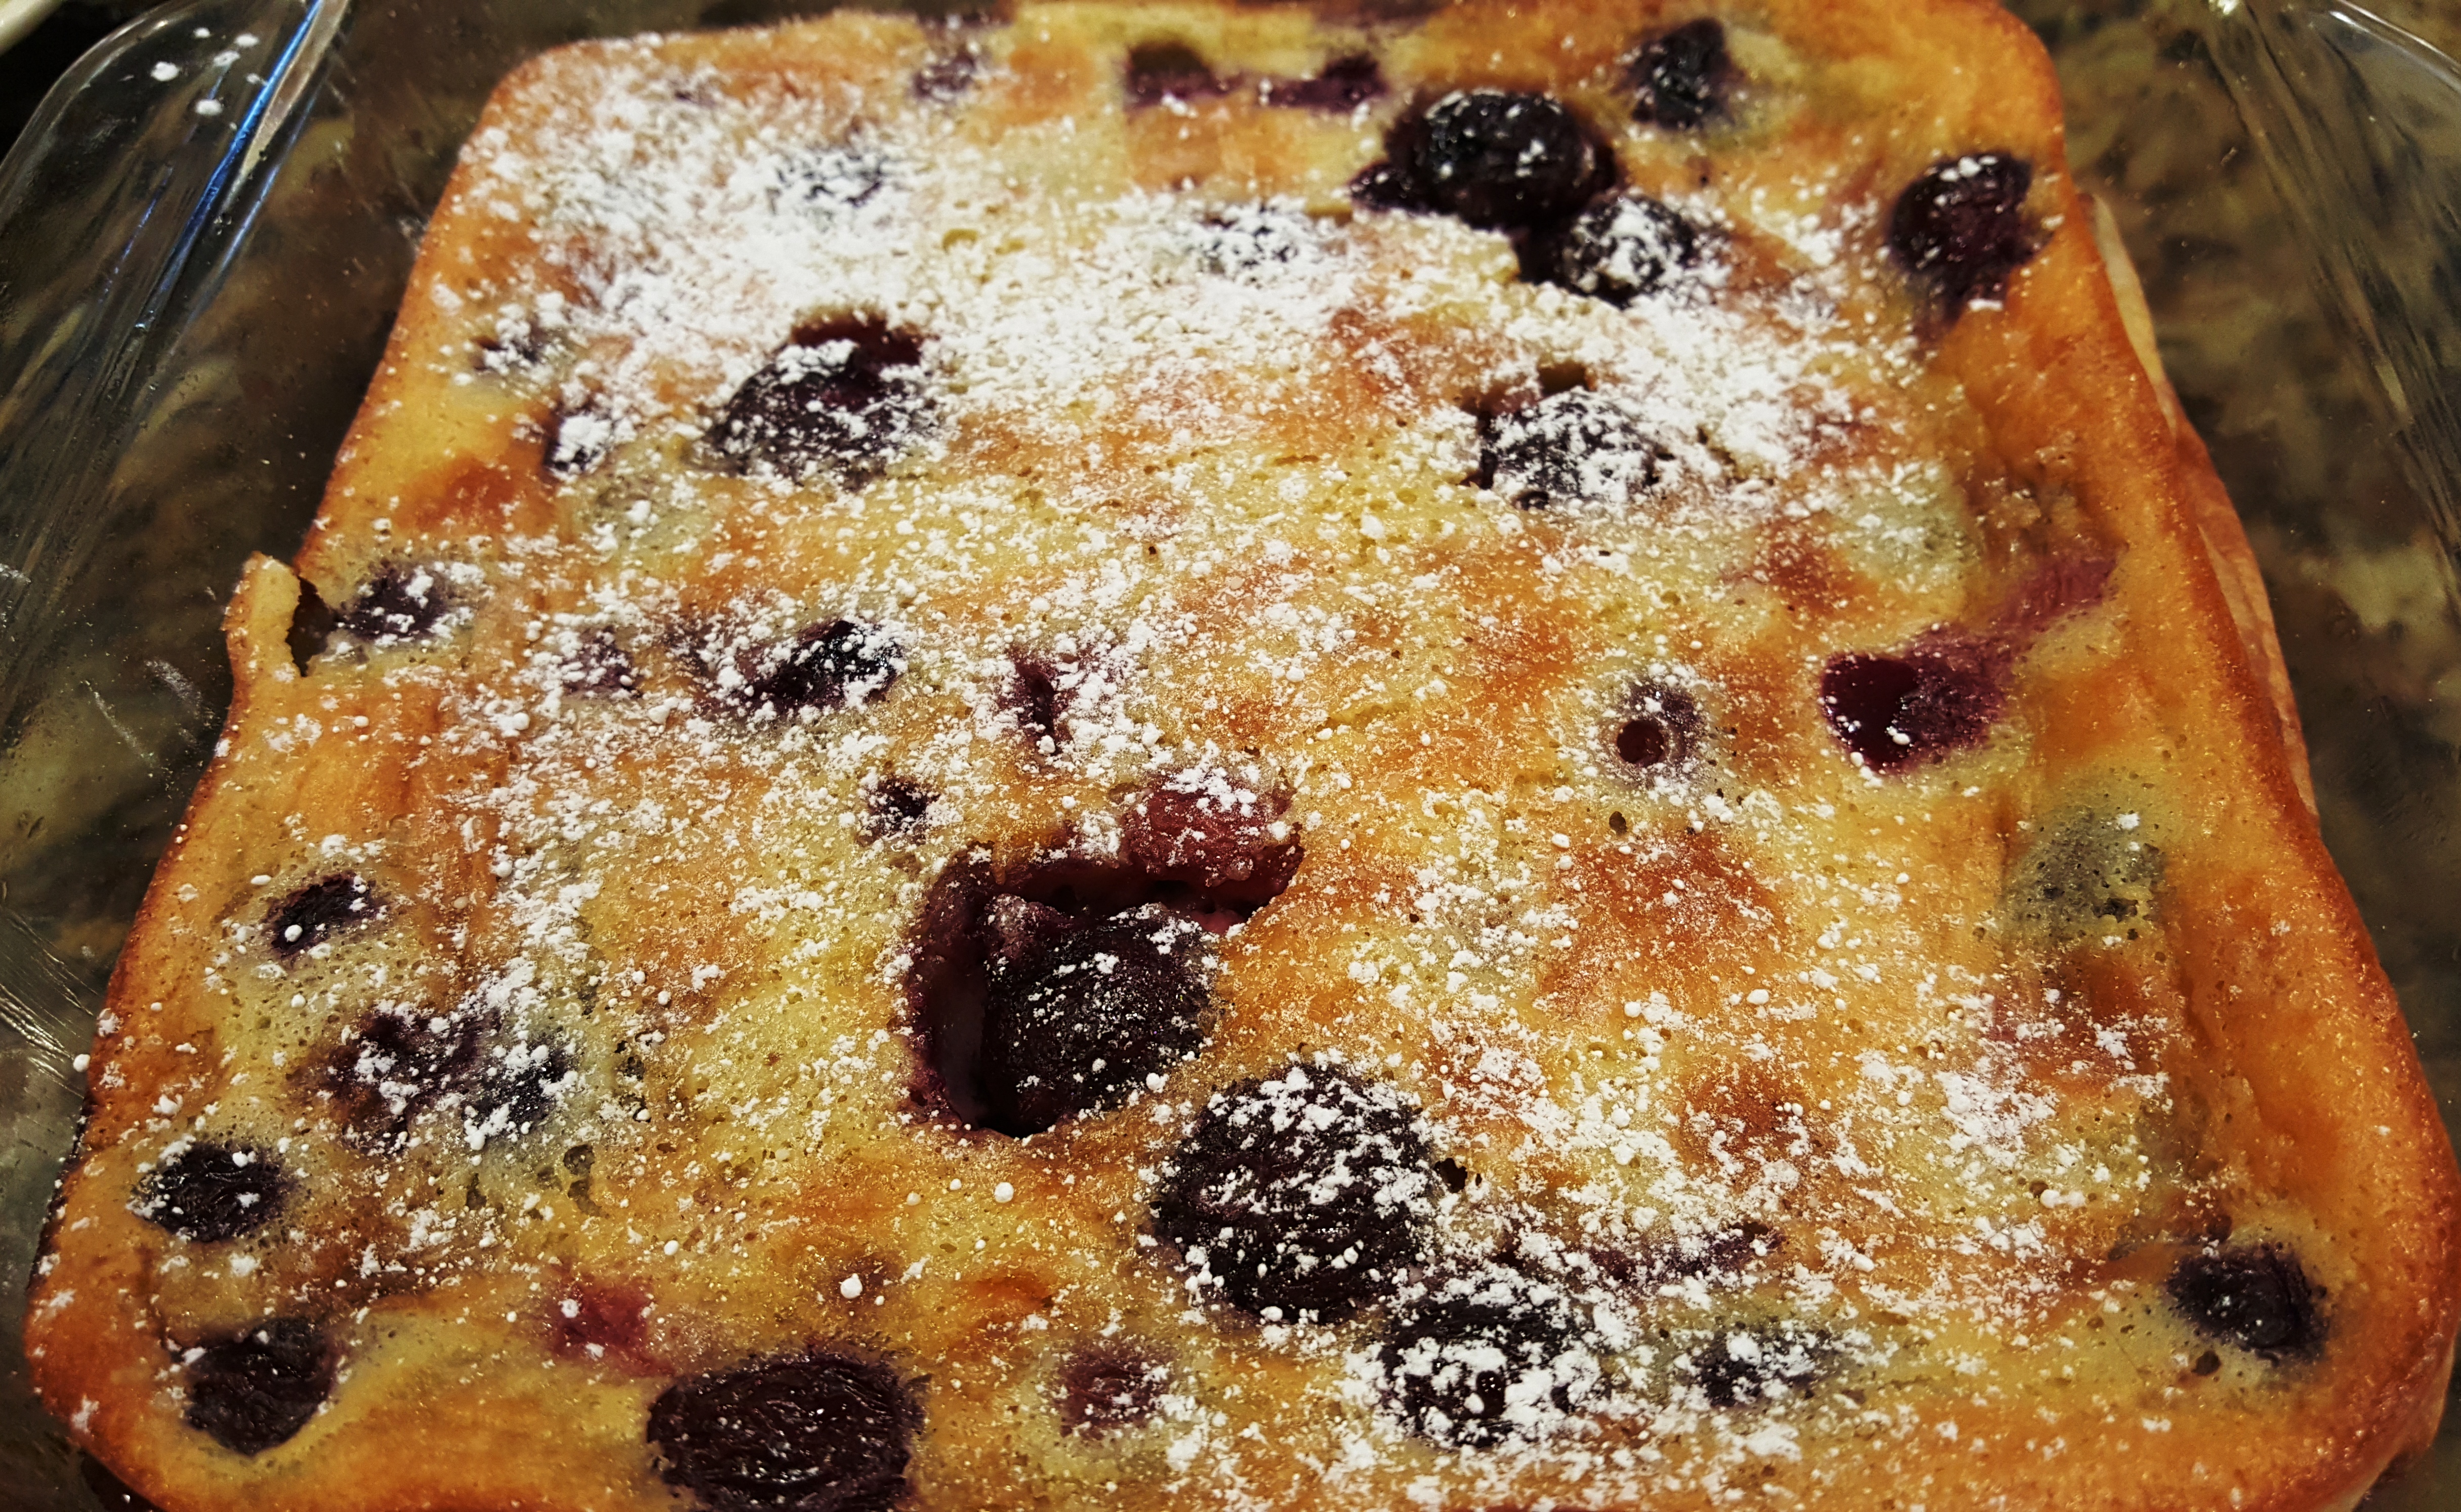
One you get the Cherries pitted, it is quick and easy to make – the Clafoutis is best served warm but it can also be served cold. We like it with Whipped Cream but Ice Cream is good too or you can just serve it as is.
When you read the recipe you will be amazed that originally the pits were left in the Cherries – you can imagine what eating it must have been like! The reason that the pits were left was for the flavor but today the flavor of the pits is replaced with Almond Flavoring. The reason for this is that Almonds, Peaches and Cherries all have similar flavor characteristics. Just compare a Peach Pit with an Almond and you will see the similarity. I know a Cherry Pit does not look like an Almond or a Peach but the flavor profile is very similar.
BELOW ARE PHOTOS OF THE PREPARATION PROCESS:

Pitted Cherries

Making the Batter

First layer of Batter

Sugared Cherries

Cherries in Baking Dish

Baked Clafoutis

Inside View of Clafoutis

Powdered Sugar on Top MEMBERS PHOTOS

Cynthia Allen

Eileen Delcore Bennet

Jeanne Ackerman

Terrie Cooper

CM Wolkon

Elizabeth Barnhart Mockapetris
Categories: Baking, Baking Tidbits, Dessert Ideas, Farm Markets, Main, Sunday Baking Project Tags: baking, Dessert Ideas, Eggs, Fruit
SUNDAY BAKING PROJECT #3 – VERY BERRY TORTE
A Very Berry Torte was the selection for Week Three of our Sunday Baking Project. The recipe was selected from the book – Baking from My Home to Yours by Dorie Greenspan.
The Torte consisted of a Cookie Crust which differs from the traditional Graham Cracker Crust in that you actually make it from a Sugar Cookie Dough. Jam goes on the bottom and the Cheese Cake Filling goes over the top. It is made in a Spring Form pan which allows you to remove the cake without destroying it – this is especially good when the crust is quite fragile due to the ingredients it is made with. A Spring Form Pan has sides that lock on to the bottom and by use of a spring lock can be removed once the baked product is finished. If you don’t have a Springform Pan you can purchase one at your local Culinary Store or on line at Amazon.com.
The Filling was also a little different than the traditional Cheesecake in that in addition to Cream Cheese it also had Cottage Cheese in the Filling. The Cottage Cheese helped to give the filling a little more texture than normal which turned out quite well.
The preparation of the Torte begins with the Crust which is pretty similar to a traditional Sugar Cookie Dough and it certainly behaves like one in that it is not super easy to work with. To roll the Dough out with as little trouble as possible it is best to refrigerate it first. I did this by flattening the dough into a circle between two pieces of waxed paper. When you do roll it out it is best to roll it between the sheets of waxed paper so it doesn’t break up. You can also press the dough into the Springform pan although I don’t think you can get as even a crust as you would like with this method.
After the Dough is rolled out it is then refrigerated for 30 minutes before baking. To bake the Crust it is best to use a ‘Blind Filling’- a sheet of buttered Aluminum Foil placed on the Dough with Pie Weights. The Weights can be purchased or you can use dried beans. The beans can be stored in an airtight container and used again many times as of course the weights can. The Weights come in various forms – some are metal, others are ceramic. They all work in pretty much the same way and whatever you buy would be up to you.

Pie Weights on Foil in Crust
The recipe said to bake the crust for 30 minutes before removing the weights, but I found that to be a little too long. Try it yourself with different times – every oven is a little different so what I tell you may not work in your oven. I would start out with the suggested time and then adjust it from there if you plan to make the torte again.
After the foil and Weights are removed the crust is returned to the oven for about 5 more minutes to brown the surface. I personally thought the crust was over-done and would definitely try it with less time or maybe not pre-bake at all. If I do bake the Torte without prebaking the Crust I will come back here and post the results.
The Jam is spread over the baked crust – to my taste, 1/3 cup of Jam was not enough to cover the bottom of the crust – next time I would use at least half cup or maybe even more. It is supposed a Berry Tart and you do want to be able to taste it.
1/3 cup thick Berry Jam

Jam Spread on Crust

Cherry Preserves
To make the Filling the the Cottage Cheese and Cream Cheese are first blended together. Then the Sugar, Salt and Spices are blended and then the Eggs are beaten in. This can all be done in the Food Processor or by hand in a large bowl with a whisk. I think the Food Processor (if you have one) is the preferred method. Much faster and the ingredients will be beaten more thoroughly than if you do it by hand.
9 oz. Brick Cream Cheese

Filling Poured In
9 oz. Small Curd Cottage Cheese
3/4 C. Sugar
1/4 tsp. Salt
Pinch Ground Cinnamon
Pinch freshly Ground Nutmeg
2 Eggs
The Torte should bake for about 60 minutes or until the filling no longer jiggles when the pan is moved. Additional cooking will take place after the heat is shut off and the pan is taken out of the oven. In the older methods of making Cheesecake the instructions say to leave it in the oven (after it has been turned off). I haven’t checked my old recipes but I think the actual baking time would be less. i have the bad habit of over-baking my cheesecakes so if I looked up the old method it would probably be better for me to do it that way.

Baked Torte
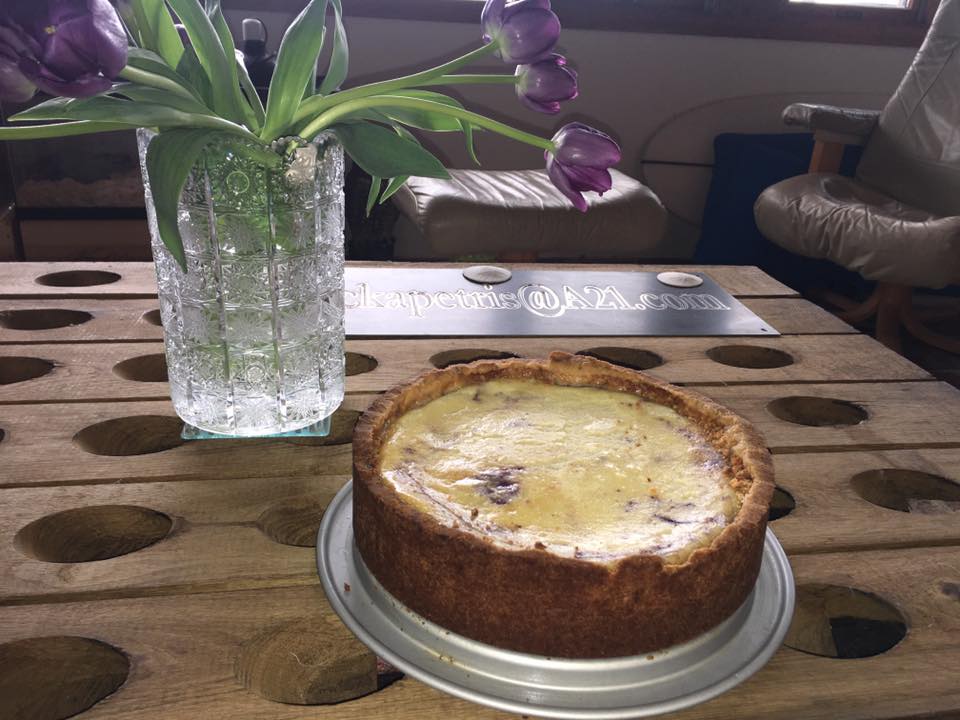
In the Baked Torte photo you can see the clasp that holds the circular sides onto the bottom of the pan. When the Torte is baked and cooled the clasp is opened and should slide right off. Oftentimes you may have to use a straight-edge spatula to completely separate the cake from the pan.
All in all, this Berry Torte Cheesecake was very good – it tasted delicious even if my version didn’t come out looking beautiful. We had it for Breakfast – after all it does contain Eggs, Cheese and Fruit – items that we often incorporate into our Breakfasts. Of course we didn’t eat the whole thing at once, so it was also eaten for Dessert at another meal.
In the photos below are the plated cake and a slice topped with Whipped Cream.
MEMBERS PROJECT RESULTS

Elizabeth Barnhart Mockapetris

Jean Ackerman

Terrie Cooper

Elizabeth Delcore Bennet
Categories: Baking, Baking Tidbits, Cakes, Cales, Cheese, Dairy, Dessert Ideas, Main, Pastry, Sunday Baking Project Tags: baking, Cheese, Dessert Ideas, Eggs, Fruit
THANKSGIVING FAVORITES – DISHES TO CREATE FOR YOUR FAMILY DINNER
Thanksgiving is on the horizon and many families will be busy preparing food and enjoying it with their loved ones. If you love to cook and even if you don’t but are going to be cooking listed below are the links to some delicious recipes that you may enjoy for your Thanksgiving Meal. Take a look at them and then try out one or two or three or all. When you do, please let me know how you, your family and friends enjoyed them.
CREAMED SPINACH – Spinach is one of my favorite Vegetables and this version is delicious, even for non-Spinach lovers. It is also versatile and can be turned into a Creamed Spinach Soup just by adding some Vegetable Stock and a little more Cream or Milk. A great recipe for Thanksgiving and the days beyond.

Creamed Spinach
CURRIED FRUIT STUFFING – a little different twist on Thanksgiving Stuffing – the Curry and Fruit give your stuffing additional flavor in a delicious way. This recipe uses Traditional Stuffing Ingredients with the addition of Apple, Apricots and Golden Raisins or whatever you wish to use plus Curry Powder. It is delicious and quite tasty with the addition of the fruit.

Juilienned Apples

Dried Apricots

Golden Raisins
GOLDEN SQUASH JUBILEE – is a simple Vegetable Dish made with only 4 ingredients:
2 lbs. Banana Squash – shredded
1 cup dried Apricots – chopped
½ Cup firmly packed Brown Sugar
¼ cup Butter
This dish can be cooked in the Microwave or baked in the Oven.
MASHED POTATOES – be sure to use Russet Potatoes (you need to use a Potato that will crumble when baked so that they will mash easily

Mashed Potatoes

Green Asparagus
TURKEY FRITTATA – this is a great dish to use most any kind of leftover – it is an omelet made with Onions, Potatoes, Tomatoes and Cheese as well as the leftover Turkey. A Frittata is good for Breakfast, Lunch or Dinner.
TURKEY CROQUETTES – these are made with leftover Turkey, Onions and a smattering of other Vegetables – they are breaded and then fried and served with Remoulade Sauce.
TURKEY POT PIE – made with leftover Turkey, Vegetables and a Rough Puff Pastry or purchased Puff Pastry if you prefer. Great for leftover Turkey, Chicken or whatever else you have. Serve with a Salad and you have a complete meal.
Categories: Culinary Makeovers, Dinner Ideas, Leftovers, Main Tags: Apples, butter, Celery, Eggs, family dinner, Fruit, holiday recipes, Leftovers, Thanksgiving, Tomatoes, Vegetables
BACKYARD BOUNTY – ASIAN PEAR TART
We have several fruit trees in our backyard and an Asian Pear is one of them. This year the branches were so laden with fruit that one of the branches actually broke forcing me to bring in the pears and use them. Some of them were rather small as this was early in the season. But since Asian Pears are usually pretty firm and even crunchy when ripe, I was able to use them. I actually let them sit in the house for about a week to ripen sufficiently. Fortunately, there are still many more pears on the tree that are reaching their potential in size and ripeness.
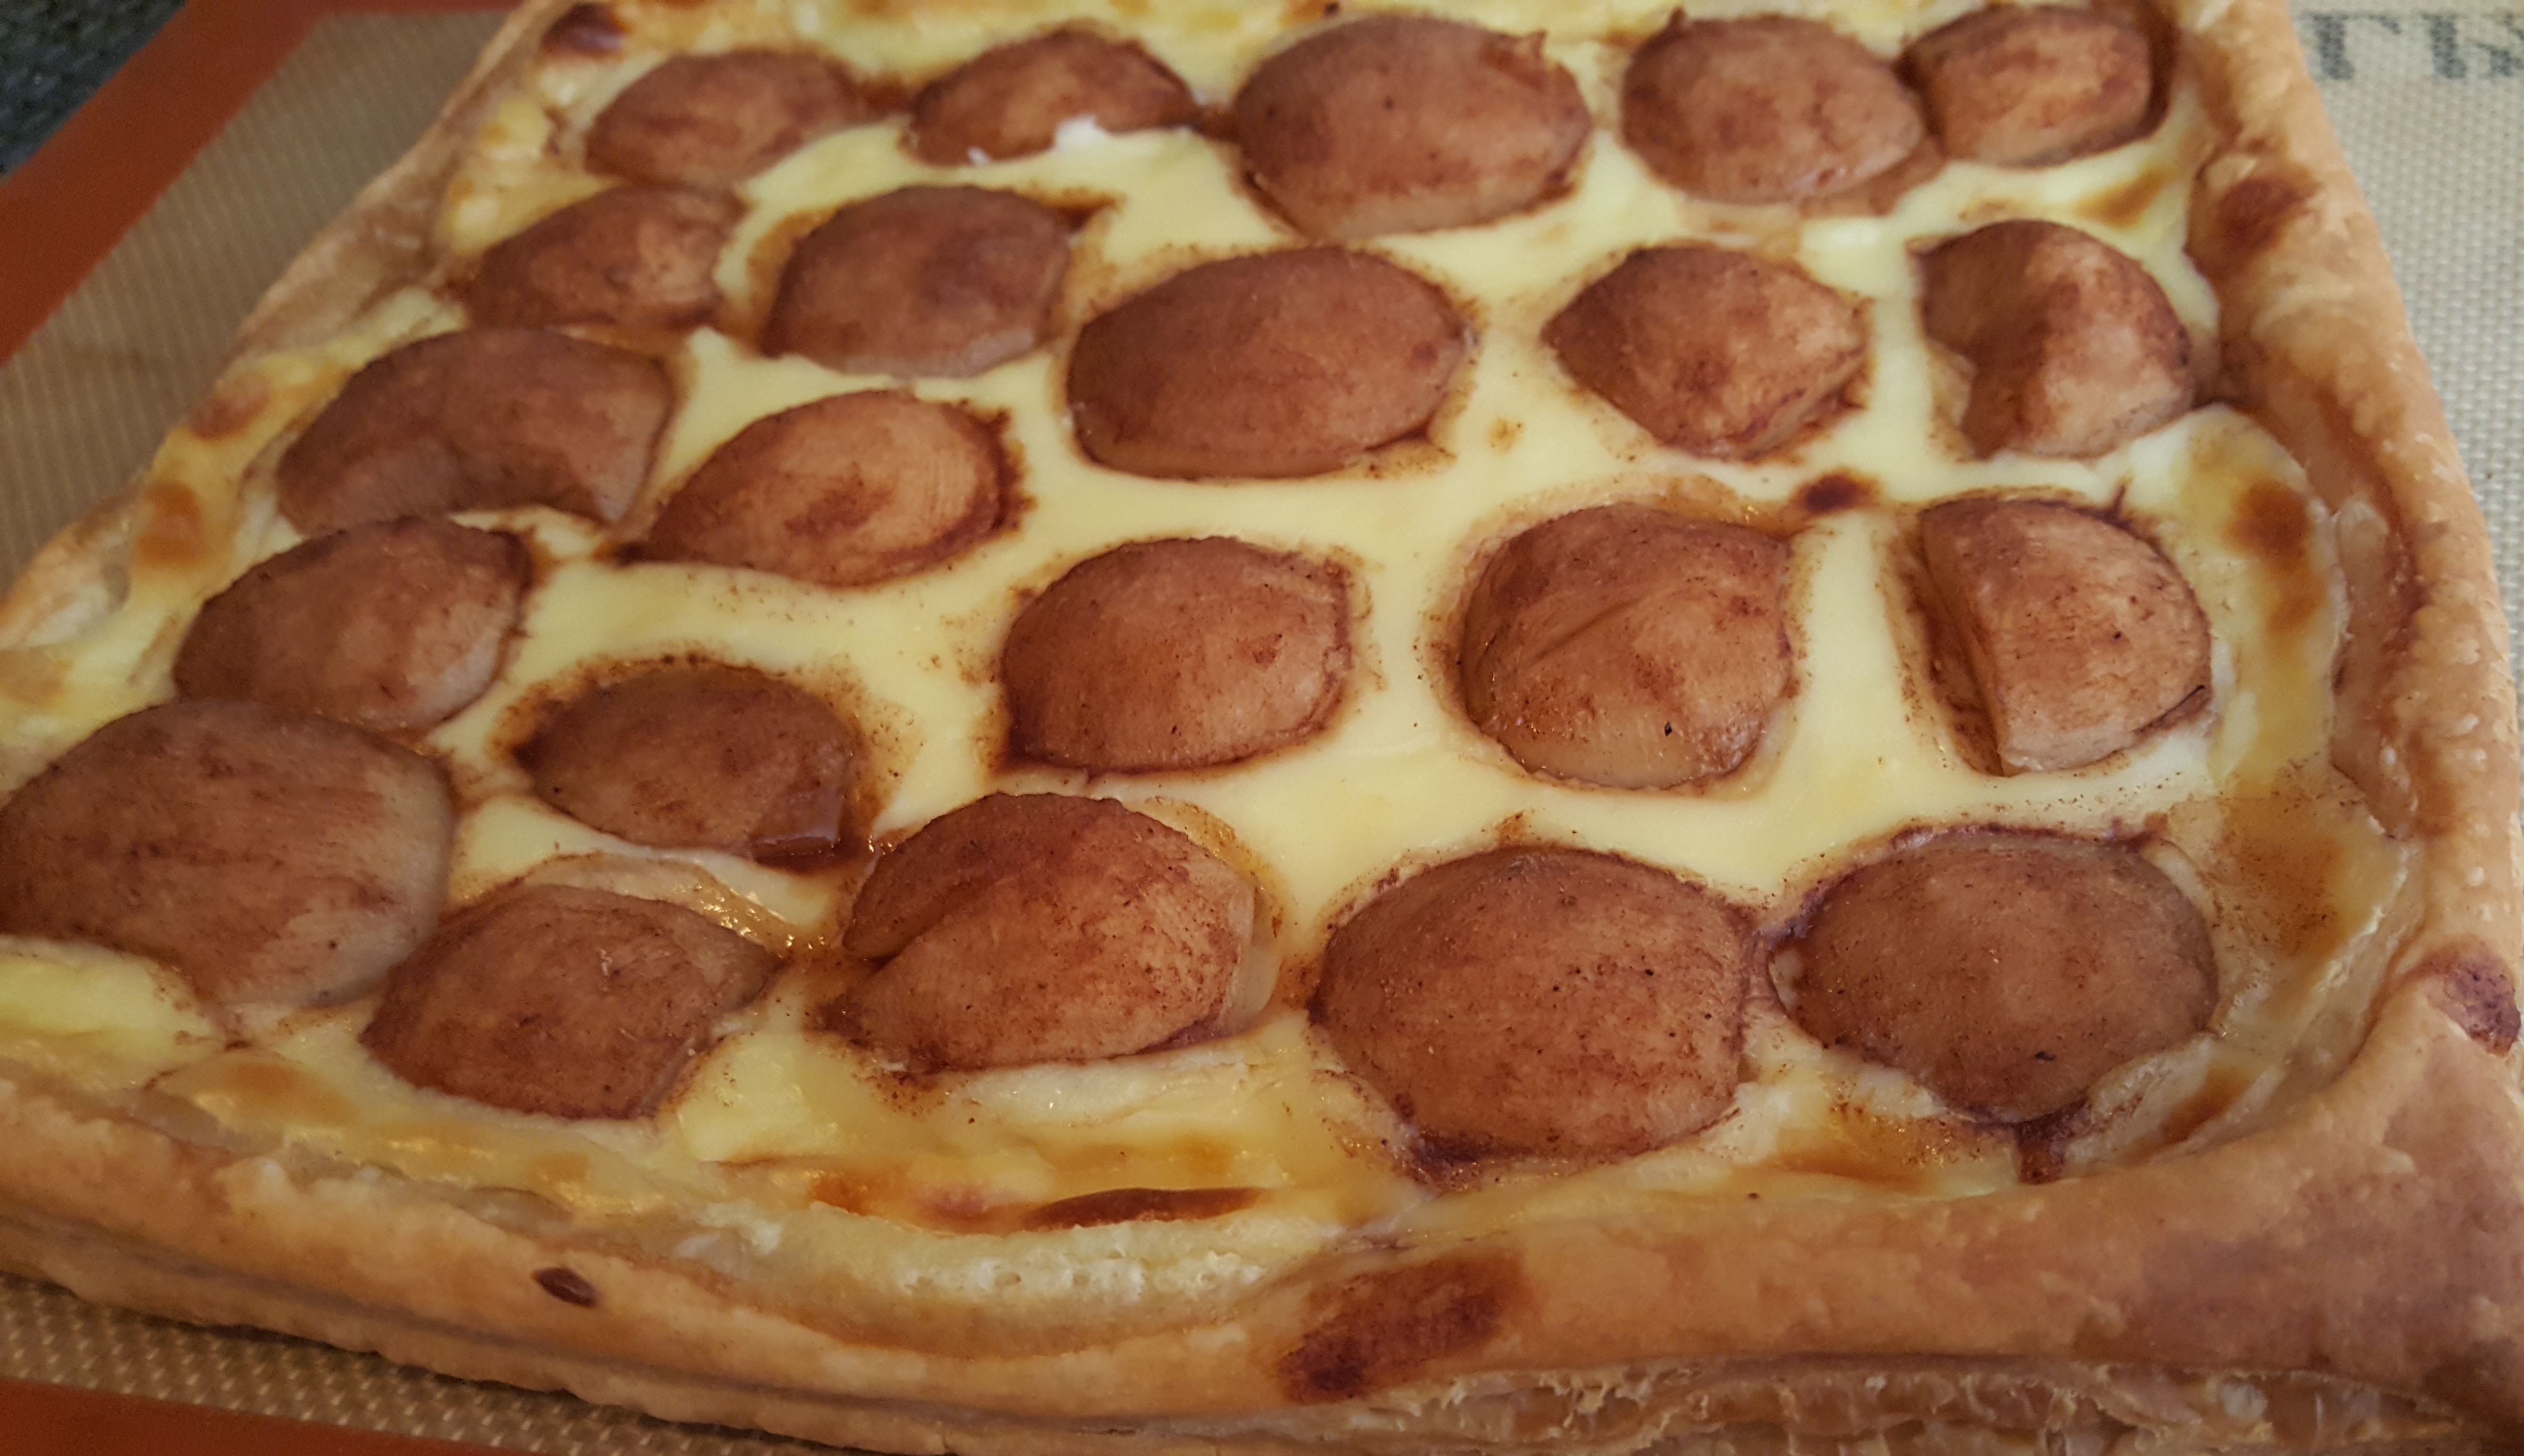
With this first batch I decided to make a Pear Tart. I love Pears and I love Pastry, especially that made with Puff Pastry. The Tart that I made is really fun to do in that when you place the fruit and filling on the pastry, it is flat. You place the filling on the dough and leave almost an inch of dough all the way around. When it bakes, the sides raise up to form a rim around the tart. The instructions and photos will be give below. Please be sure and try it yourself and see how good it can be.
The ingredients you will need for the Pear Tart is a sheet of Puff Pastry (or you can make your own pastry dough and fit it into a tart pan. The only kind of pastry dough that will raise up around the filling is the puff pastry. So Ingredients listed below.
Puff Pastry (This dough takes a long time to make but it can be purchased in large sheets at a restaurant supply such as Smart and Final.
Pears (peeled and quartered (Any fruit will do)
Tapioca or Corn Starch
Brown or Granulated Sugar
Cinnamon
The Equipment you will need:
Baking Sheet
Silicon Sheet or Parchment Paper. (The Silicon Sheet works best)
Dough Docker or a fork
2 quart Saucepan to cook the Custard in
Process:
- Make your Custard and set aside.
- Peel, core and quarter the Pears. (You should have about 4 cups)
- Place in a colander; rinse and dry thoroughly. Then place in a medium size mixing bowl.
- Combine 2 Tbsp. of Tapioca (can be purchased in an Asian Market or Restaurant Supply House) or Corn Starch, 1- 2 Tbsp. Cinnamon (depending on your taste), 1/4 cup Brown or Granulated Sugar.
- Toss the quartered Pears with the Starch/Cinnamon Mixture and set aside.
- Place a sheet of Puff Pastry (about 12 inches square – or any other shape you want to use) on the prepared pan. (If frozen, allow about 5-10 minutes for it to thaw)
- Use a dull knife (such as a butter knife or pie trimmer) to mark off the edges – 1/2 to 3/4 inch.
- Use your Docker or Fork to poke holes in the dough – all over!. (This will prevent the pastry from raising up.) In the photo below are the Docker, a Pizza Cutter and an old-fashioned Pastry Trimmer.
- Preheat your oven to 400 degrees and make sure the baking rack is at the middle position.
- Evenly spread the Custard on the Dough within the lines that you marked.
- Remove the pears from the Starch/Sugar Mixture with a slotted spoon. This will ensure that any liquid released from the Pears will stay in the bowl. (The liquid will make your pastry soggy so be sure to leave it behind!)
- Arrange the Coated Pears evenly over the Dough.
- Place in the preheated oven and bake for 20-25 minutes. The Pastry edges that raised up should be a dark golden color when finished. You want to be sure that the pastry is well baked before removing form the oven.
- Allow to cool slightly before serving. Cut into squares and serve as is or with Whipped Cream.
This Tart make a delicious dessert or can also be eaten for breakfast!
Categories: Baking, Breakfast Ideas, Dairy, Dessert Ideas, Fruit, Main, Pastry Tags: baking, Dessert Ideas, Fruit
Southern California Farmer’s Markets – Calabassas
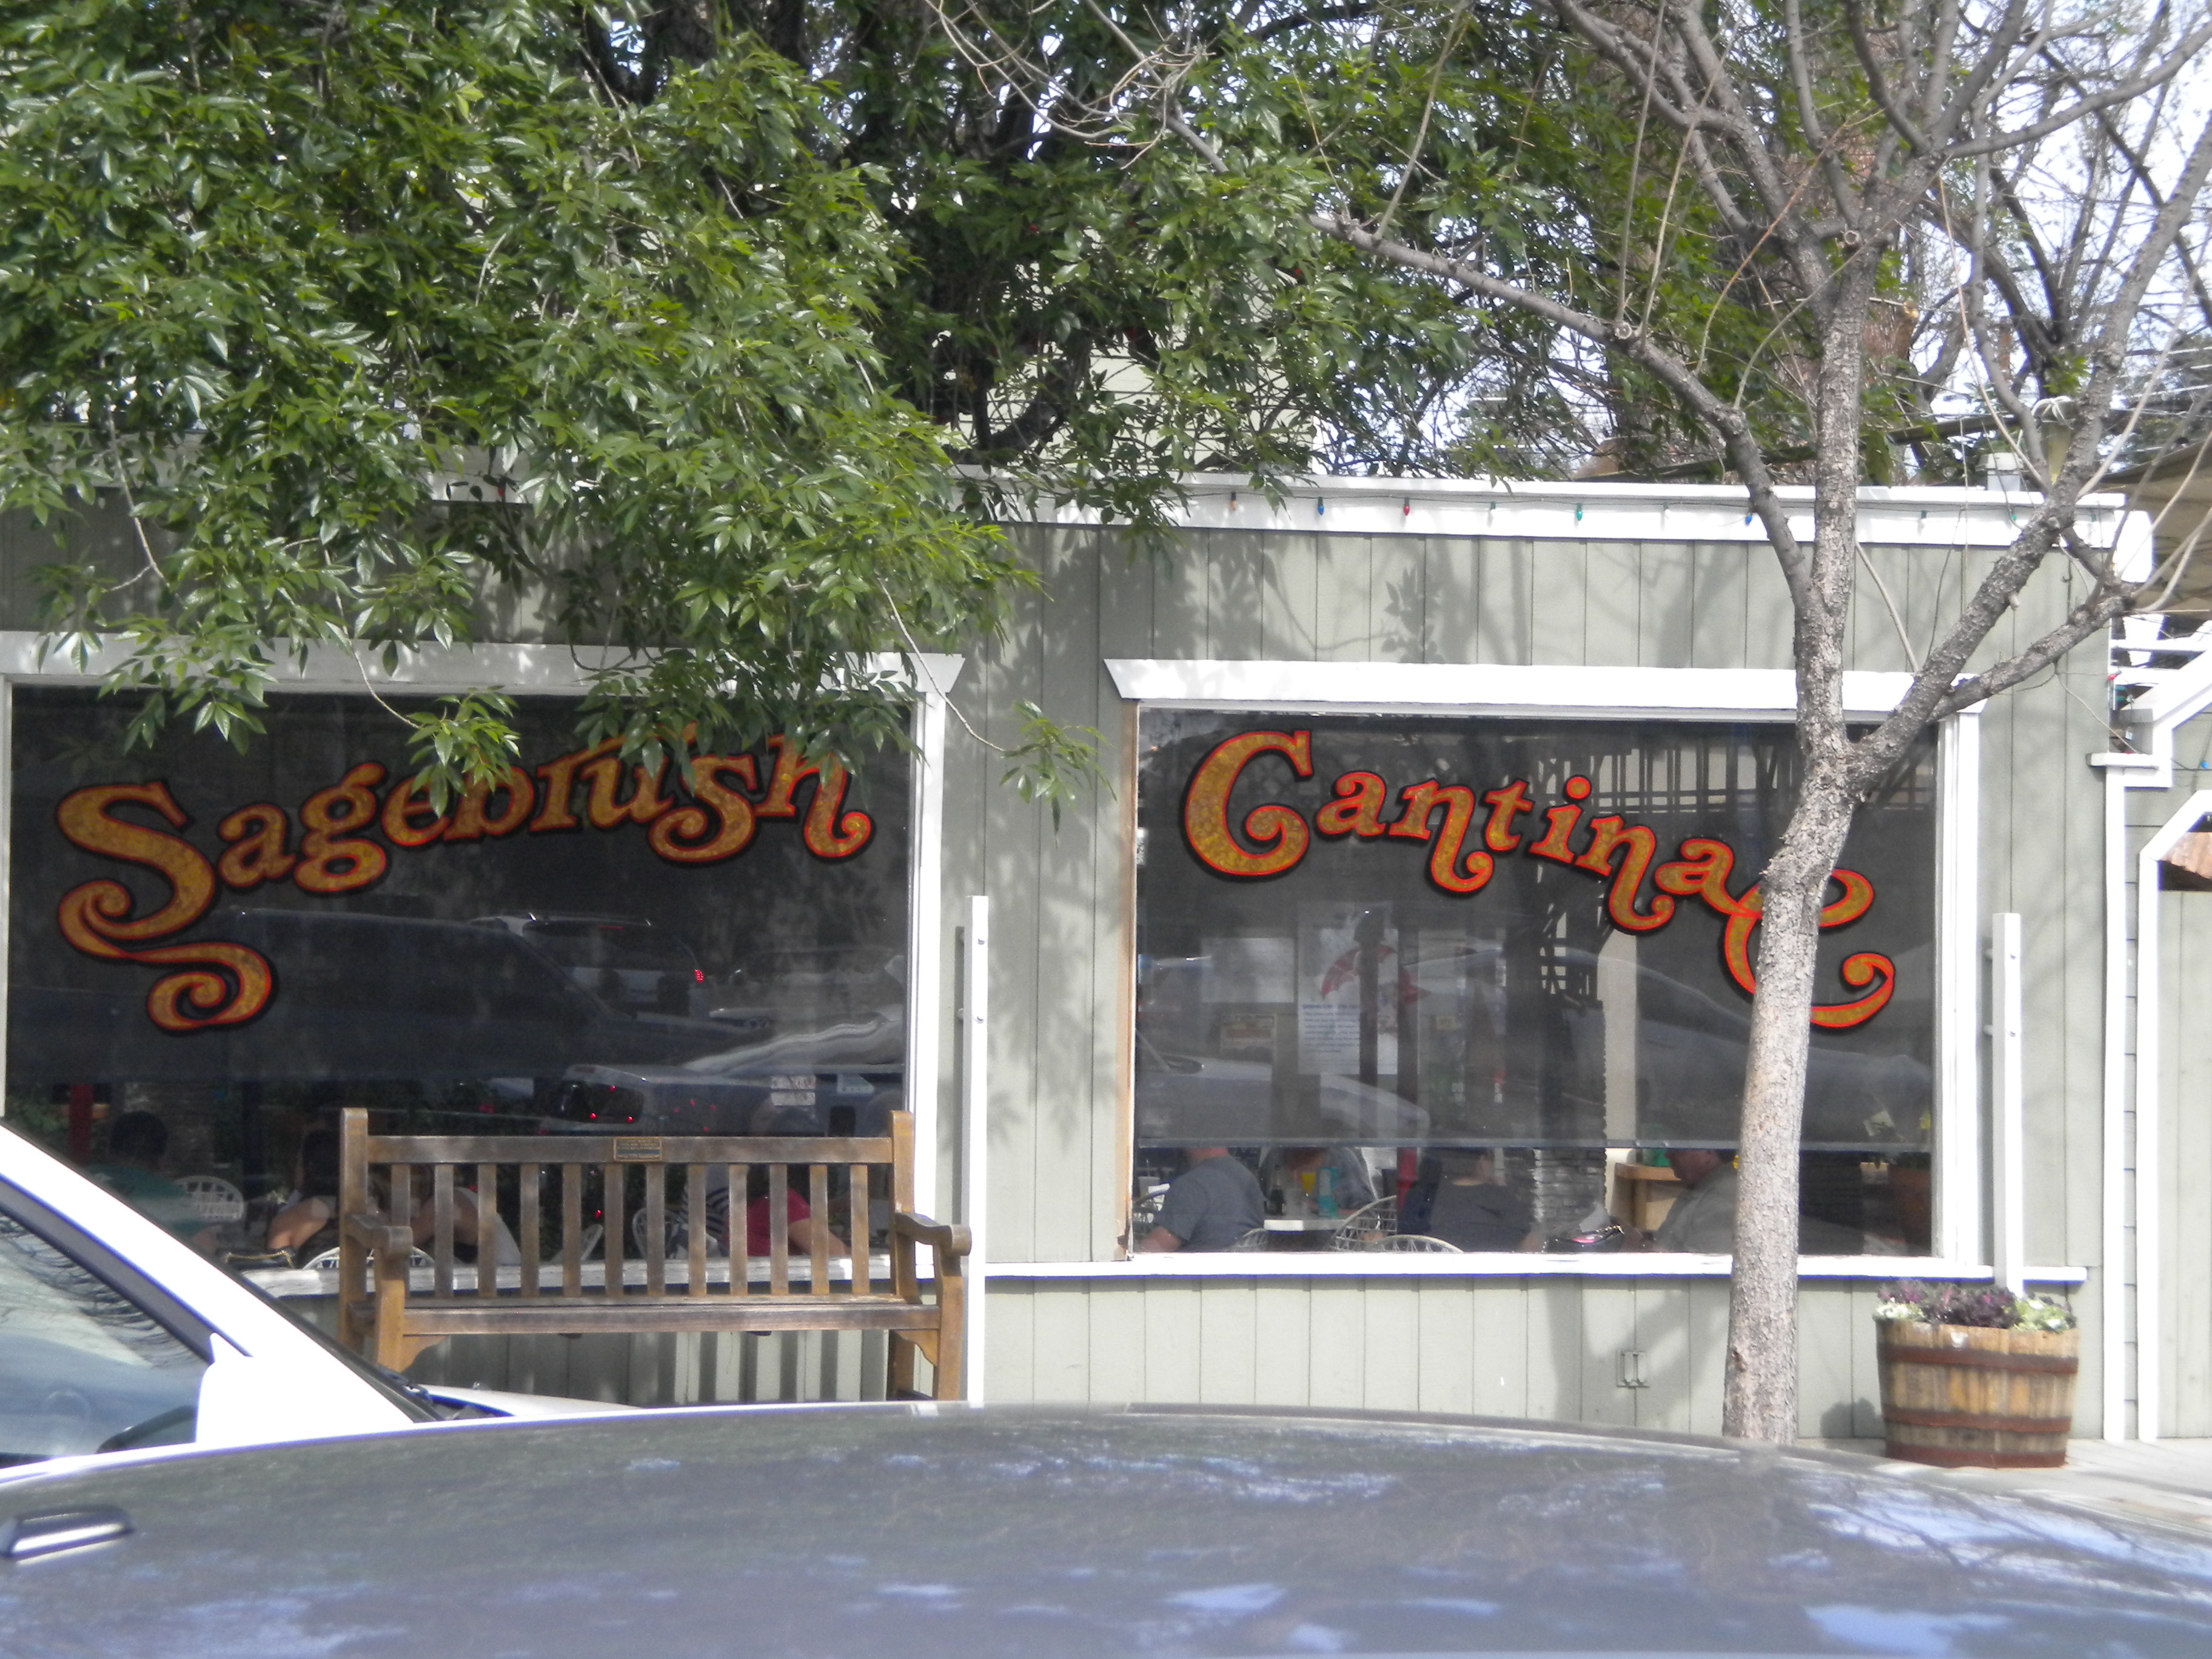
Saturday Morning Farmer’s Markets abound in Southern California. Within the distance of approximately 33 miles, extending from the city of Ventura to Calabassas (at the far Western end of the San Fernando Valley) there are 4 markets that I know of: Ventura, Camarillo Old Town, Newbury Park and Calabassas. You can go further South and find quite a few more but of course, it would be difficult to attend all of them in one day. On my foray to Calabassas I also went to Newbury Park and could have hit Camarillo if I had so desired. The market is across the street from the most prominent and probably well-known business in Camarillo and that would be the Sage Brush Cantina. The Cantina opened years ago in a one store front location and soon took over the properties next to it, so that now the whole block (where there used to be a bakery and other businesses) is now all Sage Brush Cantina and their parking lot. It has become a gathering for locals and out of towners as well.
The Calabassas Market is probably the most diverse and exciting of the one that I previously mentioned. The time slot is from 9 in the morning until 1 in the afternoon. You can buy produce, flowers, artisan bread products and foods ready-made to eat on the spot.
The first thing when you walk into the market is a sign for Valet Parking and an attendant to manage it. The fee is only $3.00 which is the same that the parking lot across the street charges. There is very little street parking in Calabassas and since the Market is well-attended the lot or Valet Parking is well worth it. An alternative is to park in the shopping center on Valley Circle – it is about a one block walk but if you are carrying market produce it can be a little tireing.
There are many flower vendors and they are the ones that are most prominent in the front of the market. This is not to say there are no produce vendors there – there are plenty but the flowers are so colorful and beautiful that they do stand out. If you are planning on purchasing flowers as well as produce wait until you are finished and almost ready to leave – that way your flowers will have stayed fresh in water until you pick them and take them home. If you carry them around the market there is a strong possibility that they will start to wilt, especially if it is a hot day.
There are many produce vendors but one of my favorite has produce similar to Underwoods in Camarillo in that they have those beautiful heads of Purple and Gold Cauliflower along with Romesco which is shaped like a castle with little turrets.
One of the ways in which I like to use the Cauliflower is to prepare it with a Cheese Sauce – the simplest Cheese Sauce that you will ever make. Simply shred as much Medium or Sharp Cheddar Cheese and combine it with enough Mayonnaise to make a spreadable mixture. Place the washed Cauliflower in a microwavable dish and spread the Mayo/Cheese mixture all over it. Microwave for approximately five minutes or until the Cauliflower is fork tender.
I love Mushrooms and one of the Vendors has a great variety of Mushrooms and they are locally (in the Conejo Valley just West of Calabassas) raised. Mushrooms grow best in the dark and not exactly knowing I asked the Vendor where he grew them – in a Greenhouse? The answer was no – he actually grows most of them in a warehouse building – probably in raised beds or flats. You could purchase one type of mushroom or a variety pack of different sizes and different prices. I couldn’t resist and did buy a $15 pack which did last me for several meals.
Also at the market were Citrus Vendors, Vegetable Vendors, Egg Vendors, Hot Sauce Vendors and many more. I am pictured below at the booth of a vendor from Central California – at this point in the day (about 1 hours before closing) his products were marked down to 3 for $5.00. An excellent and everything I purchase from his was of excellent quality.
This next vendor sells Cucumbers, Tomatoes and Beans at both the Calabassas Market and the Market in Thousand Oaks on Thursday afternoon. When I visit these markets her stand is always one that I stop at. The Cucumbers are of the Japanese variety and do not need to be peeled. They are always sweet and crisp and delicious.
One of the Vendors at the Calabassas Market was not selling produce but instead he had Pasta and Olives – the booth was called Zona de Italy. Lots of interesting pasta and delicious Olives of various varieties.
So take a trip out to Calabassas and check out their produce, flowers, pasta, etc.
Categories: Dinner Ideas, Farm Markets, Fruit, Lunch Ideas, Main, Pasta, Salads Tags: Apples, family dinner, Fruit, Mushrooms, Pasta, Tomatoes, Vegetables
BLACK FOREST CAKE for EV’S BIRTHDAY
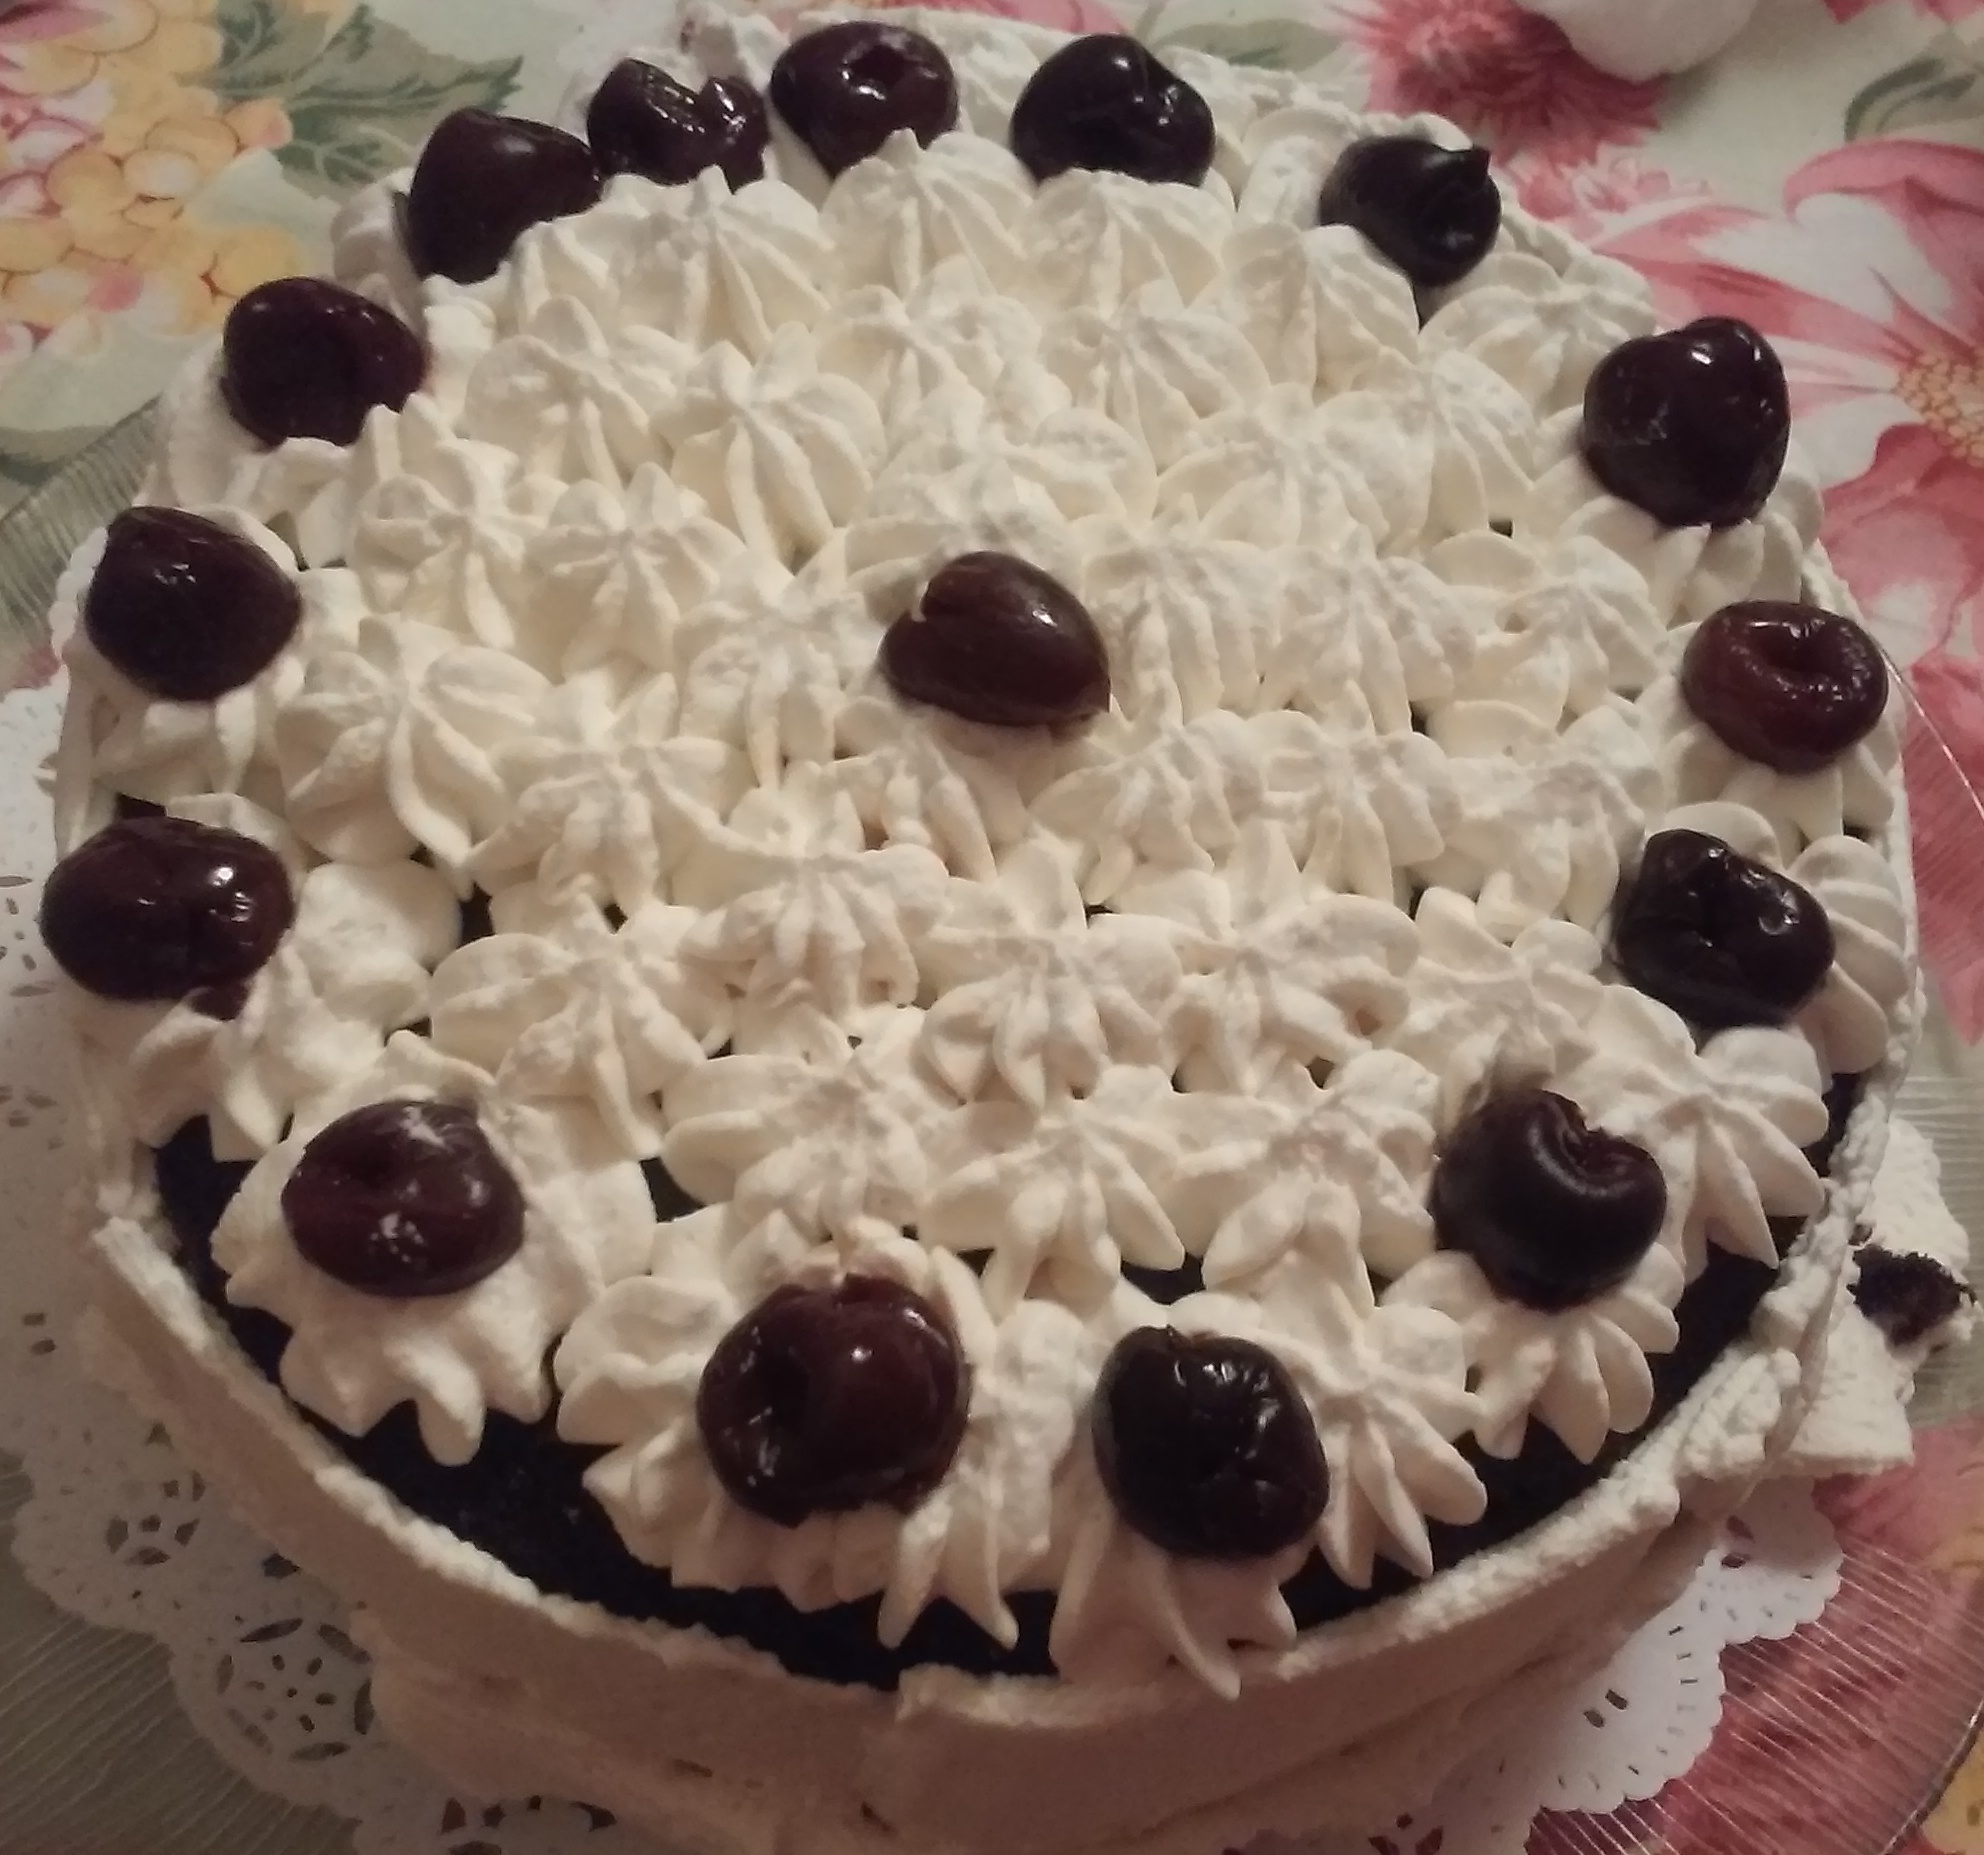
Ev requested a Black Forest Cake for his Birthday this year. I made for past Birthdays and he loved it so much he wanted another one. So now I have decided to document the preparation of this utterly delicious, decadent cake. If you can, make it when fresh Cherries are available but if not, then frozen or canned Cherries will work. This year I used dried Cherries which I reconstituted in Cherry Liqueur along with frozen Cherries. There was an excess of frozen Cherries, so I put the leftovers on top of the cake as decoration.
The ingredients you will need for a Black Forest Cake are:
1 dozen large Eggs
Water
Granulated Sugar
All-Purpose Flour
1/2 cup Cocoa Powder
1/2 cup Black Cocoa Powder or a total of 1 cup regular Cocoa Powder
Vanilla & Almond Extracts
Cherries
Sugar
Cornstarch
Almond Flavoring
1 Qt. Whipped Cream
Note: For exact measurements and complete directions please go to Black Forest Cherry Cake
First of all, gather and measure all of your ingredients. Separate the Whites from the Yolks and allow them to come to room temperature.
Prepare three 9″layer pans by spraying with a Vegetable Spray and then fitting with Parchment or Waxed Paper.
Preheat the oven to 350 degrees.
Sift together the Flour, Cocoa Powders and 1/4 cup of the Sugar.
Beat the Egg Yolks and 1/4 cup of Water with an Electric Mixer until they are thick and light colored. Gradually add the Sugar while still beating; once all the Sugar has been beaten in add the Flavorings.
Exchange the Wire Beater for the Paddle Beater. Sift the Flour Mixture over the Beaten Egg Yolks and slowly beat it in with the Paddle Beater.
Flour Mixture Blended in
Next using a clean bowl and beater use the Wire Whisk to beat the Egg Whites to a soft Peak. (Over-beating them will make the cake dry and underbeating them will cause the cake not to rise fully)
Once all the Egg Whites have been well-blended into the Chocolate Batter, pour into the prepared pans and bake in the preheated oven for 20 minutes or until a toothpick inserted in the middle of each layer comes out clean.
Set the pans to cool on a wire rack; once the layers are cool to the touch (about 15-20 minutes) invert onto the rack by placing the rack over the pan and turning over. Cool the layers completely before assembling.
While the layers are cooling, prepare the syrup, the filling and the Chantilly Creme. (This may also be done while the cakes are baking) See the link above for the recipes and directions.
Brush the cake layers with the Syrup.
Place the first layer, top side up on a serving plate and spread with the Chantilly Creme. Add half the Cherry Filling and the second layer of cake.
Repeat the process with the second layer and then add the third layer.
Use a pastry bag filled with the Chantilly Creme and drop Rosettes on the top of the Cake. If there is Creme left over, spread it on the sides of the cake.
Top each Rosette with a Cherry (if any leftover or use Maraschino Cherries or none at all, if preferred.
Refrigerate at least one hour before serving. When serving cut with a serrated knife and cut small to moderate pieces as this is a rich cake. Delicious, but rich!
Categories: Baking, Dessert Ideas, Fruit, Main Tags: baking, Chocolate, Dessert Ideas, Fruit, holiday recipes
SO. CAL FARMER’S MARKETS – OLD TOWN CAMARILLO
There are numerous Farmer’s Markets in Ventura County – on Saturday alone there are four different markets all within driving distance of each other. Starting in Ventura, you have a medium size Market on the corner of Santa Clara and Palm Streets. (See my previous post in January of this year)
Another local Saturday Market in Ventura County is the one in ‘Old Town Camarillo’. This one is different from the other markets available in that it is sponsored by the Camarillo Hospice and a portion of all sales goes to this cause. The Camarillo Market is a Certified Market and is probably the largest one in the County, maybe only equal in size to the Thousand Oaks Market.
At the Camarillo Market you will find produce vendors, flower vendors and food product vendors. There is also a booth for Kettle Corn, Tamales, and Coffee. You can buy Olive Oil, Hummus and Flat Breads, and best of all, ‘Old Boney Mountain’ Hot Sauces and Grotto Dust. The Old Boney Products are produced by Jeff Losey who own the company and has named it for ‘Old Boney Mountain’ which can be found in the National Recreation Area in Newbury Park and which also can be seen from his property.
My favorite produce vendor is Underwood farms which also goes to the Thousand Oaks Market. If you miss a market day and need fresh produce, you can also go straight to the Underwood Farms in Somis and/or Moorpark, both of which are in Ventura County.
Shown below are some unusual varieties of well-known Vegetables. The Romanesco is a form of Broccoli but is certainly much more fun. Since it almost looks like a Castle, I have used in Children’s Cooing Classes when there was a ‘Kingdom’ Theme involved. Next is my favorite type of Cauliflower – Purple and Yellow or Golden. It is probably just my imagination but I do think the colored Cauliflower, especially the yellow one has more flavor than the white. This may be true because there certainly has to be more Carotene in the yellow variety and carotene does provide flavor.
Next is the Purple and Green Cabbage which is not unusual in itself, but these are so fresh and so beautiful that you cannot help purchasing them and running home to use them.
Another produce vendor that you will want to stop at is the Tomato Booth from Beylik Farms. They have Orange Tomatoes, Red Plum Tomatoes and Japanese Tomatoes. The winter variety are grown in Green Houses, but they taste as good as if they were grown outdoors.
In addition to Underwood and Beylik Farms there are numerous other Produce Vendors. There are also booths selling artisan Greens such as Kale and other Greens. One of the offerings that I love is the booth that sells Sprouts of different varieties. I especially like the Sunflower Sprouts which are great on sandwiches and in salads. Then we have the fruit vendors, selling Apples, Oranges and other Citrus fruit in addition to Strawberries (fresh picked the same day as being sold from local fields.
One of my favorite vendors is ‘Old Boney Mountain Hot Sauce Products’. Jeff Losey, who is the owner and CEO of the Company donates his profits to organizations such as the Camarillo Hospice, Wounded Warrior and Newbury Park High School Football Team. Old Boney Products are named after ‘Old Boney Mountain’ in the National Recreation Area in the Santa Monica Mountains located in Newbury Park. Jeff and his family can view Old Boney Mountain from their home where the Peppers are also grown.
There are also at least two flower vendors – one sells live plants (this particular vendor goes both to the Camarillo Market and the Thousand Oaks Market. Every Fall right before Thanksgiving, I buy my Pansy Plants from them. The price is right and the plants are beautiful. (Living in Southern California with hot summers, the Pansies do not survive beyond late Spring, so I have to replant them every year. In addition to the Pansies, they also sell Orchid Plants and other shade plants. *** There are other vendors selling cut flowers to take home to enjoy.
Last, but not least, are the prepared food vendors. One sells freshly baked Artisan Bread Products. Normally I will make my own Challah and other Egg Breads but this past Saturday I had not had the time to do so and wanted to make French for Breakfast on Sunday so I purchase a Brioche from this vendor. It was very expensive ($10.00) and cost about 5 times what it would cost me to make it (not counting my time) but it was well worth it. It was delicious and made not only great French Toast but excellent sandwiches as well.
Another Vendor sells Tamales, another sells different varieties of Hummus and Flat Breads and of course Kettle Korn. If these aren’t enough, there are also booths selling handmade crafts, such as jewelry, shell items, wood items, etc.
Take a trip out here next Saturday (or whenever you happen to be in town) and enjoy the wares at the Old Town Camarillo Farmer’s Market.
Categories: Farm Markets, Main, Salads Tags: Apples, Fruit, Salad, Tomatoes, Vegetables