Archive for June, 2012

MY CULINARY DIARY – Summer Grilled Steak Salad


MY CULINARY DIARY

Monday, June 26, 2012


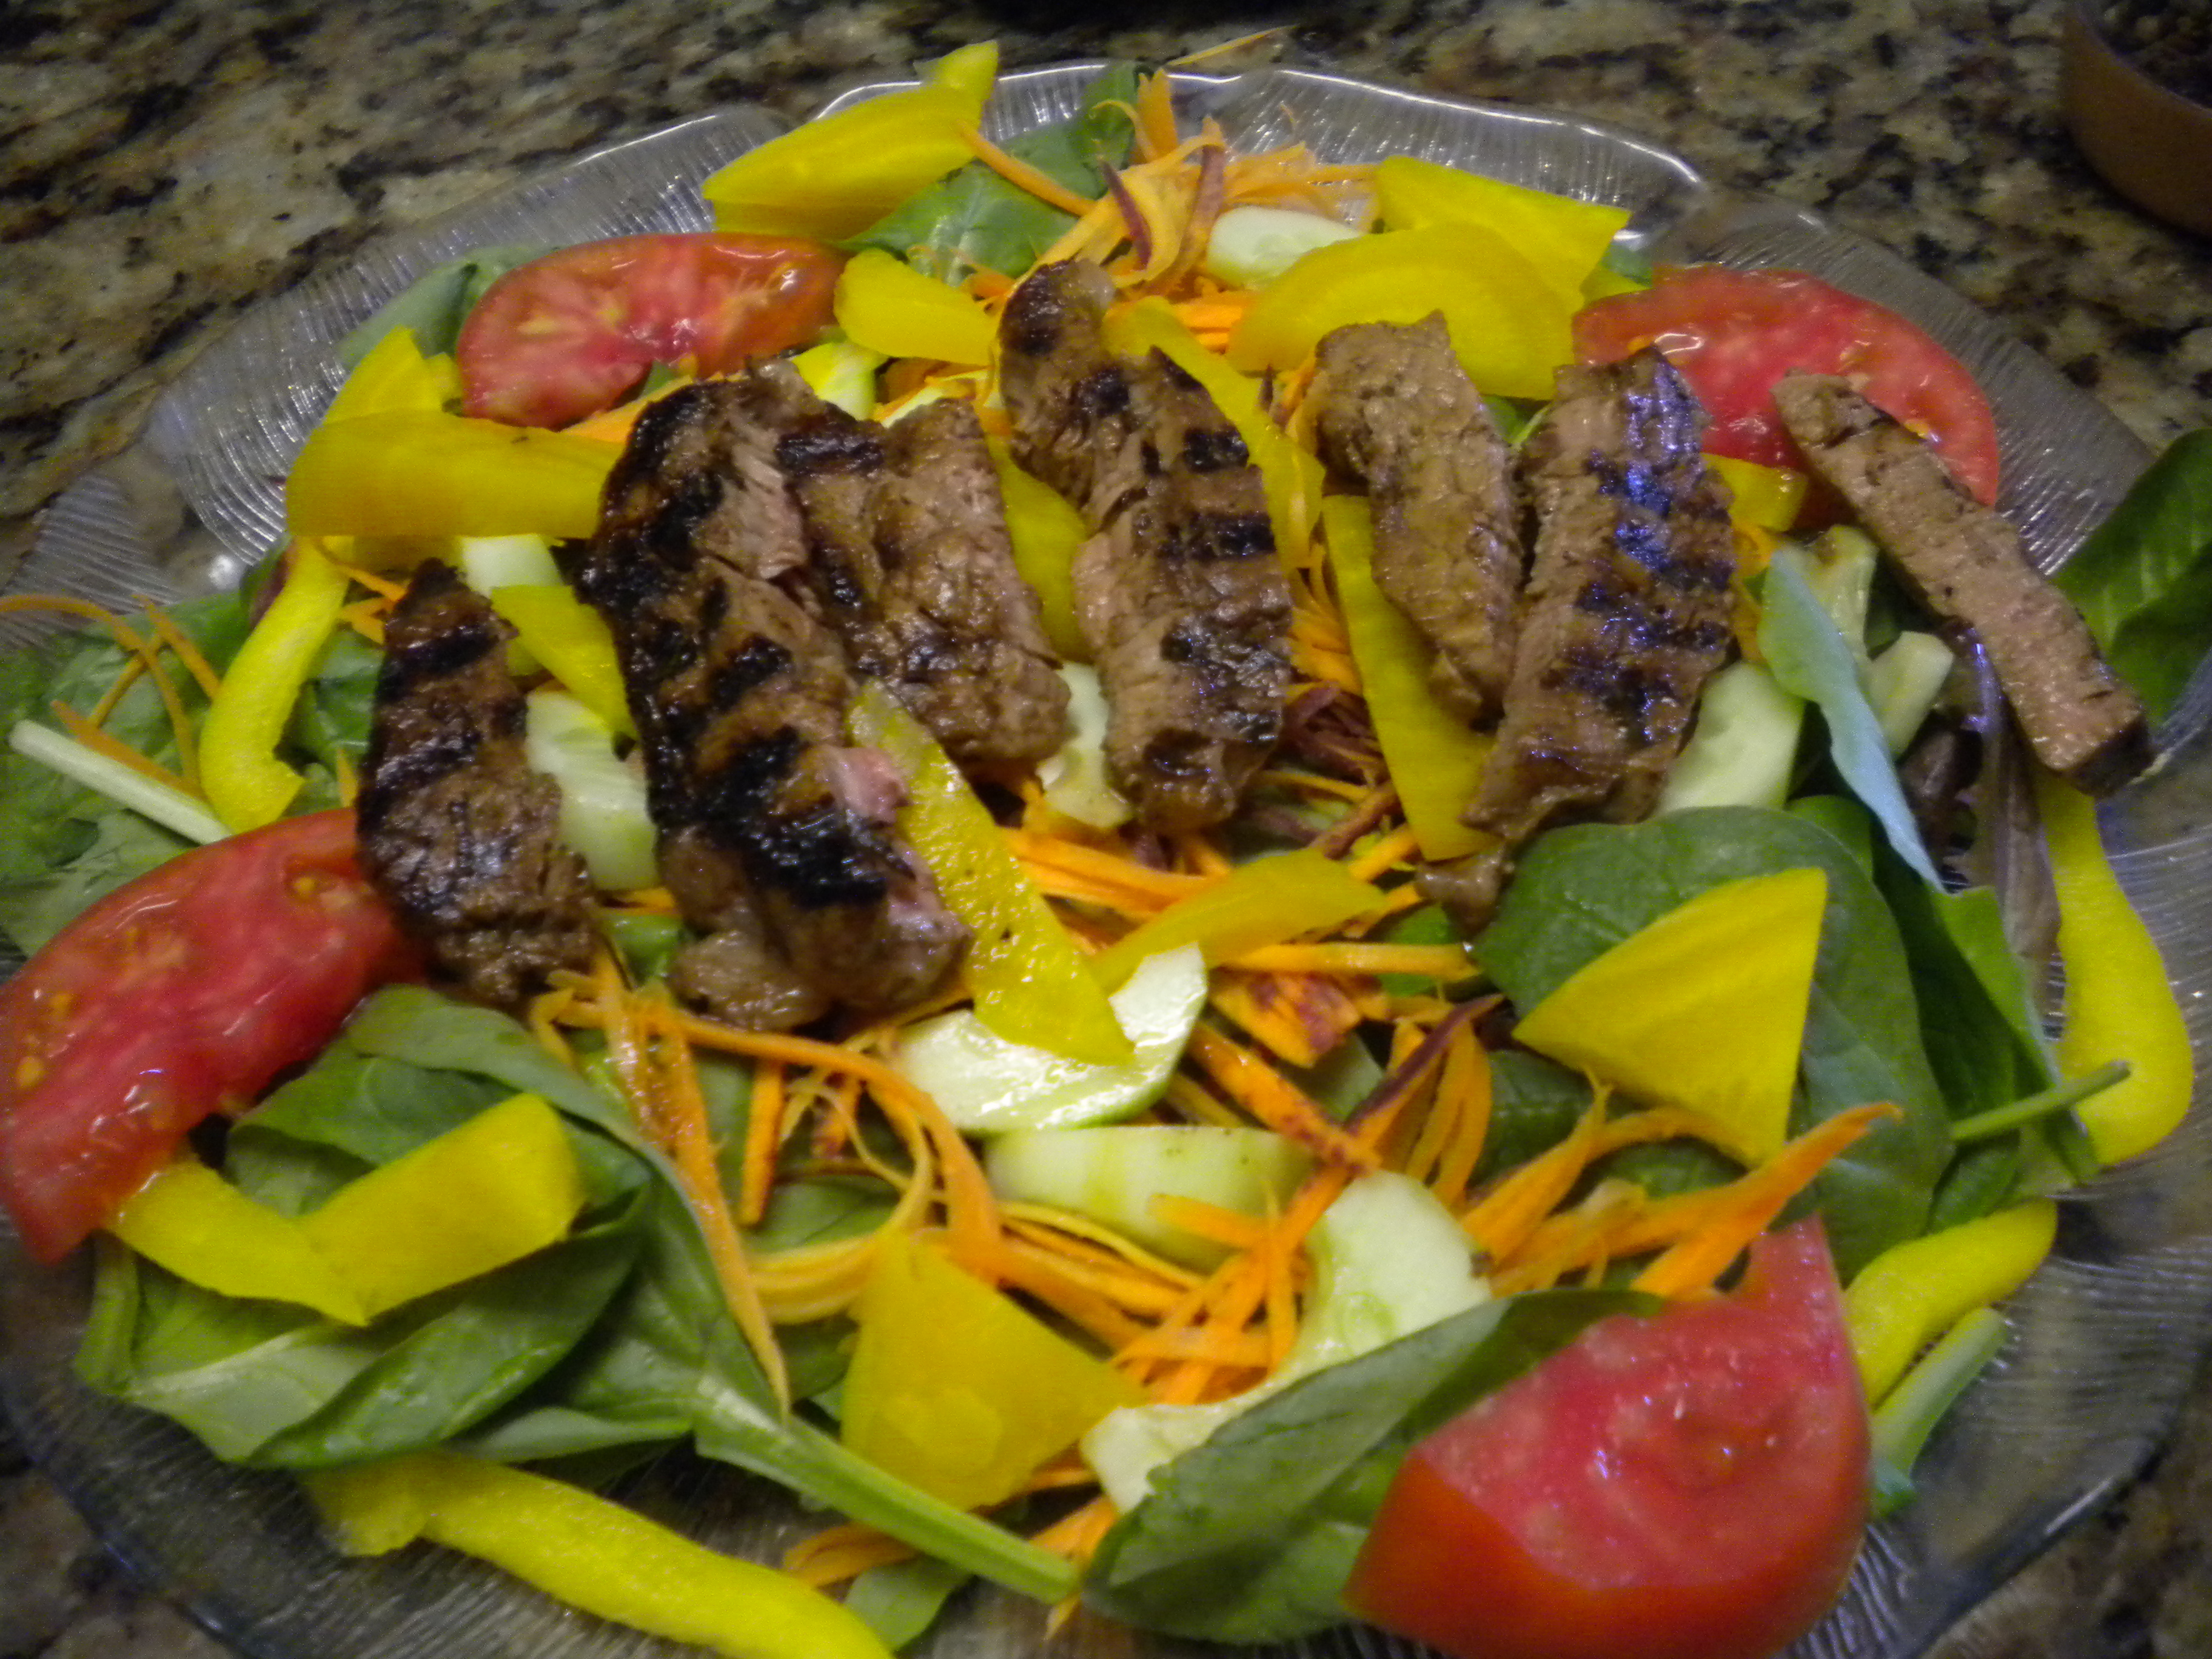
I just love Summer and all the ripe fruit and vegetables that are available.  I also love the fact that we can eat lighter meals and feel satisfied doing so.  Tonight’s dinner was in fact one of those wonderful salads using fresh produce and tomatoes from our garden.  I decided to make a Steak Salad. I really wanted to make a Mongolian Lamb Salad but did not want to have to purchase a whole lamb leg as steak cuts were not available.  Thus, I used Beef Filet instead and these turned out to be very,  very good.

I used two Beef Filets which were just right for two people (we actually had some leftover for lunch the next day).  To marinate them I used a Balsamic Vinaigrette which was made with:

Balsamic Vinegar

Garlic

Basil

Olive Oil

Dijon Mustard

Salt & Pepper


I placed the Steaks in a shallow glass dish and poked a few holes in them to allow the marinade to penetrate into the steak and then I poured the Marinade over the steak.  If you do this, be sure to turn the meat over a few times to get it thoroughly coated with the Marinade.  It is also a good idea to turn it over again halfway through the marinade time.


For the Salad I used:


Baby Artisan Lettuce

Red & Orange Carrots & Yellow Bell Pepper

Red & Orange Carrots, Yellow Bell Pepper & Fresh Tomatoes


Pickling Cucumbers (Persian, Japanese or English are also good)

Fresh Home Grown Tomatoes

Golden Beets, par-boiled  (save the cooking liquid for Vegetable Soup or poaching liquid)


Golden Beets


Instead of making one large salad from which everyone would be served, I decided to make the salads on individual plates.  This is one way to get the person who does not take much salad on their plate to eat a little more than they normally would.


Any color Beets can be used, but I prefer the Golden to the Red or Purple.  I think they have a milder flavor than the darker ones which taste more earthy.  They are also prettier and don’t leave as much color behind them.  To prepare the Beets, cut off the roots and leaves and scrub them really well to get off all the dirt that they tend to gather.  Next put them in a pot and cover them with cold water and add a tablespoon of salt.  Bring to a boil and then shut off the heat.  Let them sit in the pot until they cool down.  Remove and peel.  The peel will just slide off with the slightest help.  The cooking liquid can be used for Vegetable Soup, as poaching liquid for fish or chicken or as a tint for hard-cooked eggs.  The Eggs end up looking like Chinese Tea Eggs which are traditional at the Chinese New Year in late January or early February. (This depends on the Chinese Calendar)


The first thing that went on the plates was the Baby Lettuce which served as the base for the salad.

Lettuce Base


Next came the Red & Orange Carrots.  First I peeled the Carrots, then rinsed and dried them and julienned them with a julienne peeler.  I could have done this in the Food Processor with the 3 x 3 julienne blade, but I like the texture and taste of the julienne peeled carrots better, plus they look more attractive.

Carrots Added

Julienne Peeler


Next came the Yellow Bell Pepper which was cored, seeded and julienned.  The pieces went around the outer edges of the plate to frame the salad.


Yellow Bells Added


The Cucumbers were peeled, halved, seeded and then thinly sliced.

Cucumbers - the Melon Baller was used to remove the seeds before slicing

Melon Baller - used to remove Cucumber Seeds


The Cucumbers went on top of the Carrots along with the sliced Tomatoes. 

Cukes & Tomatoes added


Next the Beets were sliced and placed on the plate.

Golden Beets Added


The next thing to do was to grill the steak.  My stovetop grill had been heating up, so I placed the steaks on the grill and seared both top and bottoms.  After turning them over the first time, the remaining marinade was poured on top.  After searing them, I removed them from the pan and sliced them against the grain into pieces about 3/8” thick.  I then returned the slices to the pan and seared them very quickly on each side so that even though they were done on the outside they still retained a little rareness on the inside.


Grilling Steak

Sliced & Regrilled - ready to turn over


The sliced and seared steak was placed on top of the plated salad and served with a Balsamic Mayonnaise.  Balsamic Vinaigrette is also a good dressing for this salad.  Along with Home-Fried Potatoes and the Bread I made yesterday,  this was a very good and tasty summer meal that left us feeling satisfied without being stuffed.


The Completed Salad


Home Fries


Roast Turkey slices or grilled Shrimp can be substituted for the Steak slices.  Or just use your imagination and see what you can come up with!


Digg This
Reddit This
Stumble Now!
Buzz This
Vote on DZone
Share on Facebook
Bookmark this on Delicious
Kick It on DotNetKicks.com
Shout it
Share on LinkedIn
Bookmark this on Technorati
Post on Twitter
Google Buzz (aka. Google Reader)

Be the first to comment - What do you think?
Posted by sylveee - 2012/06/28 at 8:00 PM

Categories: Baking, Bread, Cooking for Everyone, Dinner Ideas, Main, Salads   Tags: , , , , , , , , ,

MY CULINARY DIARY – Shrimp and Pasta

MY CULINARY DIARY

Sunday, June 24, 2012


Today was a Culinary Half-Marathon.  Since we were almost out of bread, I decided to make some Country White Bread.  I once got a T-Shirt at one conference or another that had the White Lily Flour Logo on it.  I had never actually ever used White Lily because it does come from back East and I have never seen it for sale on the West Coast until about 4 weeks ago when I was browsing through Surfas, a great Restaurant Supply Store in Culver City.  There and behold was White Lily Flour! Not being able to resist it I purchased a 5lb. bag of their All-Purpose Flour and their Bread Flour.  Today, I decided to try out the Bread Flour in my Bread.  It really turned out quite scrumptious.

I made the Dough using the Dough Blade in my Food Processor and then put it in a 2 gallon plastic bag.  Before I bagged the Dough I covered it in a thin layer of Olive Oil.  This adds flavor and keeps the dough from drying out.  I did not use a recipe for the Bread but here are the ingredients I used:

4 cups Bread Flour

1 Tbsp. Dry Active Yeast

1 Tbsp. Malt Powder (Sugar or Honey may be used instead)

1 ½ tsp. Salt (2 tsps. Would have been better)

2 Tbsps. Olive Oil

1 ½ cup Water


If you make this Dough in your Food Processor, use cold water as the heat from the motor of the processor heats up the dough.  You do not want the dough to get so hot as to kill the yeast.


You can also make the Dough by hand or in a standing electric mixer.


While the Dough was rising, I took a trip to the market(s) to purchase some other ingredients. My first stop was Sprouts to purchase Shrimp and look for Rennet Tablets and Citric Acid.  Monti made Mozzarella Cheese and has inspired to try it too.  Looks very simple and fresh Mozzarella is really good.  I purchased the Shrimp, 2 boxes of Strawberries which were on sale for a very good price.  I found the Citric Acid but not the Rennet.  I did find Vanilla Powder though.  Vanilla Powder is a good substitute for liquid Vanilla Extract when you do not want to add any more moisture to a baked product, especially ones like Churros or anything fried.


The next stop was Whole Foods to look for the Rennet, but all they had were very expensive Mozzarella making Kits.  I did find some nice Mango Bath Salts though which are good for a very relaxing bath.


The next stop was Ralphs where they had Eggs on sale for 88 cents a dozen. (Limit 2 doz.)  Since I use a lot of Eggs for baking this was a good deal.


On to home and the rest of my afternoon cooking and baking.  Once I put away the groceries, I put the Baking Stone in the bottom of my lower oven and turned the oven on to 500 degrees to heat up the stone.  (It takes at least 30 minutes to heat the stone, but 1 hour is even better)  Since it was a warm day, I knew that the Bread would rise up fast, once it was shaped.  The next thing I did was to put some Cornmeal on my Pizza Peel (which I use to slip the bread onto the stone with) and shape the Bread.  I flattened the Dough to get out the Carbon Dioxide build up.  You always want to raise your dough at least 2 times, even three to get a great loaf of bread.

Flattend Dough


Next I shaped it into a rectangle and folded over the top third.  After flattening that as much as I could, I then folded over the bottom third and then flattened it again.  The loaf was the lifted onto the peel.  Realizing that the seam was up and should have been down, I turned over the loaf.  That is why when you look at the photos that there is cornmeal on top of the bread as well as the bottom.  This actually give some additional texture, taste and crunch to the crust.  The top of the loaf was slashed with a Baker’s Blade (Lame);  this allows for expansion and better baking.


French Lame (Baker’s Blade)


Shaping the Bread – top third folded down    Completely folded


Completely folded


I covered the loaf with a clean dish towel and then went on to my other tasks of making Strawberry Parfait and Angel Food Cake.  The Strawberry Parfait was made with fresh Strawberries and Heavy Cream which was to be whipped.  I did not want the Cream to break down, so I measured out 2 teaspoons of Gelatin (Gelatin comes in 1 oz. Packages or 1 lb. Containers)  The one ounce package has 2 ½ tsps. In it.  I also measured 2 cups of Heavy Cream (Whipping Cream) and poured 2 Tbsps. into a small bowl and then sprinkled the Gelatin over the cold cream.  Once the Gelatin softened I placed it in the Microwave to dissolve it.  Stir it thoroughly to be sure that all the granules are dissolved.  I then poured the Gelatin mixture into the remainder of the Cream and covered it and refrigerated it to be sure it was cold enough to whip without turning into butter.


Next I placed the Strawberries in a Colander and rinsed them with Cold Water.  I set them aside to drain.


Next I made my Angel Food Cake.  Before starting this though, I made sure the oven rack was at the bottom and that the upper racks were well out of the way.  Next I turned the oven to 375 degrees.  To make Angel Food Cake, use a tube pan and DO NOT GREASE IT!

I used the White Lily All-Purpose Flour for the Cake which normally calls for Cake Flour.  Since the White Lily All-Purpose Flour is lighter than most commercial brands of All-Purpose Flour (you actually have to add 2 Tablespoons to every cup of White Lily Flour to have it equal 1 cup of regular All-Purpose Flour)  The White Lily Flour was almost the weight of the Cake Flour.

The reason I decided to make an Angel Food Cake was because I had a large collection of Egg Whites that I had saved from recipes that only called for Yolks.  I could have made a larger Angel Food Cake than I did, but two people can only eat so many sweets!


The recipe I used called for:


1 cup Egg Whites (approximately 12)

1 tsp. Cream of Tartar

¼ tsp. Salt

1 ½ cups Granulated Sugar (divided in half)

1 cup Cake Flour

1 tsp. Vanilla


For the complete recipe see: angel-food-cake/


Beaten Egg Whites

Cake Batter into Pan


Once the cake is done remove from the oven and turn upside down until completely cool.  Run a spatula around the sides of the pan and If your tube pan is a 2 part pan, remove the sides and then run the spatula under the bottom part of the cake.  Turn over onto a serving platter.

Angel Food Cake makes a great base for Strawberries and Whipped Cream or for the Strawberry Parfait that I made next.


For the Strawberry Parfait I used:

1 Pint Strawberries

1 Pint Whipping Cream

2 tsps. Gelatin (I think 1 would probably have been enough)

Superfine Sugar

Pureed Berries


Berries added to Cream


For the complete recipe and directions see:  strawberry-parfait/


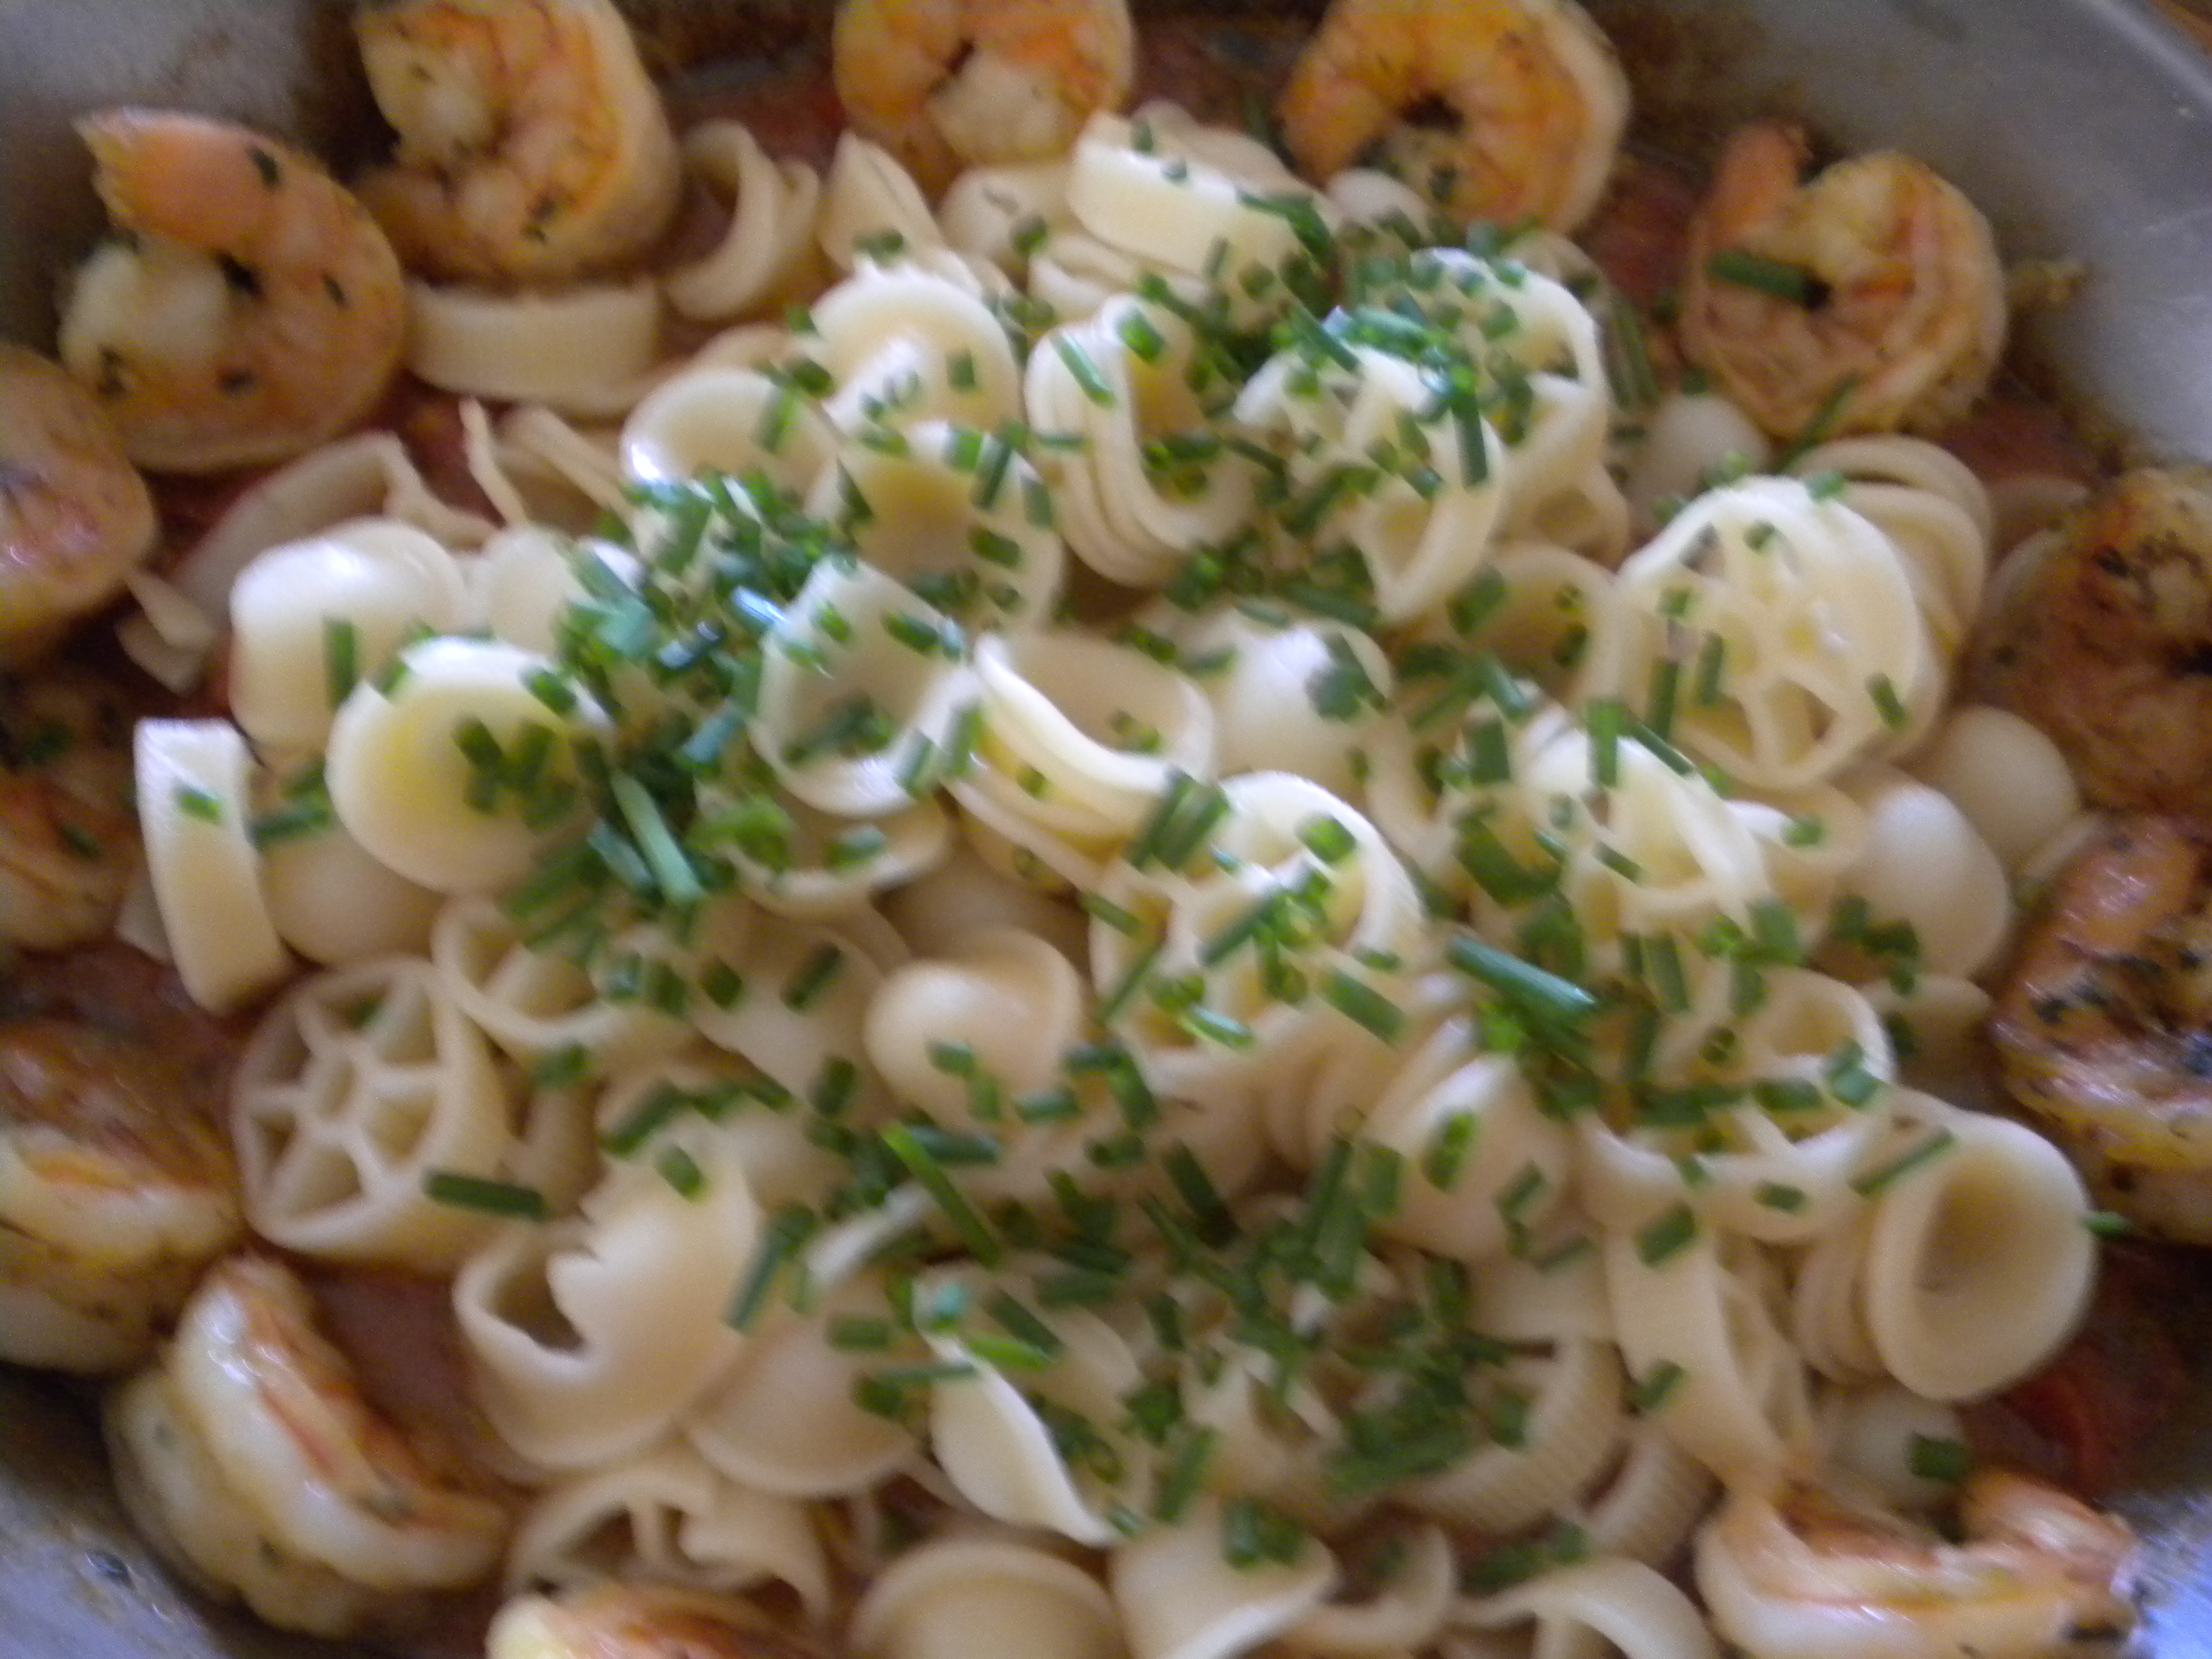
Once the Parfait was done I began preparations for dinner which was Oriechetti  (Ear-shape Pasta – the name actually means little ears);  there were a few wagon wheels thrown in the the Oriechetti as I wanted to use up the small amount I had) with fresh Tomato and Herb Sauce and sautéed Shrimp.  I shelled and deveined the Shrimp and rinsed them with cold water and then blotted them dry with a paper towel.  I add some minced Basil mixed with some Himalayan Sea Salt, Olive Oil and Saffron.  (The Saffron gives color and is a browning agent – Paprika or Turmeric can be used instead although the Turmeric will add its own flavor)  You can also add some Lemon Juice to this mixture, but this time I added Marsala Wine.

Marinating Shrimp

Shrimp Sauteing


The bread was put in the oven before the Cake was put in.  As I said it was a very warm day and the loaf rose up quickly.  The bread also finished baking before the Cake.  When it was done I removed it with my peel and placed it on a rack to cool.  Ev couldn’t stand it (the aroma of freshly baked bread is so good!) and he had to have a slice with Butter of course!

Baked Loaf on Cooling Rack


Next I washed the Tomatoes (no need to dry) and removed the cores.  Next I diced them and minced some fresh Oregano Leaves.

Cored Tomatoes

Diced Tomatoes


I also minced some Chives but kept them separate as they were to be used for a garnish.  Usually I grill the Shrimp (grilling adds flavor and gives more color to the Shrimp) but since I already had several pots and pans on the stove, I decided to sauté them instead in the pan that I was using  for the Sauce.  Once the Shrimp were sautéed I removed them to a dish and covered them until the sauce was done.


To make the sauce, add a small amount of Olive Oil to the pan and add some diced Onions.  Sauté until the Onions start to soften and then add the Tomatoes along with the fresh herbs and 1 tsp. of Sea Salt and some freshly ground Pepper to taste.  Cook until the tomatoes are reduced and a sauce start to form.  If desired, you can add a little Marsala to the Sauce but be sure to cook it down somewhat.

While I making the Sauce I cooked the Pasta in plenty of boiling salted water.  Once it was done, I poured it into a Colander and shook out all the excess water.  Once the Sauce was done I put the drained Pasta on top and surrounded it with the Sautéed Shrimp.


Oriechetti & Shrimp


In addition to the Shrimp and Pasta we had the freshly baked Bread and some sautéed Spinach to go along with it.  All in all it was a delicious meal followed by Angel Food Cake and Strawberry Parfait.


Strawberry Parfait with Whipped Cream & Strawberry Garnish


Digg This
Reddit This
Stumble Now!
Buzz This
Vote on DZone
Share on Facebook
Bookmark this on Delicious
Kick It on DotNetKicks.com
Shout it
Share on LinkedIn
Bookmark this on Technorati
Post on Twitter
Google Buzz (aka. Google Reader)

Be the first to comment - What do you think?
Posted by sylveee - 2012/06/26 at 9:51 PM

Categories: Baking, Bread, Cooking for Everyone, Dessert Ideas, Dinner Ideas, Fruit, Main, Pasta   Tags: , , , , , , , , , , ,

MACARONI DAY

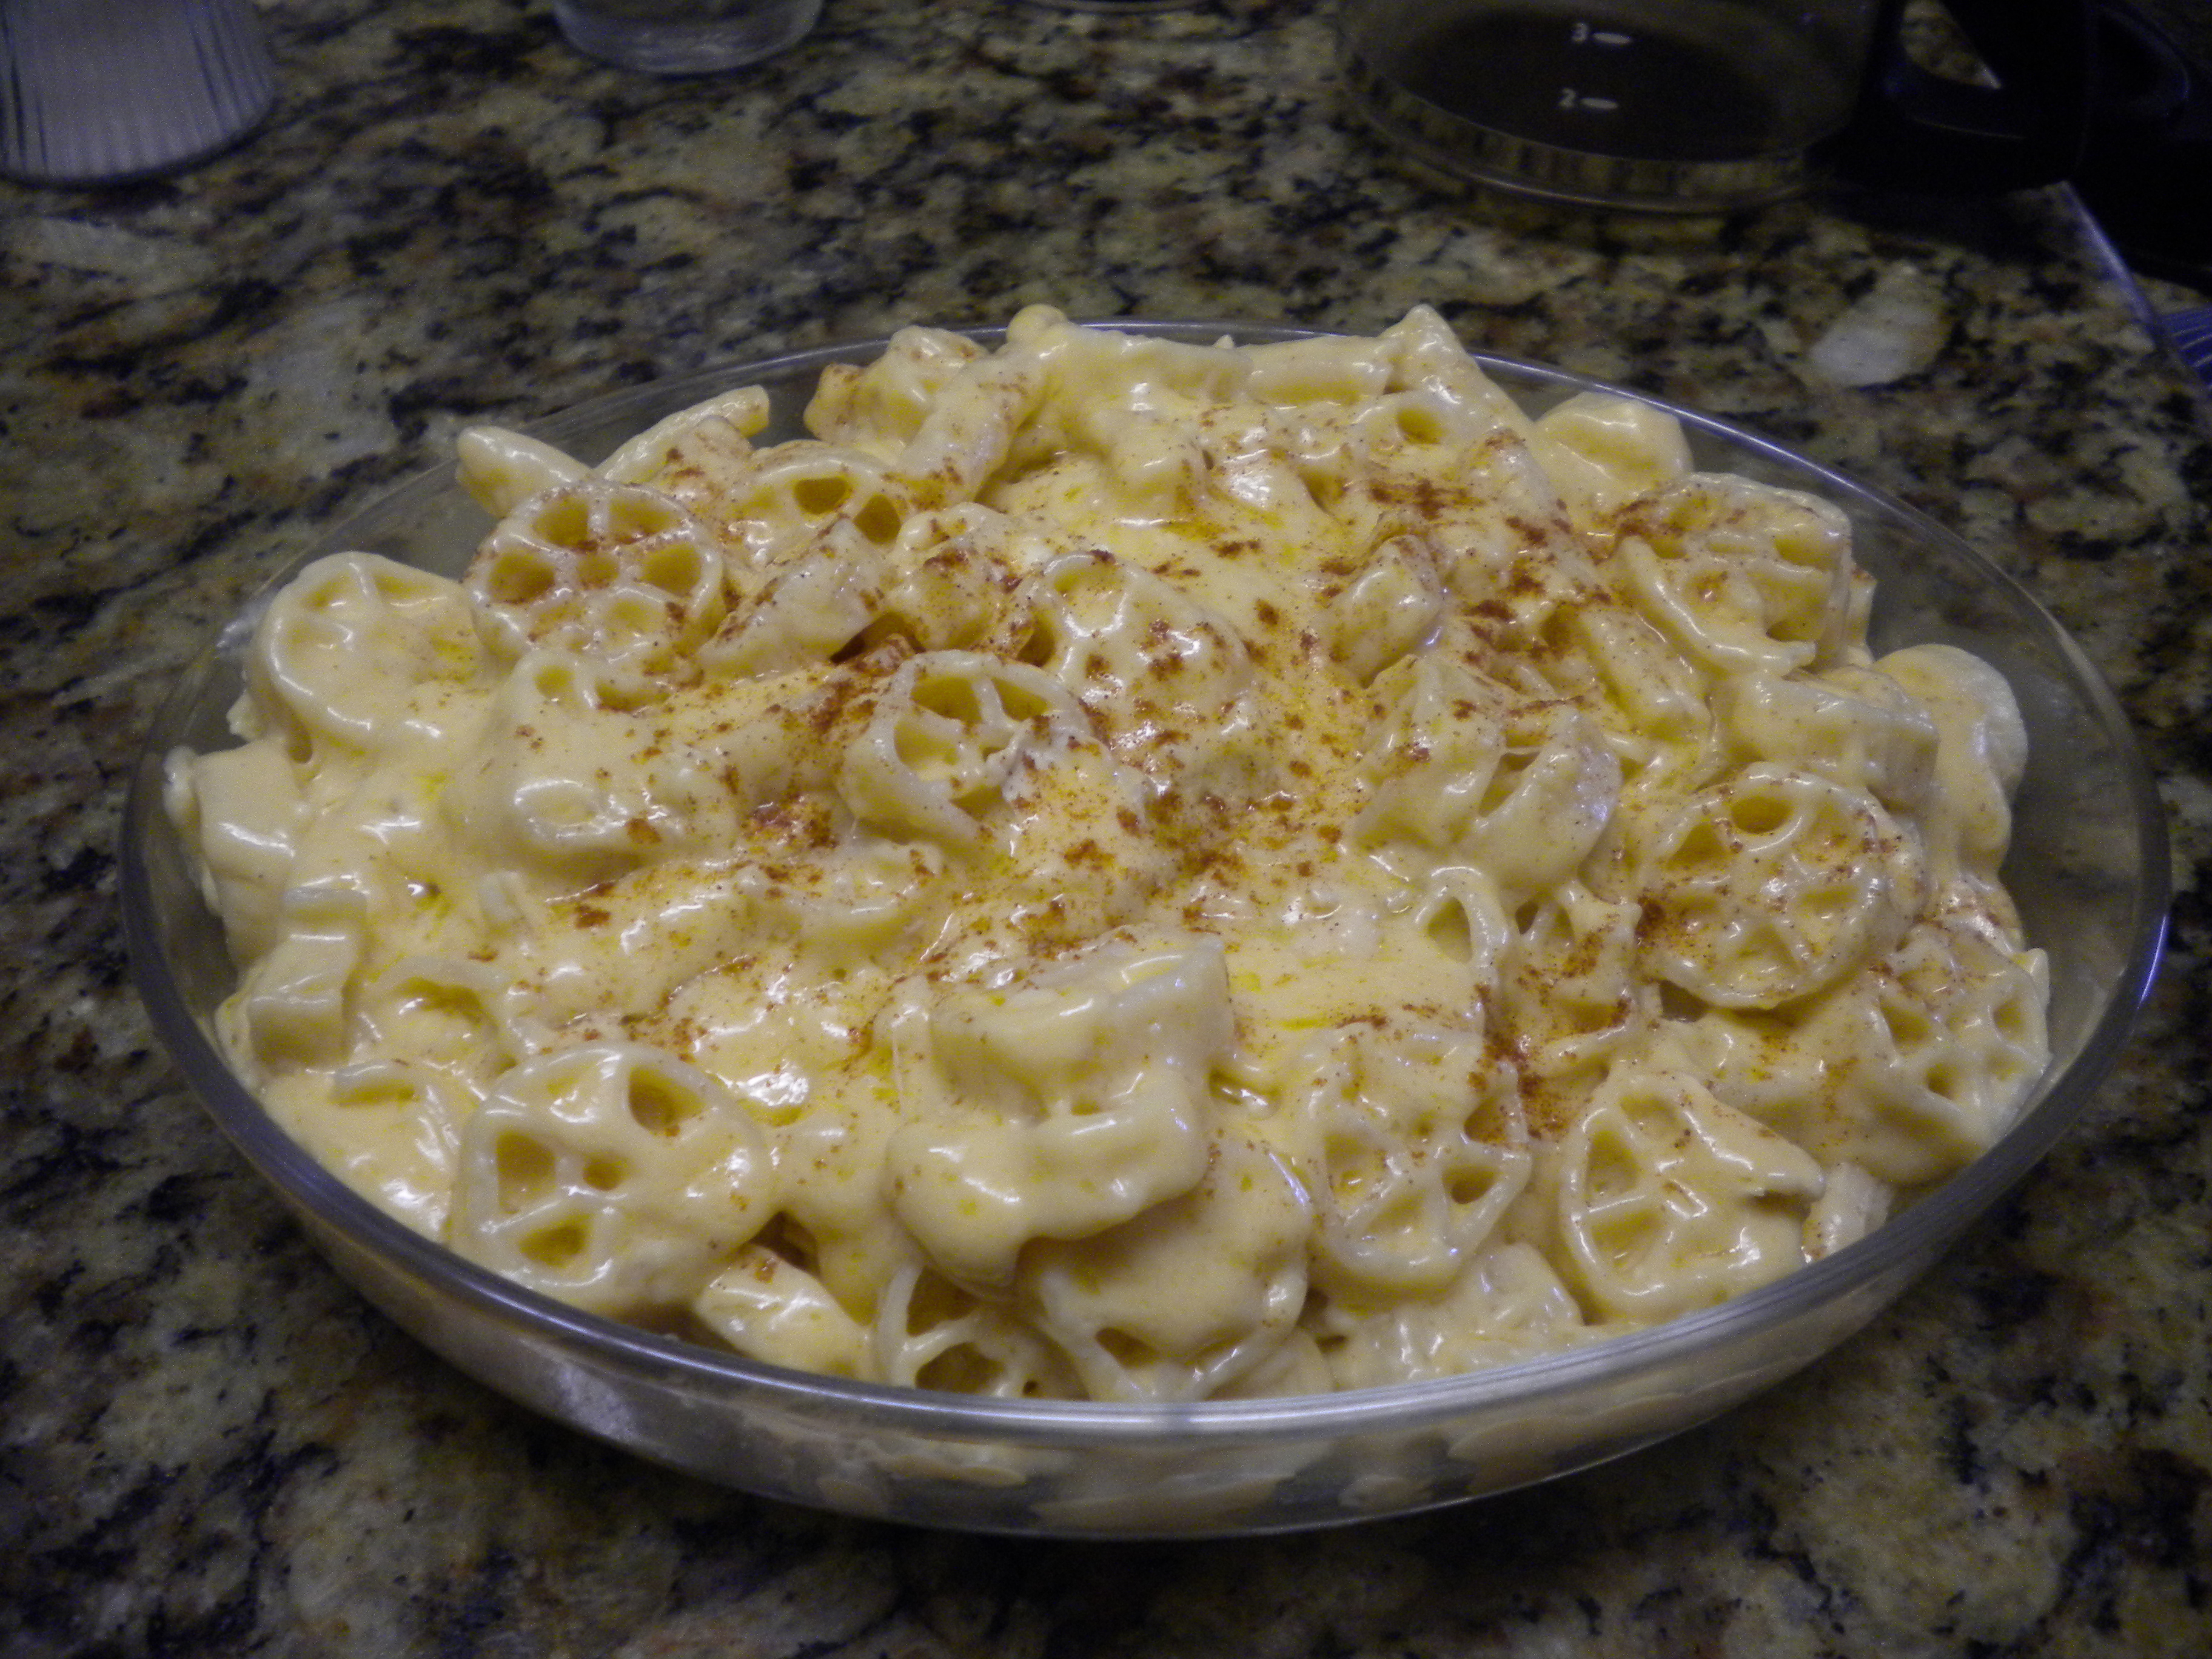
July 14th is Bastille Day in France but in the United States it is Macaroni Day.  What better way to consume your macaroni than in the All American Favorite – Macaroni and Cheese.  There are many ways in which you can make this yummy dish and there is a whole range of pasta shapes that one can use.  One of the favorites of my family is Wagon Wheels, the shape that is reminiscent of the American Pioneer’s trek westward.

Macaroni and Cheese is traditionally made with Cheddar Cheese, but the addition of other cheese gives more depth of flavor and creaminess.  To make Mac & Cheese you will need:

½ lb. Pasta

½ lb. Cheddar Cheese

¼ lb. Gouda or Cream Cheese (for creaminess)

Diced Onion

4 Tbsps. unsalted Butter

4 Tbsps. All-Purpose Flour

2 cups Milk, Cream or Half & Half

1 tsp. Dijon Mustard

Dash Worcestershire Sauce

Salt & Pepper  (to taste)

Chives

Paprika


Bring at least 4 quarts of salted water to a rapid boil.  The salt adds flavor to the pasta and also increases the temperature point of the water, thus making the pasta cook faster.  Once the water comes to a rolling boil, add the Pasta, stir and continue boiling (uncovered) for anywhere from 8 – 12 minutes.  (This will depend on the pasta used)  It can be just a tad undercooked if the Mac & Cheese is to go into the oven.  All pasta should be cooked to ‘al dente’ which gives it just a little bite.

While the Pasta is cooking, begin making your Cheese Sauce.  Shred your Cheese if you purchased block cheese and set it aside.

Shredded Cheddar


In the photo above, the Cheese is sitll in the Food Processor but with the blade removed.


Dice your Onion (about ¼ cup will do); using the Onion is optional but it does give nice flavor to the cheese.

Use a large Saucepan and melt the Butter over low heat; add the Onion and cook until soft.  Next stir in the Flour and continue stirring until a paste is formed.  Slowly add the Milk, stirring continuously.  If the mixture seems to be a little lumpy, use your whisk to smooth it out.  Cook and stir until the mixture thickens (it should be able to coat the back of a metal spoon).  Once the White Sauce is of the desired consistency, add the Shredded Cheese and the Cream Cheese.  If Gouda is used instead of Cream Cheese, this should be shredded along with the Cheddar Cheese.


Adding the Cheese to the White Sauce


Shut the heat off and continue stirring until all the Cheese is melted.  Add the Mustard, Worcestershire and Salt and White Pepper to taste.  (Approximately 1 tsp. Salt and ½ tsp. White Pepper)

Pour the cooked Pasta into a colander and shake out all the water.

Cooked & Draied Pasta


If you don’t add the Cheese Sauce immediately, rinse the Pasta with warm water to keep it from sticking together.  Return the Pasta to its cooking pot and slowly add the Cheese Sauce.  Gently mix, over and under, to coat all the macaroni.


Adding the Cheese Sauce to the Pasta


Transfer the Cheese coated Pasta to a baking dish.  About ½ hour before serving time, place the dish in the oven and heat until the Mac & Cheese is thoroughly heated through.  (This will take about 20 minutes)  Mac & Cheese can be made early in the day or the night before, but be sure to refrigerate it until ready to use.  If you do refrigerate it, allow the dish to warm up before baking or place it uncovered, in a cold oven and then turn the oven on.  This will allow the dish to warm up slowly without being stressed to the point of breaking.

This is just one way to enjoy Macaroni.  You can use any shape pasta you desired and any combination of cheeses.  So enjoy Macaroni Day with your own creation of Mac & Cheese or a Macaroni Salad.


Digg This
Reddit This
Stumble Now!
Buzz This
Vote on DZone
Share on Facebook
Bookmark this on Delicious
Kick It on DotNetKicks.com
Shout it
Share on LinkedIn
Bookmark this on Technorati
Post on Twitter
Google Buzz (aka. Google Reader)

Be the first to comment - What do you think?
Posted by sylveee - 2012/06/23 at 11:49 PM

Categories: Dinner Ideas, Lunch Ideas, National Food Days   Tags: , , , , , , , ,

‘NATIONAL CHERRY TART DAY’

NATIONAL FOOD DAYS

‘National Cherry Tart Day’

June 18th, 2012


June is the perfect month for ‘National Cherry Tart Day’. Cherries are ripe and ready for picking, at least in California! Cherries are delicious to eat out of hand and are also delicious in whatever dish you decide to incorporate them into.  The three main varieties of Cherries available in Southern California are Bing (the sweetest), Mt. Rainer (also sweet) and Queen Anne (in recent years not so easy to find) which are a tart cherry that is perfect for making pies or jams and jellies.

To make a Cherry Tart you will need several components, namely a base for your tart, a custard filling and your cherries.  Let’s start with the base.  You can use a standard pie crust or a sweet tart crust which is perfect for tarts, large and small. The tart crust will consist of flour, sugar, salt butter, eggs and water and vanilla.

The next component would be the custard filling which consists of eggs, milk, sugar, butter and again vanilla or better yet, almond extract which will enhance the flavor of the cherries.  Almonds, Cherries, Peaches and Nectarines all have similar enzymes which contribute to the flavor of the fruit.  Adding Almond Extract to Cherry, Peach or Nectarine pastries will enhance the flavor of those fruits.

Lastly, you will need the Cherries.  For my Cherry Tart, I used sweet Bing Cherries.  First place the Cherries in a colander and rinse the under cold water.  Shake out as much of the water as possible and then put them in a bowl that has been lined with paper towels or a clean dish towel.  Set the Cherries aside while you prepare the other components.

The first component that you want to prepare would be the Tart Crust as it is easier to roll when it is chilled.  For the complete recipe please see the recipe section of this blog. sweet-tart-and-pie-pastry/ Once your tart crust has been prepared, flatten it to disc about 1” thick, wrap in plastic wrap and refrigerate while you prepare the Custard for the filling.

For the Custard filling, please see the recipe section of this blog. pastry-cream/ When you have finished cooking the Custard, place it in a bowl; let stand until it stops steaming and then cover with plastic wrap, being sure to place the plastic wrap directly on top of the Custard.  This will insure that a skin does not form on top of the Custard.  Refrigerate the Custard until you are ready to prepare the tarts.

The next step would be to roll out and bake the Tart Shell.  If you are making a large tart (8 or 9”) you can roll out the dough in one piece.  Be sure and lightly dust your rolling surface with flour.  Flatten the Dough into a round disc and roll out to approximately ¼”, using a stockinette covered rolling pin.  You can rub flour into the stockinette which will prevent the rolling pin from sticking to the dough, without adding additional flour to your dough which would toughen it.

If you are going to make individual tarts, divide the dough into several sections, depending on the size of your tart pans.  In the photo below, the pan I am using has 12 tiny tart indentations.  The dough should have been divided into 12 pieces.  In the case of the tiny tarts, you can just flatten the dough and then minimally roll it out to fit the pan.  Once you have fitted the dough into the pan, take your rolling pin and run it around the rim of the pan to cut off the excess dough.  Many tart pans come with removable bottoms which makes it easier to remove the tart from the pan, especially in the case of the larger tart.  With the smaller tart, you can easily lift the baked crust right out of the pan.


Divide the Dough into Individual Portions for Mini-Tarts

Flatten the Dough


Dough fitted Into Pan Trimming the Dough


Trimmed Tart Shells


To bake the crusts, first poke holes in the bottom with the tines of a fork and then place a piece of foil into the bottom and up the sides of the pan.  Place some pie weights on top of the foil.  Pie weights can be aluminum weights that you buy in your local culinary shop or dried beans that you keep just for this purpose.  Once the beans are used for weights they can no longer be cooked.


Foil Added to the Tart Shells


Weights Added to Tart Shell


Bake the Crust at 325 F.  with the weights for about 15 minutes.  Then remove the weights (you can easily lift out the foil as it doesn’t get too hot – and then just dump the weight back into their container.

Brush the Crusts with an Egg Yolk beaten with a little cream of milk and then return to the oven until they are a light golden brown – about 10 more minutes.


Remove the baked crusts from the oven and once they are cool enough to handle place them on a serving plate.  This would be for the individual ones.  If you are making a large tart, remove the sides of the pan but leave the crust on the bottom or if you can easily remove it without breaking it, place it on a serving plate.

While the crusts are baking, you can finish preparing the Cherries.  You can use the Cherries uncooked, but cooking them slightly, brings out the flavor and add a natural syrup to them which coats them and preserves them.  The first thing you have to do though is to remove the pits.  There are several ways to do this.  The easiest is to use a Cherry Pitter that will remove the pits from multiple Cherries for you.  If you don’t have this type of Cherry Pitter, then you can use one that remove the pits, one Cherry at a time.  Barring that, you can do what we used to do when I was small and that was to use a large tapestry needle to remove the pits individually from each Cherry.  That was always my job after we had gone Cherry Picking and my Mother made Jams, Jellies and Pies.  Today, though if you have the proper tools, it is much easier to do.


Multiple Cherry Pitter


Single Cherry Pitter


Heat a sauté pan and add about half cup of wine (I used Marsala but you can also use Madeira, Burgundy or even Kirsch, which is a Cherry Liquer. Bring the liquid to a simmer and then add the Cherries.  Cook until the Cherries release their liquid and continue cooking until the liquid becomes syrupy.  This will take from 5 – 10 minutes but no longer.  Transfer the Cherries to a shallow bowl and allow to cool.

Cooking the Cherries


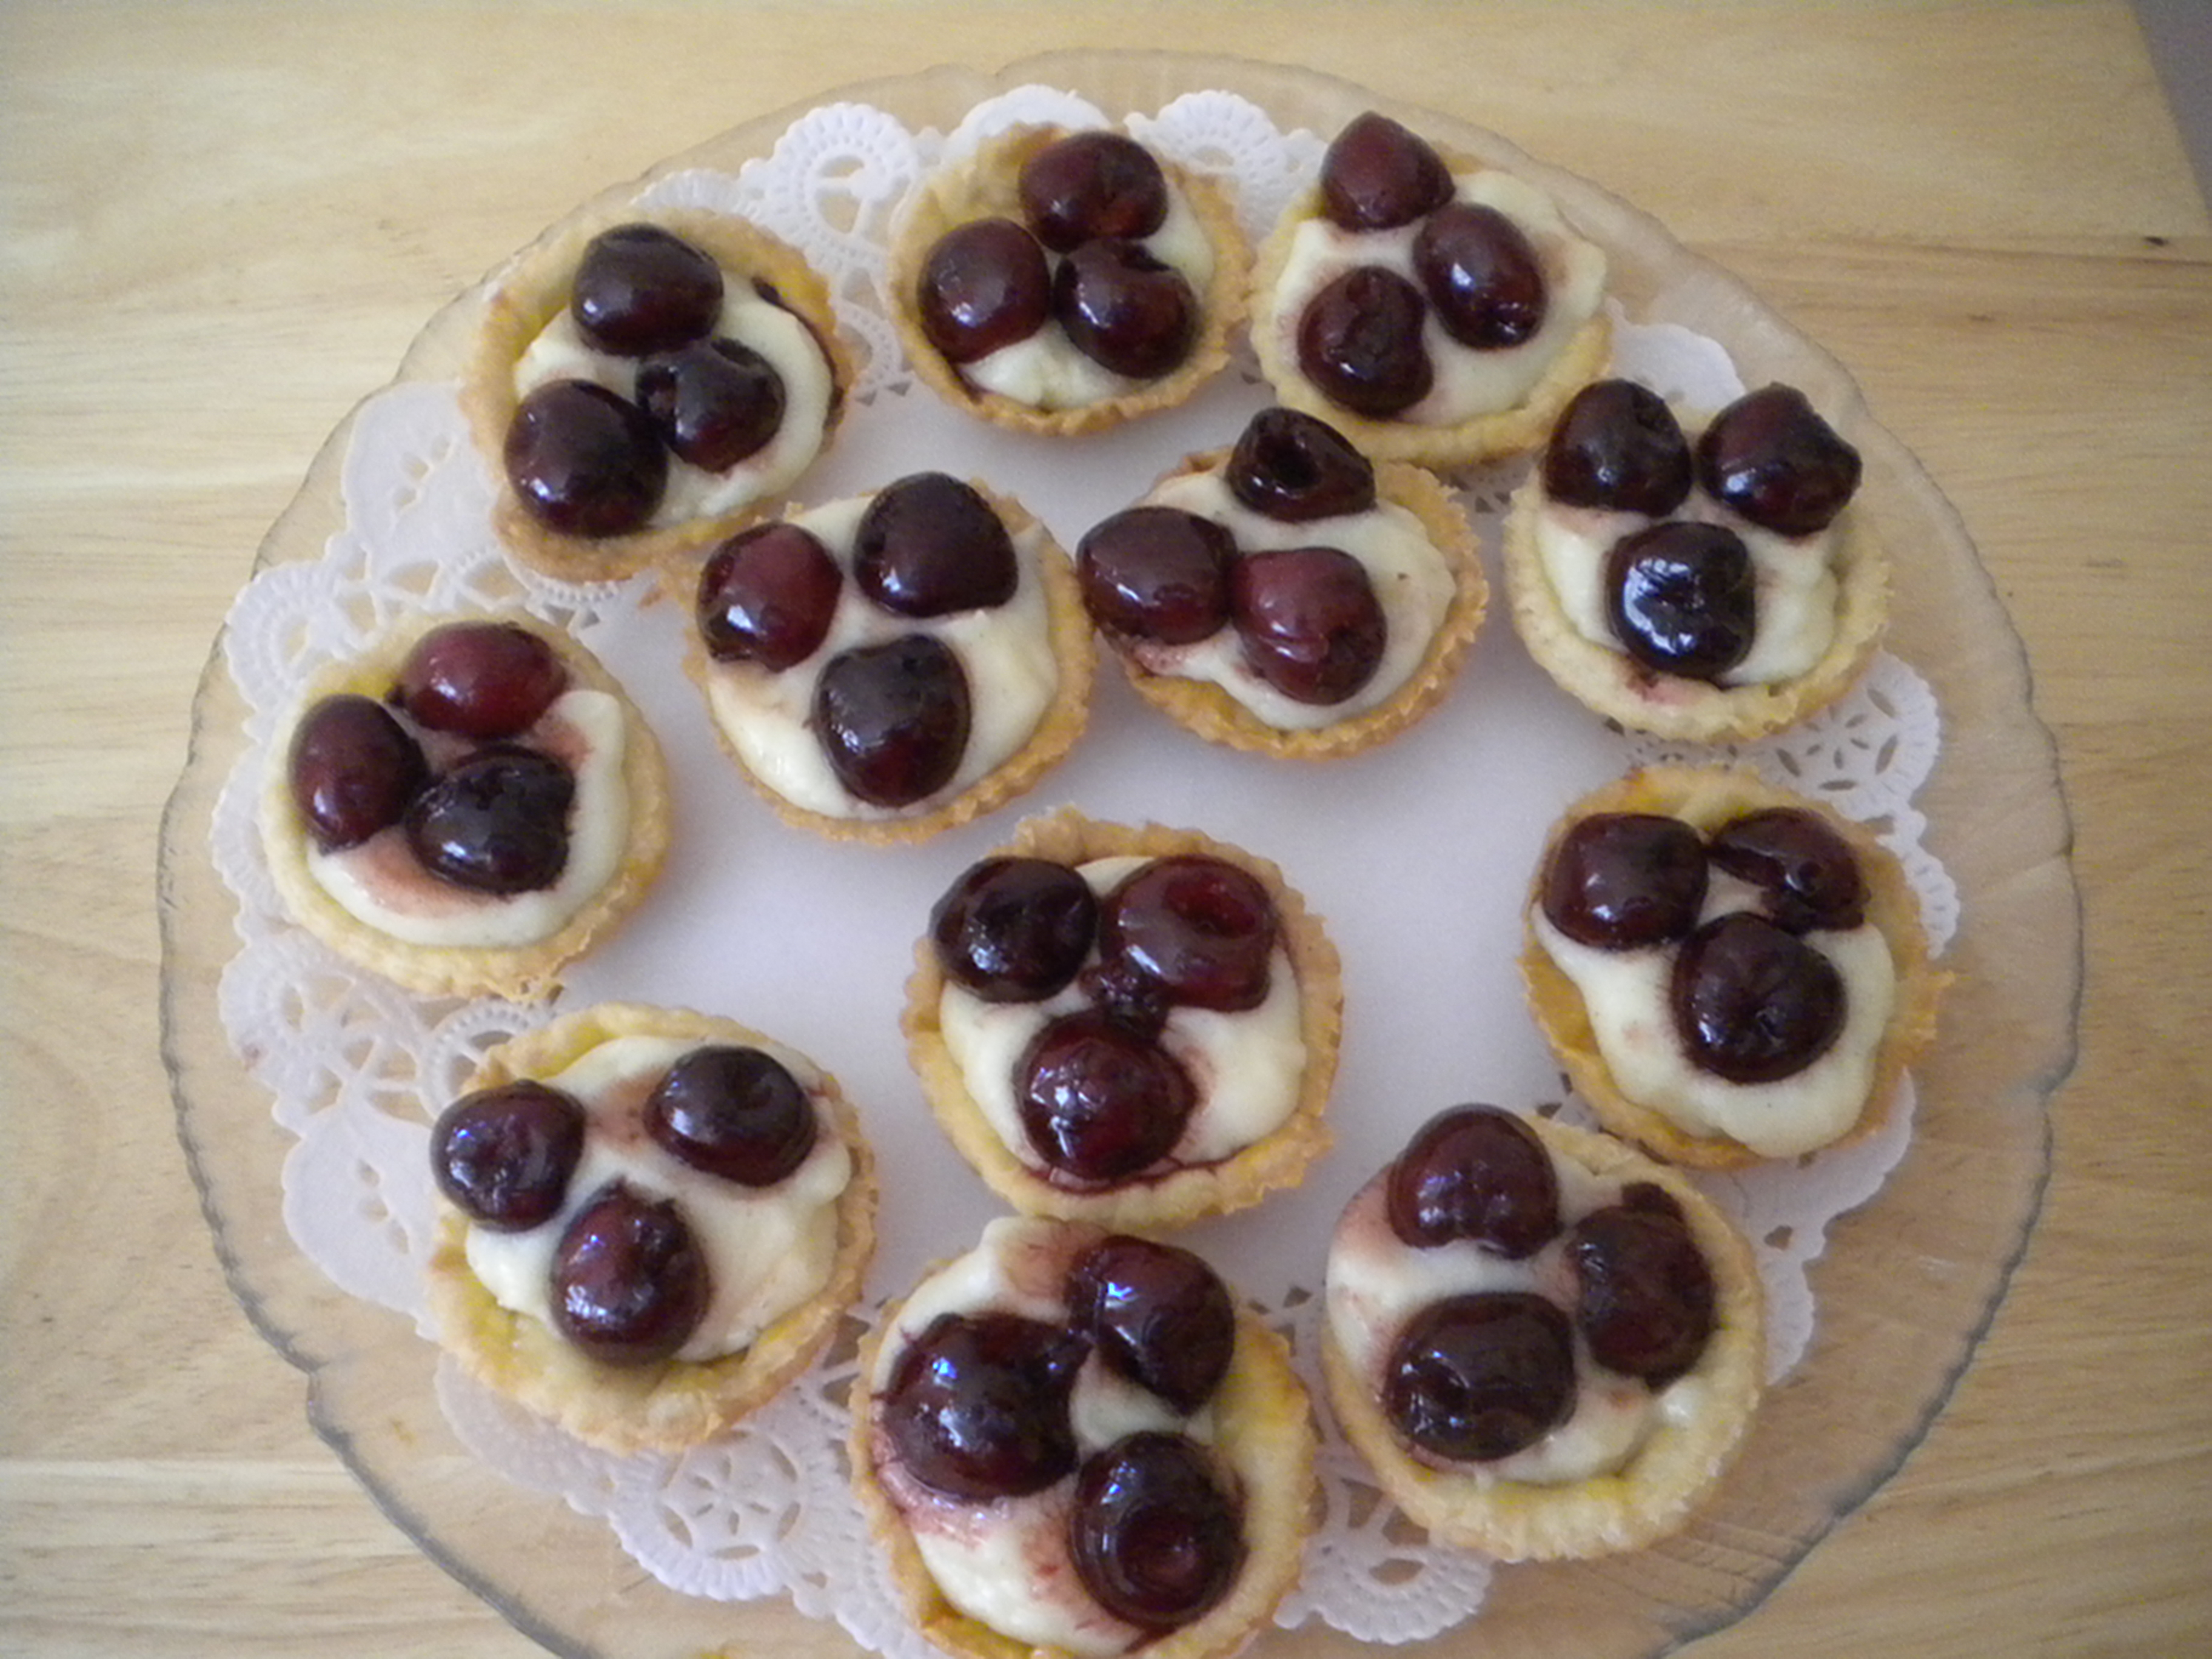
Place the Custard in the bottom of the Tart(s) and then add the Cherries to the top.  Refrigerate until ready to serve.  In the case of small tarts, one per person (depending on the size) should be sufficient for each person.  The Tiny Tarts pictured would be perfect for a Dessert Buffet which would allow each person to sample several desserts without becoming too overloaded with sugar.

Use a #60 Scoop to portion the Custard


Custard Filled Tarts


Finished Tart


Try this version of Cherry Tarts or try creating your own.  Whichever you do, you should enjoy making them and your family and/or friends will enjoy eating them!


Digg This
Reddit This
Stumble Now!
Buzz This
Vote on DZone
Share on Facebook
Bookmark this on Delicious
Kick It on DotNetKicks.com
Shout it
Share on LinkedIn
Bookmark this on Technorati
Post on Twitter
Google Buzz (aka. Google Reader)

Be the first to comment - What do you think?
Posted by sylveee - 2012/06/19 at 9:14 PM

Categories: Baking, Dessert Ideas, Fruit, Main, Pastry, Salads   Tags: , , , , ,

NATIONAL LOBSTER DAY

 June 15th, 2012 is ‘National Lobster Day’.  Lobster without doubt is one of the most expensive items that you will find on a restaurant’s menu or even at the fish market or supermarket.  But this wasn’t always the case.  In the early days of our couontry’s history, lobster was thought to be garbage or throwout food.  The reason for this is that lobster, like most all shell fish or crustaceans are bottom feeders and bottom feeders are thought be the dregs of society or the aquatic world.

When fishermen found lobster caught in their nets, they often left them on the beach for the poor or indigenous to eat.  Lobster was food that was left to the lower members of society and indentured servants.  Servants often specified in the employment agreements that they would not eat lobster more than twice a week.  How many of us would love to eat lobster even twice a month, let alone twice a week!  Alas, this attitude towards lobster did not last long and in the mid part of the 19th century lobster became a popular item on the menues of New York and Boston restaurants.  With the development of lobster fishing boats, the crustacean became even more popular.

Without a doubt, Maine Lobster is probably one of the favorite and most available here in the United States.  However, with the advent of air travel and shipping, lobster from all over the world is available.  One can purchase giant lobster tails from Australia, mid-size ones from the Carribean and even smaller ones from ???

One of my favorite lobsters are those found in Rosarita, Baja California.  The Mexican variety are smaller than the Maine Lobster, but they are sweet and usually at least two or more are served at a sitting.

One of my favorite ways to prepare lobster is to purchase one tail and cut it up in large bite-sized pieces and serve it in an Alfredo Sauce with Linguini.  This way, one lobster tail will easily serve two people.  However, we do sometimes just want to savor the lobster meat itself and in this case at least one lobster tail per person is called for.  (This is the Carribean variety – one large Australian lobster tail would do for two people, provided they do not have HUGE appetites.

To observe National Lobster Day, here is one of my versions of a Lobster Tail Dinner.  For two people, you will need two mid-size lobster tail, two large baked potatoes, fresh chives, fresh herbs such as basil, oregano, chives, etc., unsalted butter and a nice green salad made with artisan greens and dressed with a blue cheese dressing.

Scrub the Potatoes and pierce with a fork;  this will prevent them from exploding in the hot oven – just as a precaution, I always make an extra potato and if none explode you can use the extra for home fries for another meal.  If you like your potatoes to have a crsipy skin, coat the skin with vegetable or olive oil before placing in the oven.  If you do use oil on the skin, be sure and place a piece of foil under the potatoes so the oil does not drip down onto your oven floor and cause smoking.  If you are going to have Chives with your Baked Potatoes, prep them now.  We have Chives growing in our garden, so I picked them just before using them to preserve the flavor.  Wash and dry and then snip.  The easiest way to snip them is with a pair of kitchen shears.  Before doing so, hold the chives in one hand and cut them in a straight across.  This will make it easier to snip the chives evenly.

Minced Chives

The next thing to do is to clarify your butter.  Take a quarter pound of butter (1 stick) and melt it in a microwave proof bowl or measuring cup.  Let it settle so that the milk solids fall to the bottom.  (The better the grade of butter, the less milk solids there will be in it)  Once the solids fall to the bottom pour off the fat portion  through a cheese cloth lined strainer into another bowl.

Melted Butter

If you are going to make an herb butter wash and dry your herbs and then mince them either by hand or in a mini-food processor.

Herbs minced in a Mini-Food Processor


Once the Butter has settled and is clear, you can add the Herbs to the Butter;  set it aside until ready to serve.  When ready to serve, you can just re-heat it until melted.  (About 30 seconds or less in a microwave oven)


Herb Butter in individual dipping bowls

Next, prepare your salad and refrigerate until serving time.  Make the Salad Dressing – in this case ours was Bleu Cheese.  Bleu Cheese can be purchased in small portions in the Cheese Section in your supermarket or you can go to a speciality store.  For the complete recipe please see  bleu-cheese-dressing/

Danish Bleu Cheese

Bleu Cheese Dressing


Since I was serving Mushrooms with the Lobster, the next thing I did was prepare the mushrooms.  Wipe the mushrooms with a damp paper towel.  (Since mushrooms act like sponges and soak up water, it is best to avoid washing them if possible – I don’t often follow this advice as some mushrooms also pick up a lot of the growing compound and just have to be washed)  If you do wash your mushrooms, be sure to blot them dry really well with a paper towel.  I quartered the Mushrooms and then sauteed them in Olive Oil with 2 cloves of minced Garlic.  When they were done, I shut off the heat and set them aside.  Just before serving, I reheated them for a short time.


Caramelized Mushrooms


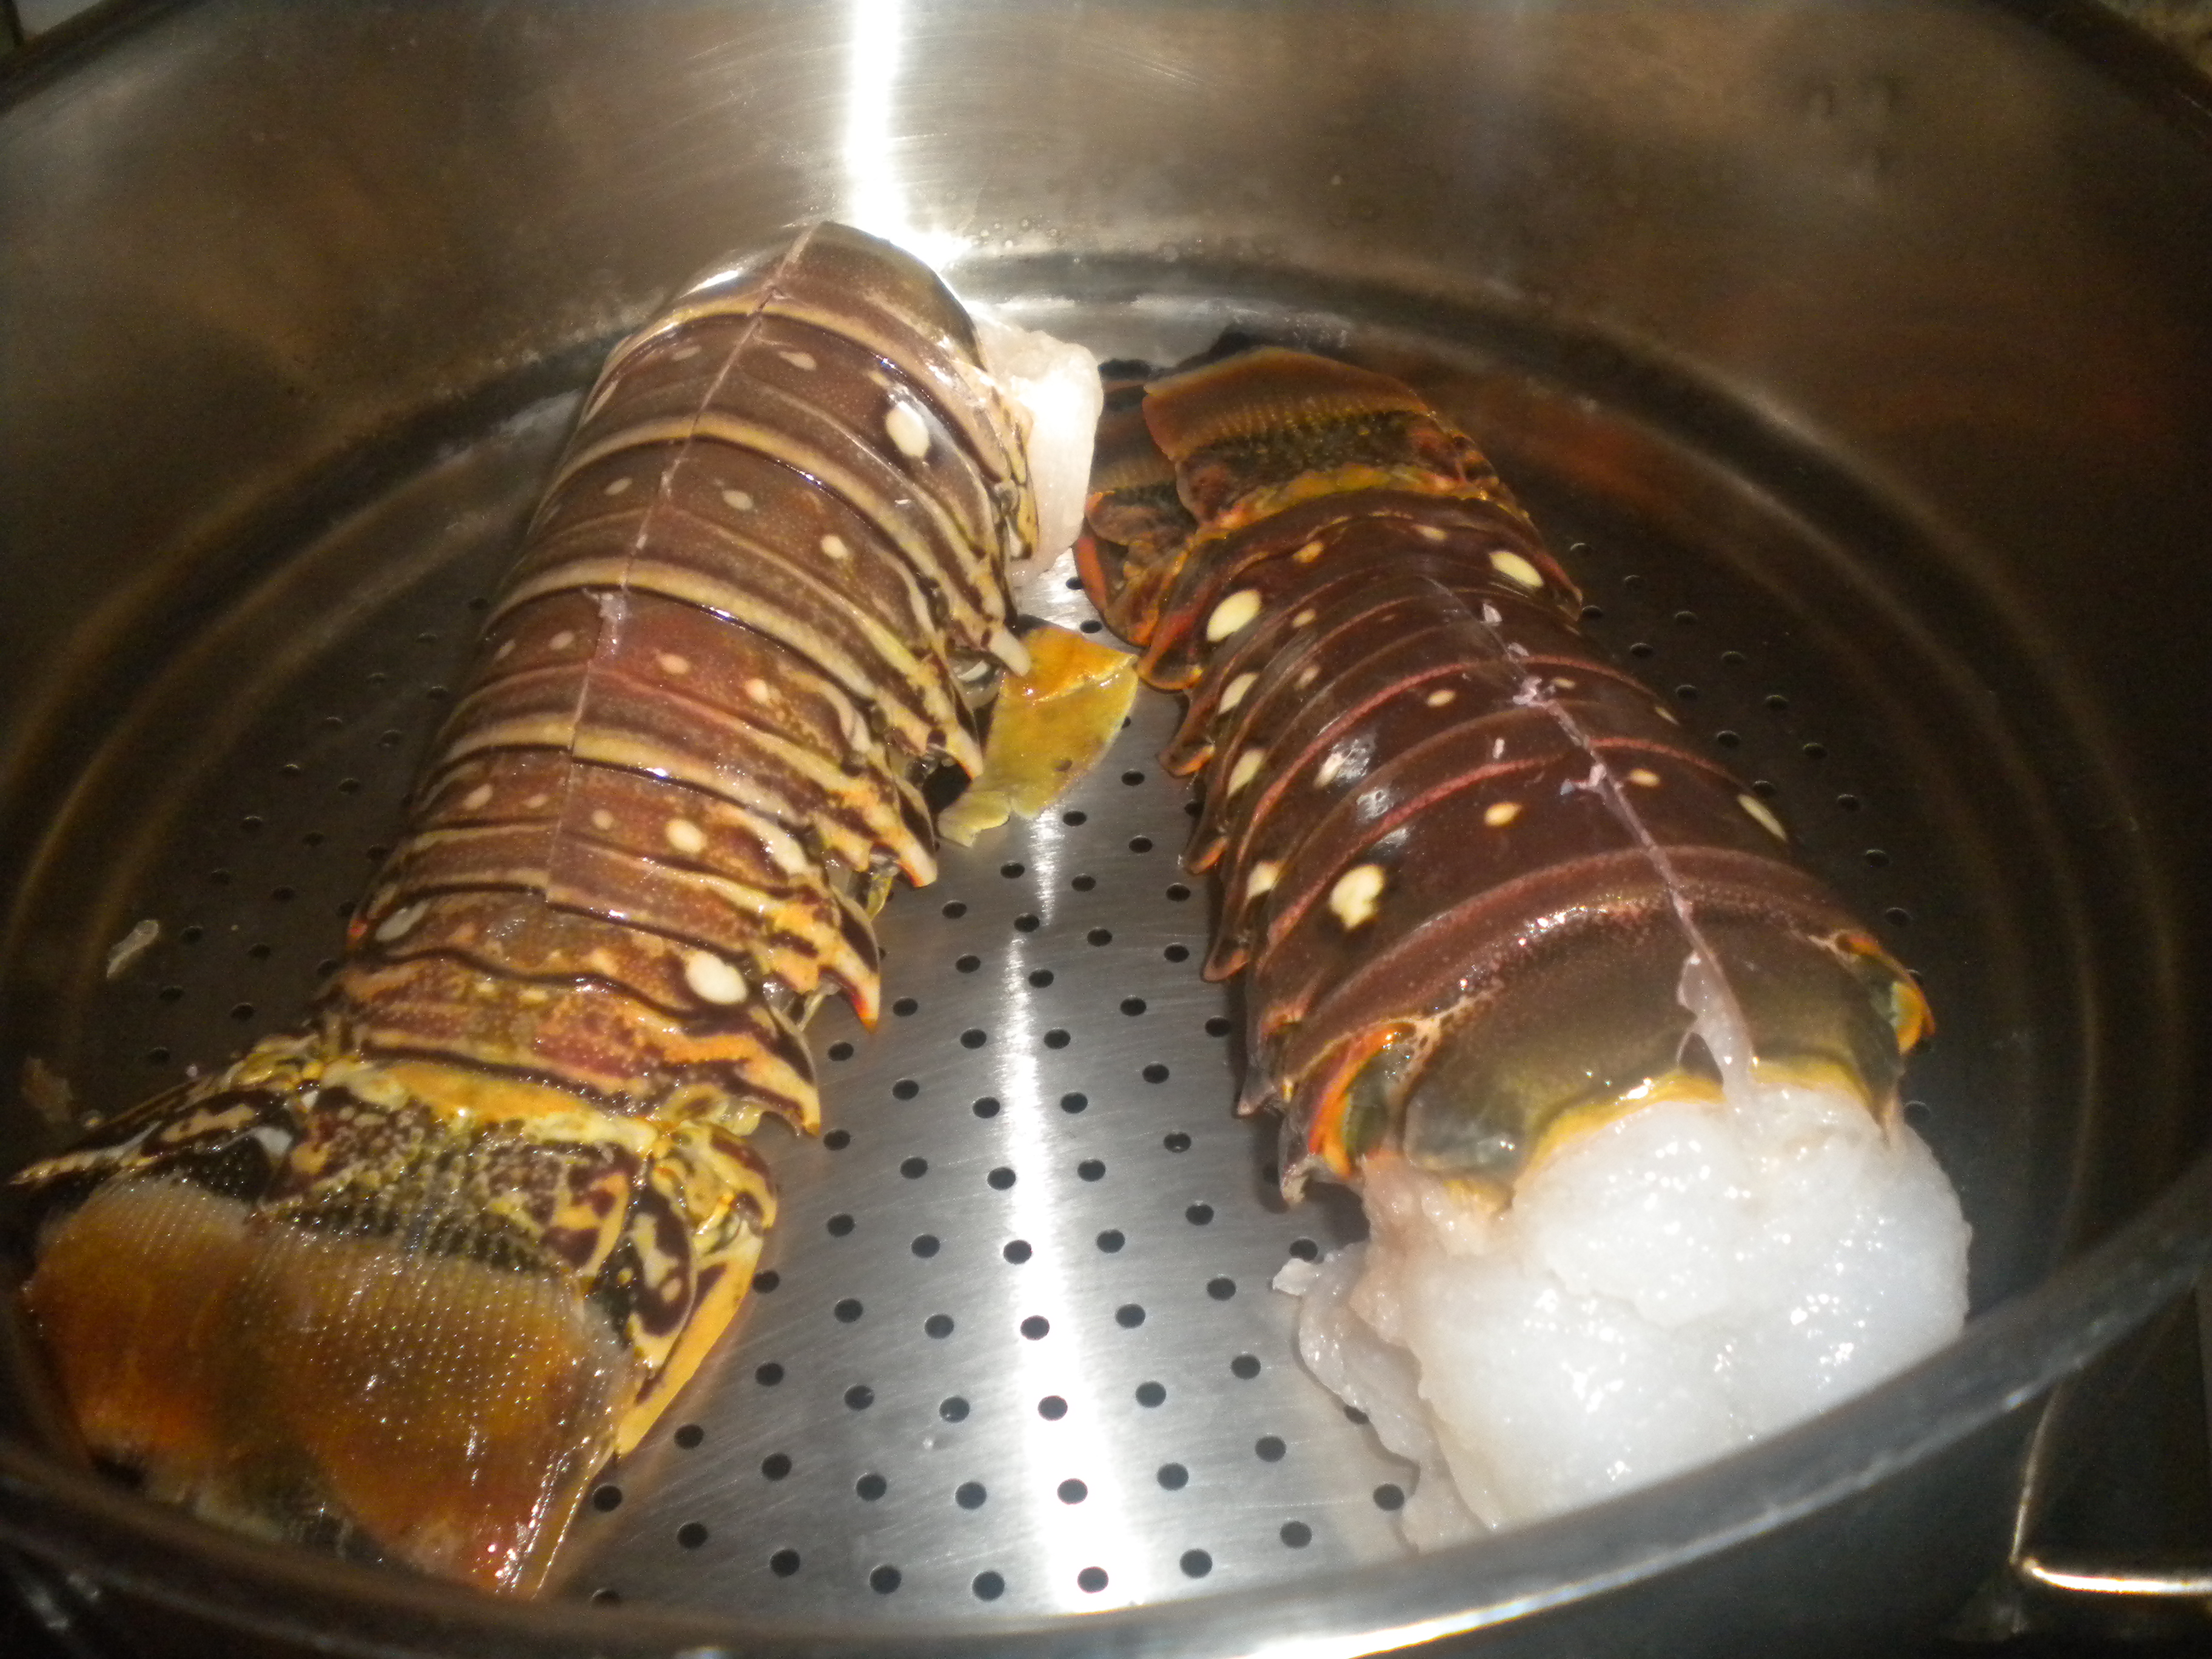
The next item on the agenda was to prepare the Lobster.  We had two tail which I decided to steam first before broiling.  When you broil them you are never sure when they are done – you don’t want your lobster to be over-cooked and when broiling for the whole time, sometimes the tops get charred.

I split the tail down the back of the shells.  This can be done with a cleaver, a sharp knife or a pair of kitchen shears.  Then I placed them in my steamer – steaming takes only 5-10 minutes depending on the size of the tail.  Just before serving I placed them under the broiler and broiled them for about five minutes.


Raw Carribbean Lobster Tails

Split down the Back


In the Steamer


Broiled Lobster Tails


While the lobster were broiling, we started on our Salad and I microwaved the butter, just to warm it up.  This took about 15 seconds.

The main course was the Lobster, Baked Potato with Butter, Sour Cream and Chives and the Caramelized Mushrooms.  These are all some of my favorite foods.  Even though the Carribbean Lobster Tail, was ample in size, I still could have eaten more.  I just love lobster!  In any form!


Digg This
Reddit This
Stumble Now!
Buzz This
Vote on DZone
Share on Facebook
Bookmark this on Delicious
Kick It on DotNetKicks.com
Shout it
Share on LinkedIn
Bookmark this on Technorati
Post on Twitter
Google Buzz (aka. Google Reader)

Be the first to comment - What do you think?
Posted by sylveee - 2012/06/15 at 11:23 AM

Categories: Condiments, Dinner Ideas, Main, National Food Days   Tags: , , , , , , , , ,

CURRIED CHICKEN SALAD

MY CULINARY DIARY

CURRIED CHICKEN SALAD

Friday, June 8th, 2012


It is Friday and we have gone through many culinary avenues this week and do not wish to repeat anything, so it is time for Chicken.  We both love fried Chicken, but since the weather is warm and I really did not want to start frying anything, we decided on Chicken Salad.  Since all we needed for the salad was enough chicken to feed the two of us, I decided on purchasing a chicken breast rather than the whole chicken.

Since it was only a breast that we needed, I decided to splurge and purchase a free range organic chicken breast.  The difference in flavor and moistness, between this type of chicken and the normal supermarket ones is astronomical.  The organic, free range chicken reminds me of the chickens that we used to get delivered years ago when we lived in Granada Hills.  A poultry company called Bob’s Poultry use to deliver Chicken and Eggs directly to our home and there was nothing like those chickens.  They were so good!  In those days, I had to cook at least 2 Chickens at one time!  Later on it was three!

Along with the Chicken Breast I purchased some white corn and an Orange Honey Dew Melon and some Croissants to go with the meal.

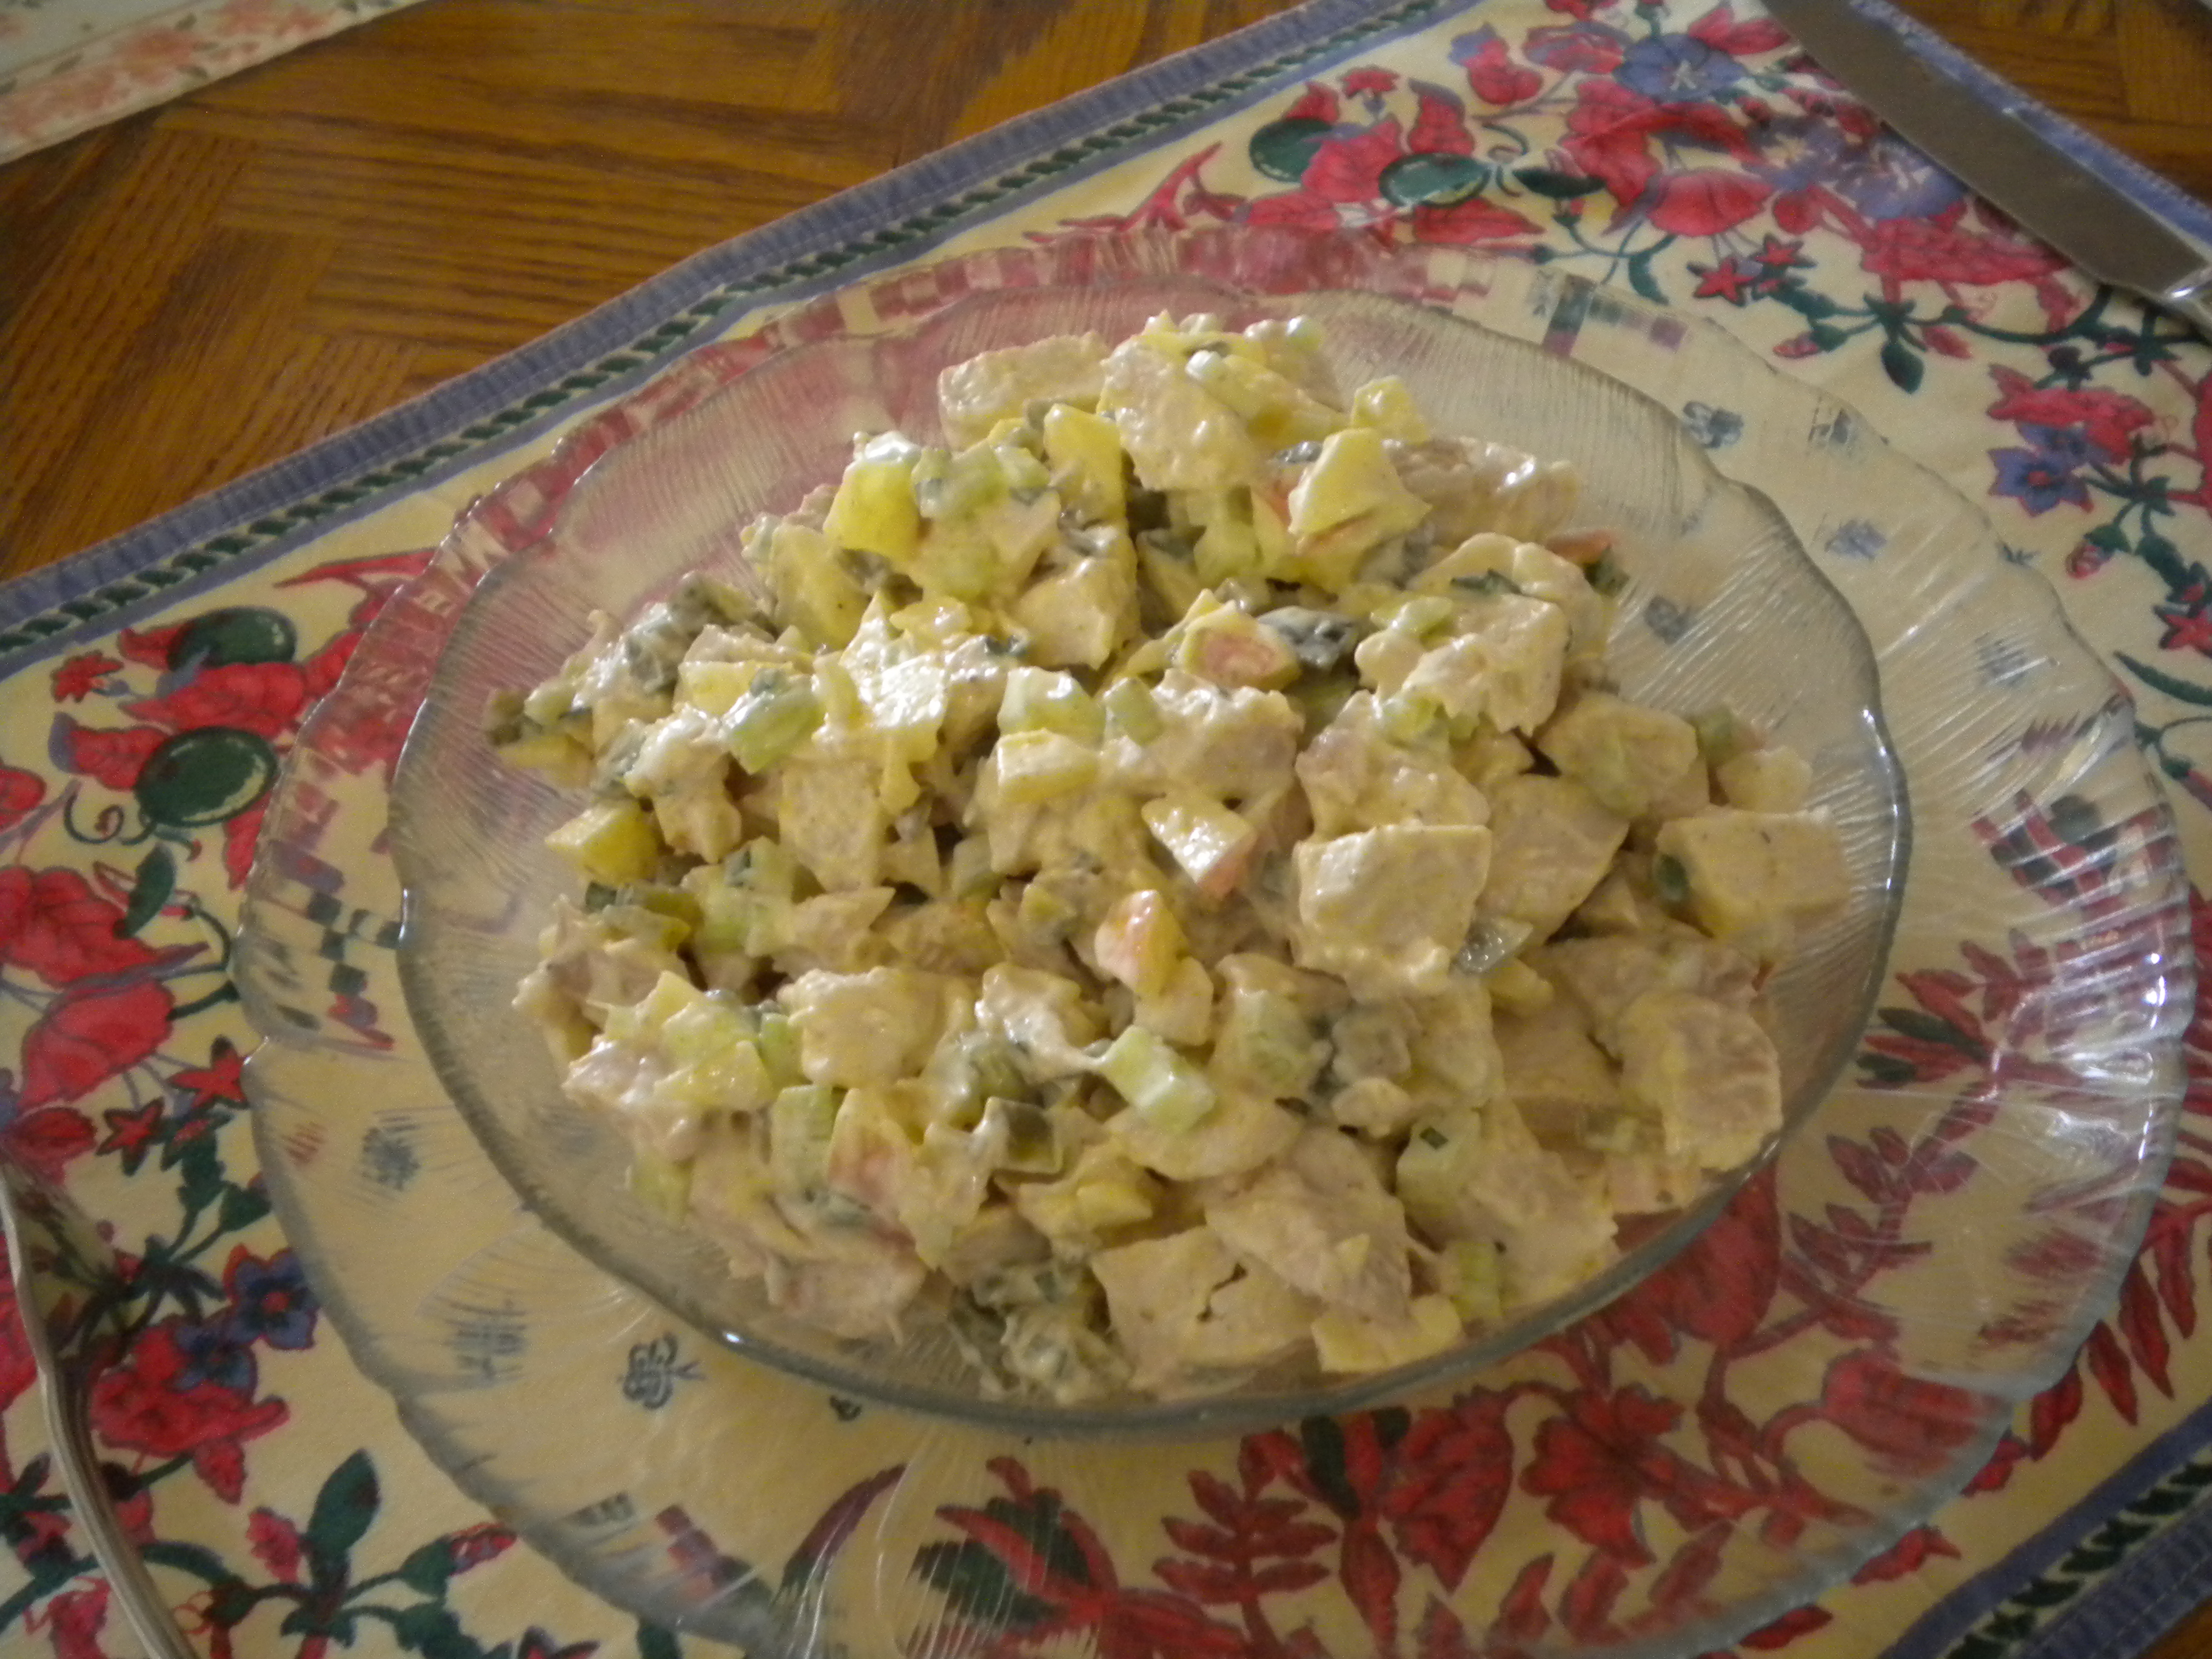
To make the Chicken Salad I poached the Chicken Breast in some Madera Wine with fresh Pineapple Sage Leaves, fresh Greek Basil and freshly cut Chives.  All the herbs were direct from our garden.  I placed the Chicken Breast in the poaching liquid, brought it up to a simmer and cooked them for about 10 minutes and then shut the heat off.  You can cut the breasts in half to make sure they are done or you can use a poultry thermometer.  One hundred seventy degrees is more than done!

Once the Chicken Breasts cooled off, I sliced them against the grain and then cut the slices into bite-sized pieces.  (The pieces were a healthy size, as I didn’t want pate.)  I washed and dried some celery ribs and cut them into bite-sized pieces.  I cut the celery considerably smaller than the Chicken pieces as celery has a tendency to get stuck in between teeth.


Along with the Celery were some more snipped Chives, Gherkin Pickles which I diced and a Pink Lady Apple, which I quartered, cored and cut up into bite-sized pieces.  I leave on the skin, because the color adds a nice contrast to the white Chicken Breast.


Diced Pickles


Even off the bunch of Chives before starting to snip them


To season the Chicken Salad, I added ½ tsp. Salt, ¼ tsp. White Pepper, 1 tsp. Curry Powder and approximately ½ cup of Mayonnaise.


The Ingredients before mixing with Mayo and Chives

The Finished Chicken Salad


 For the complete recipe please see curried-chicken-salad/


Ev husked the Corn and I washed it and made sure all the silks were off.  To cook the Corn, I placed it in my steamer with water in the lower portion and steamed the Corn for 1 minute.  Young fresh Corn does not need to be cooked for more than 1 minute – all you want to do is to get it hot – young fresh corn even tastes good raw.  In fact, I always taste it before cooking it to make sure it is sweet.  If it is not sweet you can add 1 Tbsp. Sugar and the Juice of half a Lemon to the Water and then just cook it directly in the water which should not be more than 1 inch deep.  Again, do not cook it more than 1-2 minutes unless it is old and tough and in which case you should not even be eating it off the cob.


Corn in Steamer

For our Beverage we had Ginger/Peach Sun Tea brewed in the sun with orange slices and fresh ginger.


Ginger Peach Ice Tea


Dinner tonight was the Chicken Salad, steamed Corn and warmed Croissants.  We decided to keep the Honey Dew for Sunday night when we would again eat the Chicken Salad, since I can never make just enough food for only 2 people.

This was just one variation on Chicken Salad.  There are hundreds of ways that you can prepare it.  Chicken Salad can be an Hawaiian Variation, Chinese Chicken Salad, Thai Chicken Salad, and on and on.  Just use whatever you have on hand and what you think will go well with Chicken.  Don’t forget that Chicken Breast has somewhat of a neutral flavor that can be enhanced with most anything!  Even nuts and noodles will work in a Chicken Salad!

Digg This
Reddit This
Stumble Now!
Buzz This
Vote on DZone
Share on Facebook
Bookmark this on Delicious
Kick It on DotNetKicks.com
Shout it
Share on LinkedIn
Bookmark this on Technorati
Post on Twitter
Google Buzz (aka. Google Reader)

Be the first to comment - What do you think?
Posted by sylveee - 2012/06/09 at 10:34 PM

Categories: Asian, Beverages, Condiments, Cooking for Everyone, Dinner Ideas, Fruit, Lunch Ideas, Main, Tropical Food   Tags: , , , , , ,

MONGOLIAN BEEF FOR DINNER

MY CULINARY DIARY

MONGOLIAN BEEF FOR DINNER


On Tuesday, June 5th, in order to fulfill an urge for a very tasty, beefy meal, I decided to make Mongolian Beef for dinner.   Mongolian Beef is usually made with Flank Steak which at times can be a little on the chewy side.  In order to fully enjoy the meal and not have to cook the meat for more than a minute or two, I decided to make it with Beef Tenderloin.  It may be somewhat more expensive but when you are only cooking for two, it hardly matters as compared to the enjoyment of the meal.

Mongolian Beef is usually found on the menu in Chinese Restaurants and as the name implies, its roots stem back to the Mongols. The Mongolians invaded and put forth their influence in many of the Asian countries.  Traditional Mongolian Beef is served with Mai Fun Noodles which are a rice noodle, which when cooked in hot oil, will puff up instantly and provides a nice contrast to the beef which can be a bit spicy, if prepared with an ample amount of chilies as the recipe calls for.  In our household, we do not like our food to be ultra spicy, so I always use a moderate amount of chilies, however we still like the dish with puffed rice noodles which also provide a nice texture contrast.

Along with the Mongolian Beef, I served Broccolini which is very similar to Chinese Broccoli and which does not have the same amount of buds on it as western broccoli, but is instead more leafy and has longer, more tender stems, making it taste like more of a cross between broccoli, spinach and asparagus.  Broccolini, in fact, is actually a cross between Western Broccoli and Chinese Broccoli.

I started preparations about one hour before dinner by slicing the meat across the grain into ¼” thick pieces that were slightly less than ½” in diameter and about 1- 2 inches long.

Sliced Beef in the Egg White/Corn Starch Coating

The meat was then marinated in a mixture of Egg White mixed with Cornstarch and refrigerated.


Then I mixed up the ingredients for the sauce which included Soy Sauce, Bean Sauce, Garlic and Sugar.


Sauce for the Mongolian Beef includes Minced Garlic


Wash, dry and cut a bunch of Green Onions up into 2″ pieces and set aside.  You will also need a Cornstarch/Water slurry to thicken the sauce.

Scallions or Green Onions


Next I washed and trimmed the Broccolini and set it aside.

Broccolini


I love Cucumbers and made a marinated Cucumber Salad.  Just thinly slice your cucumbers, lightly salt them and set aside.  Once the Cucumbers release some of their moisture, you can then drain them and rinse if they are too salty. Next add some Seasoned Rice Vinegar, Garlic Powder and a little Peanut Oil.  For a Thai variation, add about 1 Tbsp. Fish Sauce.

If you are serving Rice, begin cooking the rice and then heat about 2 inches of Oil in a wok or sauté pan.


Once the Oil is hot, add your Mai Fun Noodles (they should be broken up before cooking – the easiest way to break them up is to put them in a plastic bag that can be sealed – this avoids getting rice noodles all over the kitchen).  Cook a small amount of noodles at one time – if they don’t immediately puff up to the surface the oil is not hot enough.  Using your thermometer to ascertain the correct temperature which should be about 360 degrees.  Remove from the oil with a spider or slotted spoon and place on a cooling rack placed over a baking pan for them to drain.


Cooked Mai Fun Noodles


Lightly sauté the Broccolini in a sauté pan, shut off the heat and cover until ready to serve.

Next, remove the meat from the refrigerator and cook a few pieces at a time in the hot oil.  This will take less than a minute – you just want the coating to brown.  Remove the meat as it cooks.  Once all the meat is cooked, remove all but about 1 tablespoon of the oil.  Add the ingredients for the sauce and cook for about 2 minutes over high heat.  Add the Meat, Onions and Cornstarch mixture and cook for another 2 minutes or until the sauce is thickened.

Cooked Mongolian Beef


Turn the heat on under the Broccolini and heat for about 1 minute or just until the Vegetables are hot.  Place the cooked Mai Fun Noodles on a serving platter and top with the meat.  Serve immediately with steamed Rice, the Broccolini and Cucumber Salad.  The above preparation will feed four people.


Plated Mongolian Beef atop of bed of Mai Fun Noodles


Mongolian Beef is a very tasty and satisfying dish.  The amount of heat you create from the chilies will vary on how much of the chilies that you use.  I used about ¼ tsp. but if you like it hotter, just use as many as your taste buds will tolerate.  For the full recipe please see mongolian-beef/

Digg This
Reddit This
Stumble Now!
Buzz This
Vote on DZone
Share on Facebook
Bookmark this on Delicious
Kick It on DotNetKicks.com
Shout it
Share on LinkedIn
Bookmark this on Technorati
Post on Twitter
Google Buzz (aka. Google Reader)

Be the first to comment - What do you think?
Posted by sylveee - 2012/06/08 at 11:09 PM

Categories: Asian, Cooking for Everyone, Dinner Ideas, Main   Tags: , , , , , ,

NATIONAL CHEESE DAY

NATIONAL CHEESE DAY

June 4th, 2012

Today is National Cheese Day  – how many have you tasted?  Below is an alphabet of some of the Cheese of the World.

A:      American, Asiago,

B:      Bleu, Brie, Burrata

C:      Camembert, Cheddar, Cottage, Cream

D:      Danish Bleu, Don Olivo

E:      Eden, Emmental

F:      Farmer’s

G:      Gouda, Gorgonzola, Gruyere

H:      Havarti, Hoop

I:       Idiazabal, Irish Cheddar

J:       Jalisco, Jarlsberg

K:      Kasseri, Kunik

L:       Ladaff, La Tur, Leyden, Limburger

M:     Mantego, Marscarpone, Mozzarella

N:      Neufchatel

O:      Oaxaca, Oregon Blue

P:      Parano, Parmesan, Pepato, Provolone

Q:      Quark, Queso Fresca, Queso Melt

R:      Red Dragon, Red Hawk, Romano

S:      Sage Derby, Saint Agur, Swiss, Stilton

T:      Tillamook, Taleggio, TinTern

V:      Valdeon, Vincent

W:     Wasabi Capri, Windsor Blue, Windsor Red


Digg This
Reddit This
Stumble Now!
Buzz This
Vote on DZone
Share on Facebook
Bookmark this on Delicious
Kick It on DotNetKicks.com
Shout it
Share on LinkedIn
Bookmark this on Technorati
Post on Twitter
Google Buzz (aka. Google Reader)

Be the first to comment - What do you think?
Posted by sylveee - 2012/06/04 at 4:00 PM

Categories: Cooking for Everyone, Lunch Ideas, National Food Days   Tags: , ,

PARENT/CHILD PIZZA CLASS AT LGC

Saturday, June 2nd was the day of our Parent/Chlid Pizza Class at Let’s Get Cookin’.  Four Teams of 2 parents each made Piizza Dough, their own indivual pizzas and pizzas to share.  Everyone was very involved and had a good time.  The class ended with everyone enjoying a lunch of Pizza, Salad, Italian Sodas and Dessert.


The items that were made were:


PIZZA DOUGH:  Basic, Gurmet and Thin Crust

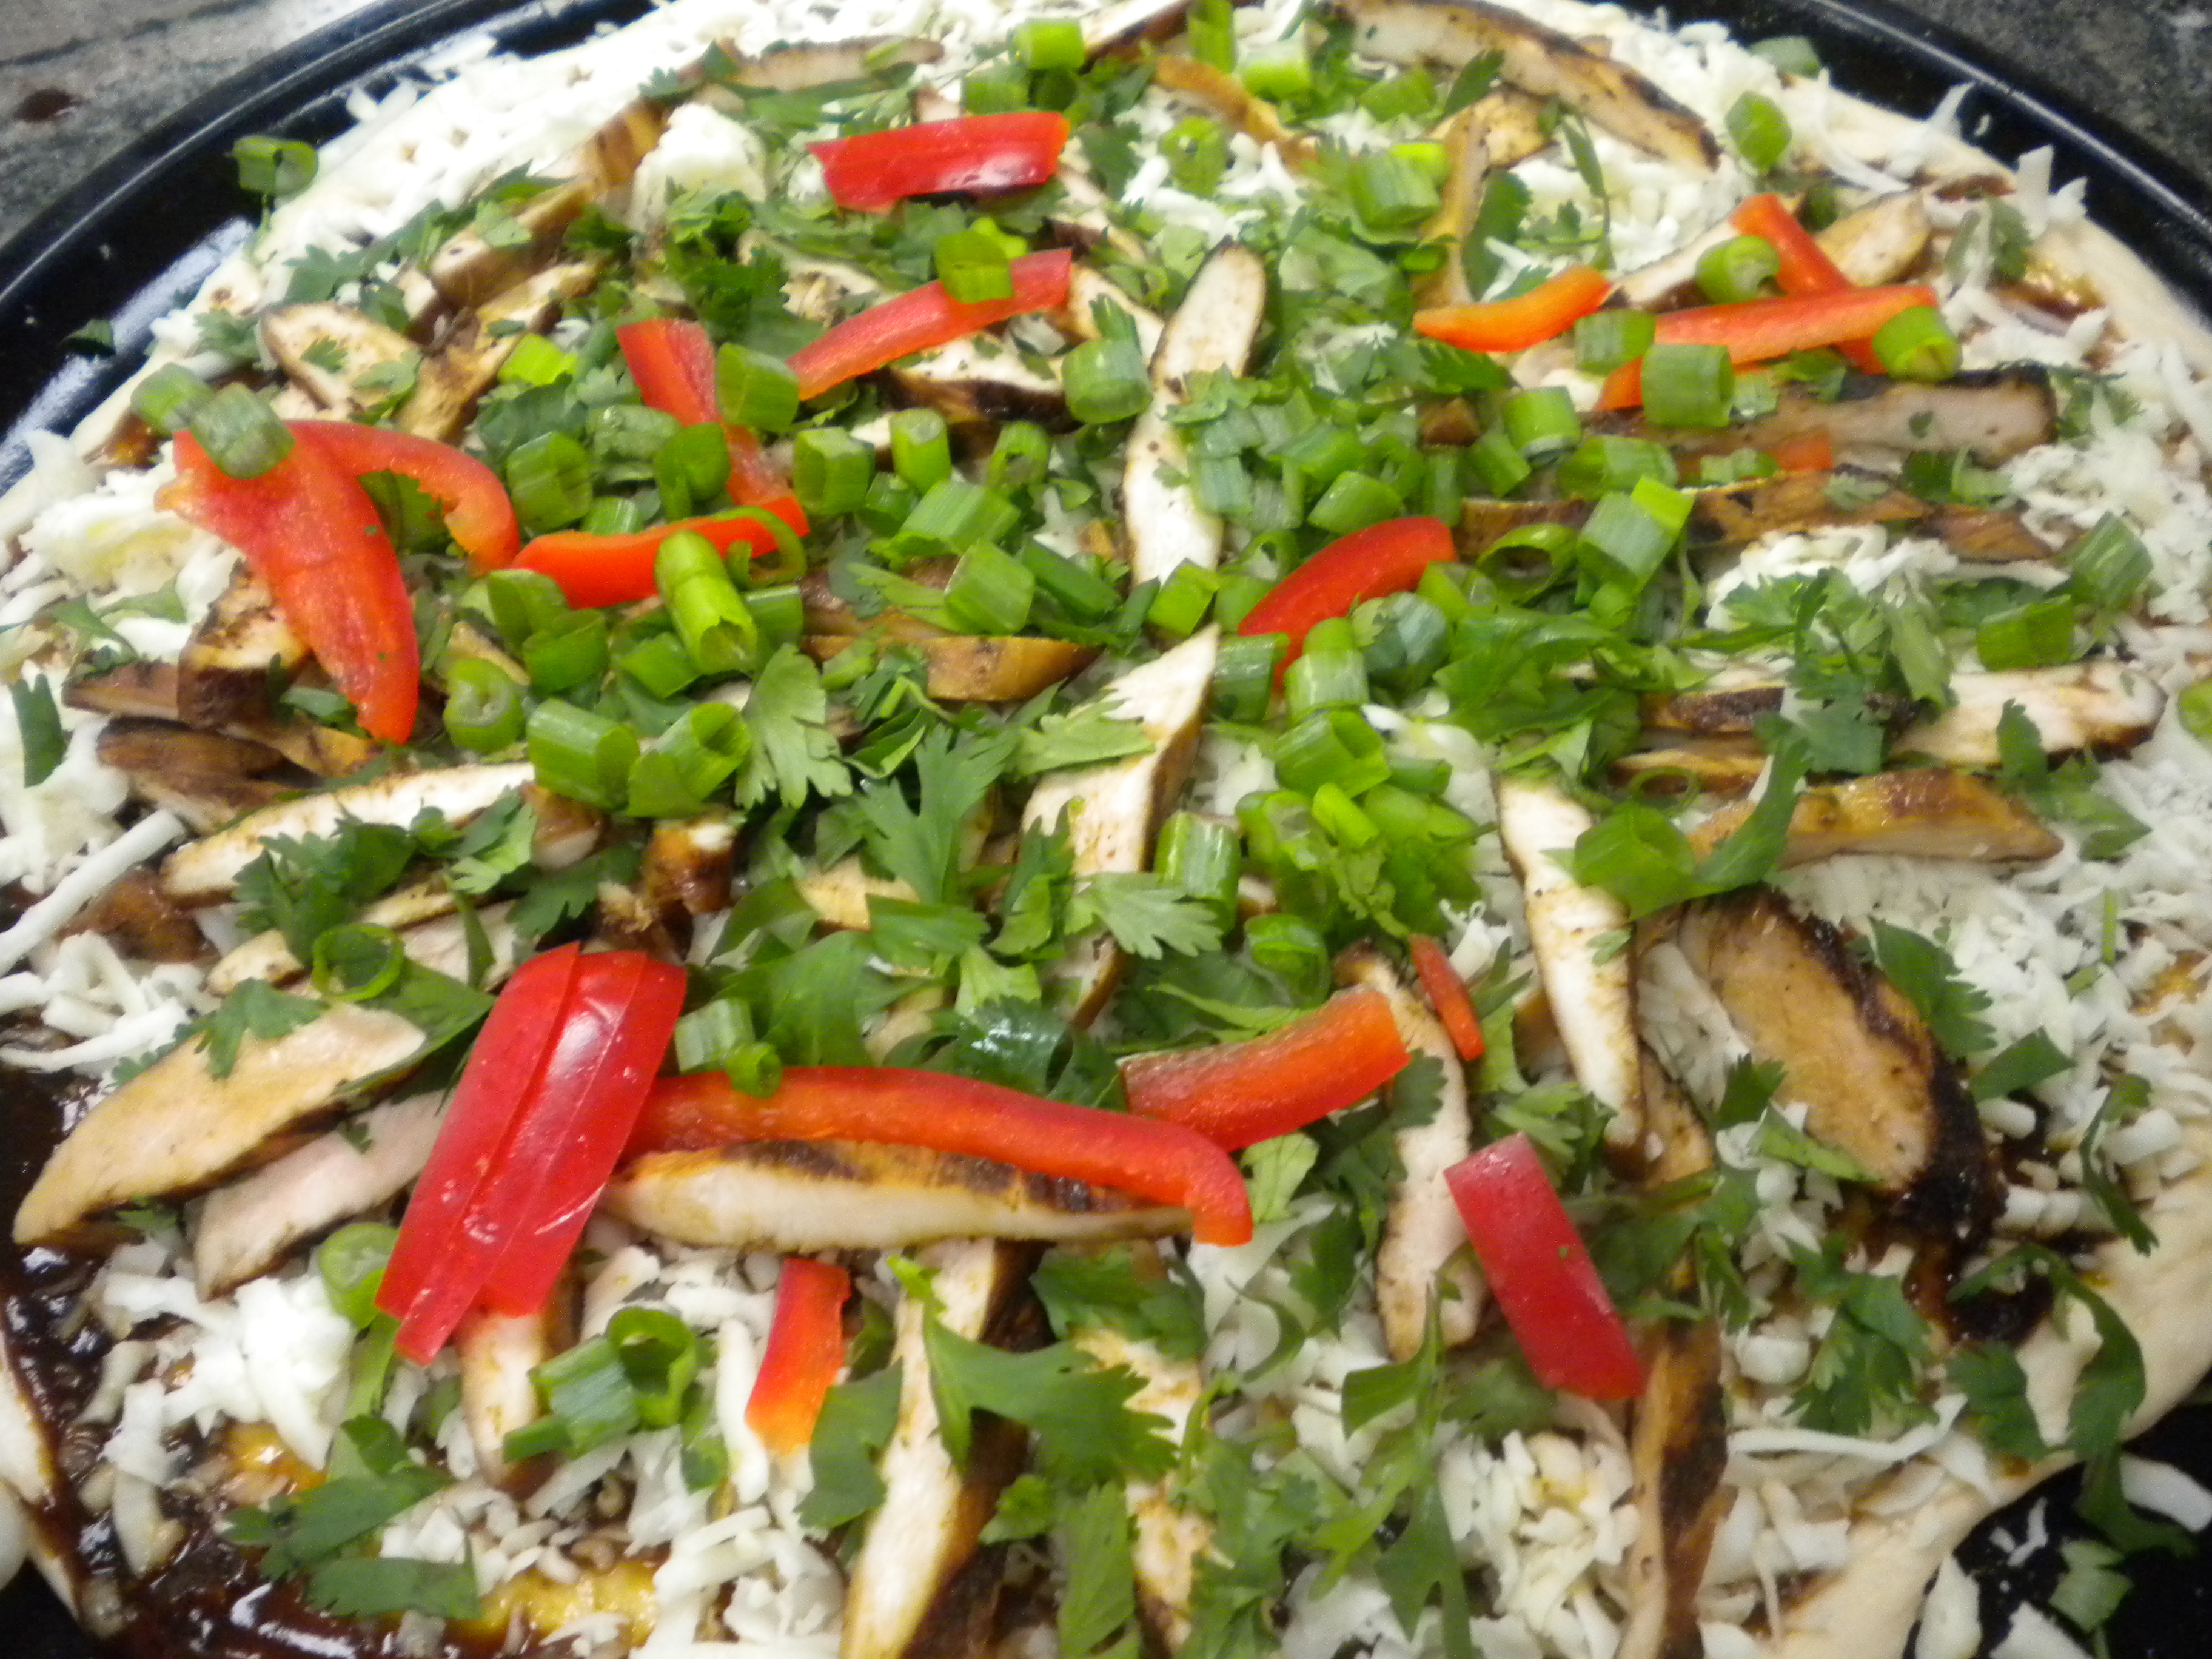
Chinese BBQ Chicken Pizza with Bell Peppers, Shitake Mushrooms, etc.

Baked BBQ Chicken Pizza Slice

Hawaiian Pizza with Portuguese Sausage & Pineapple, etc.

Derek & Sabrina with their Hawaiian Pizza

Hawaiian Pizza

Argentine Pizza with Smoked Spanish Chorizo, Red & Green Bell Peppers, etc.

Artisan Greens Salad with Zest Lemon Dressing

Chocolate Chip Cookie Pizza & Italian Sodas

Chocolate Chip Cookie Pizza

Making Pizza


Amy & Daughter


Holly & Ryder


Celene with her Pizza

Upside Down Pizza


The Upside Down Pizza shown below was made with a new pan, made especially for making a ‘Deep Dish Pizza’ which is made ‘upside down’.  It was fun to do.  The pan can be purchased at Let’s Get Cookin’ in Westlake Village, CA.


Enjoying Pizza for Lunch Enjoying Lunch


Enjoying Lunch


Everyone enjoyed making and eating their pizza and also had items to take home as there was just too much to eat all at one time.  Our next Parent/Child Class is July 14th and will include various items from Europe such as Arrabbiata Pasta from Italy, Roman Salad,  Monte Carlo Tea Cookies and Circus Snow Cones.

Digg This
Reddit This
Stumble Now!
Buzz This
Vote on DZone
Share on Facebook
Bookmark this on Delicious
Kick It on DotNetKicks.com
Shout it
Share on LinkedIn
Bookmark this on Technorati
Post on Twitter
Google Buzz (aka. Google Reader)

Be the first to comment - What do you think?
Posted by sylveee - 2012/06/03 at 3:46 PM

Categories: Baking, Beverages, Cooking for Everyone, Cooking for Kids, Dessert Ideas, Dinner Ideas, Italian, Lunch Ideas, Main, Parent Child Classes, Pizza, Salads   Tags: , , , , , , ,

MAKING MOLASSES DOUGHNUTS

NATIONAL FOOD DAYS

NATIONAL DOUGHNUT DAY


Friday, June 1st is National Doughnut Day.  You can either go out and buy some or stay home and make some.  Making doughnuts can be fun, if not messy but think how tasty, those Doughnuts, right off the fire would be.  I decided to make some Molasses Doughnuts for National Doughnut Day.  I have made these before at home and at school with my students.  Molasses Doughnuts originated in New England where baked goods with molasses are frequently made.  This particular was included in my Regional US Cooking Camp last summer.  Read and watch below for the actual procedure in making these Doughnuts at home.  See the Recipe in the Recipe Section of this Blog.

First off, make sure you have all the correct ingredients which are:

Molasses, Buttermilk, Melted Butter, Eggs, Sugar, Flour, Baking Soda, Cinnamon, Ground Ginger, Nutmet & Oil for Frying.


Next make sure you have the correct equipment which includes:

Electric Stand Mixer or Hand Mixer or Food Processor, Medium Mixing Bowl, Small Mixing Bowl,

Liquid Measuring Cups, Dry Measuring Cups, Measuring Spoons


Rolling Pin & Stockinette

Rolling Pin with Stockinette Cover


Bench Knife or Dough Scraper

Doughnut Cutter or Biscuit Cutter & Canapé Cutter or Thimble


Doughnut Cutter - upside down view


Deep Fryer


Jelly Roll Pan or Baking Sheet with shallow sides

Silpat or Parchment

Silpat Sheet - Non-sticking material


Spider, Slotted Spoon or Tongs & Cooling Rack


Spider - for removing food from hot oil


To make the Doughnuts, set out all the equipment and measure the ingredients.

Combine the Molasses, Buttermilk and melted Butter.


Combine the Dry Ingredients.


Place the Eggs and 1 cup of Sugar in the Electric Mixer with the Whisk Attachment in place.  Beat at full speed until the mixture becomes light in color and thick enough to form ribbons when the beater is lifted up.


Beat in the Buttermilk Mixture and then stir in the Dry Ingredients, 1 cup at a time, beating well after each addition.


Cover the bowl and refrigerate the Dough for at least 30 minutes.


Lightly dust a flat surface with flour and rub flour into your stockinette covered rolling pin.  Roll out half the Dough to ½” thickness.  (Refrigerate the remaining Dough until ready to use it)


Rolled dough


Cut out Circles with a Doughnut Cutter or a Round Cookie Cutter.  If you are using the Cookie Cutter, cut out small circles from the middle with a Canapé Cutter or a thimble.  (Cutting out the center will insure that the Doughnuts cook all the way through)


Cutting out the Doughnuts


Doughnuts and Holes before Frying


Place the cut out Dough on a silpat ® or parchment covered baking sheet.  While you are cutting out the dough begin heating about 3 inches of Oil (Peanut Oil, if no allergies, is best) or use Vegetable Oil.  The oil should reach 360 degrees on a deep fat thermometer or use a laser thermometer.


Place 1 cup of Granulated Sugar in a 1 gallon plastic bag or a paper bag.


Cook the Doughnuts in the hot oil;  when the Doughnuts puff up and brown on the bottom, carefully turn over, using a spider or tongs.  Cook on the other side until a dark golden brown.


Use the spider or tongs to transfer to a cooling rack placed on a jelly roll pan or a large baking pan with shallow sides.


Once the Doughnuts are cool enough to handle, place 1 at a time in the bag with the Sugar and gently toss, to coat the Doughnuts.

Sugaring the Doughnuts


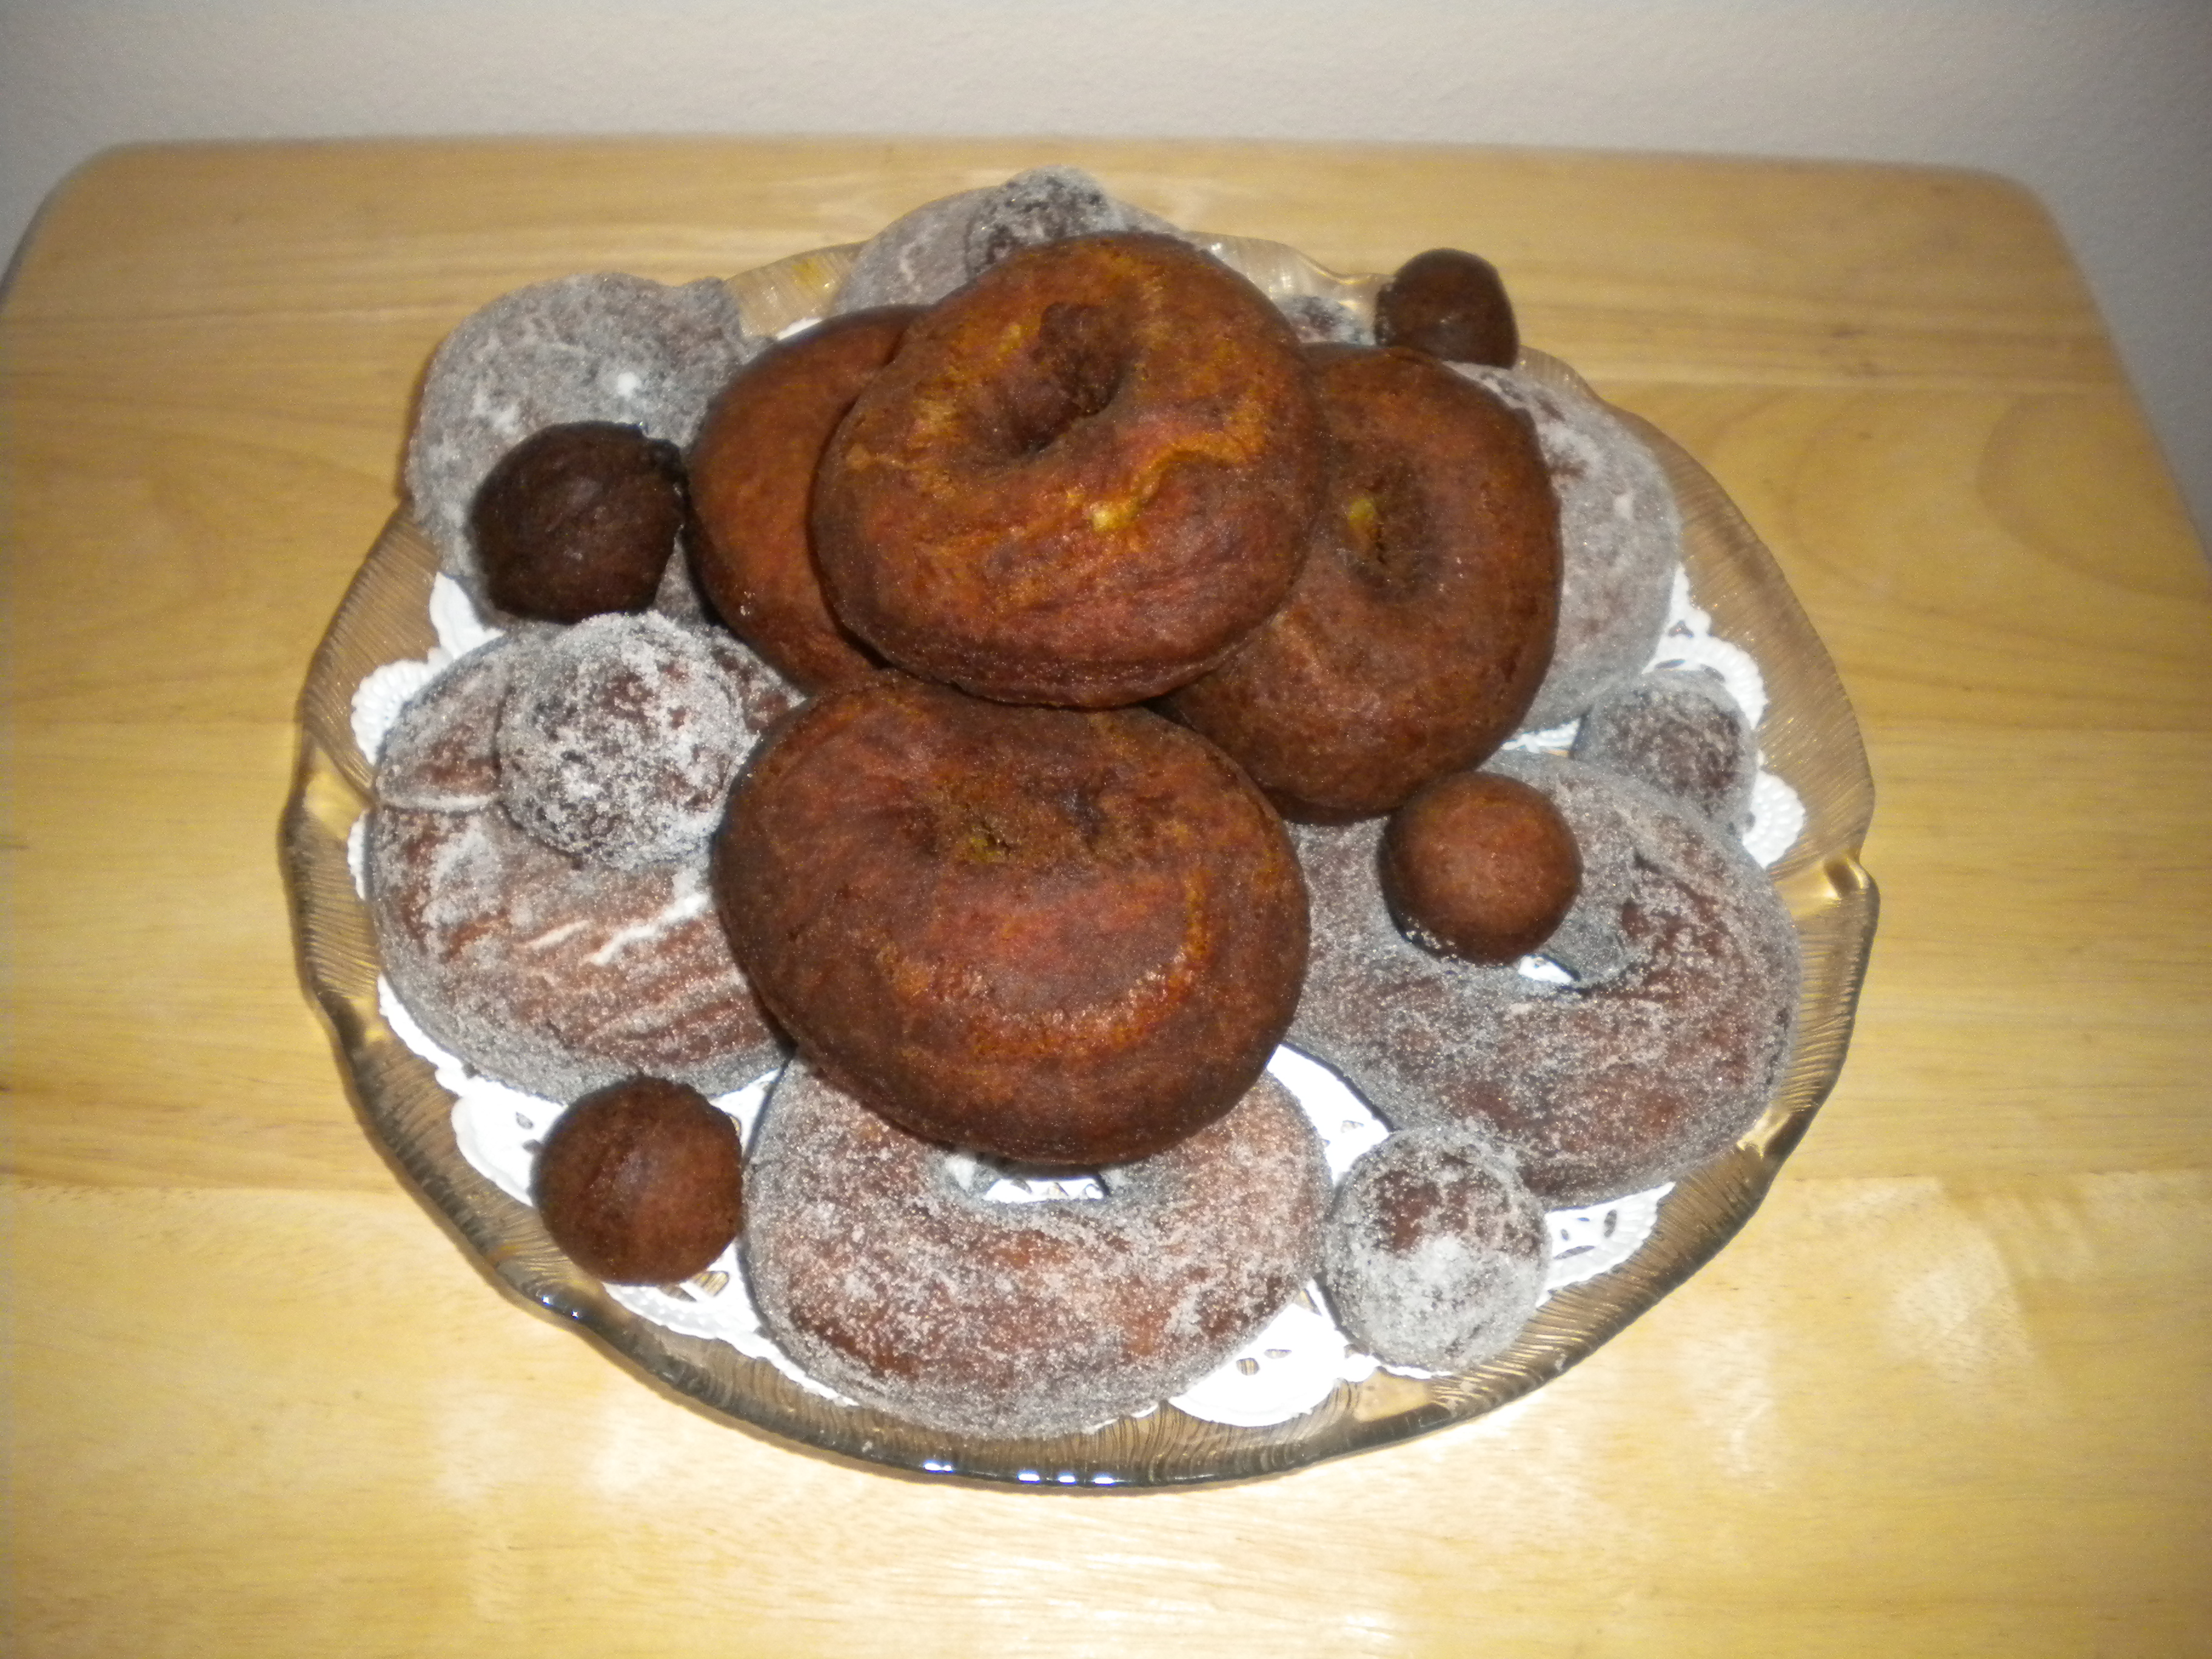
Transfer to a serving platter that is covered with a doily.


Cooked & Plated


The recipe will make 24 Doughnuts and 24 Doughnut Holes.


This is a very tasty Doughnut that will keep for several days.  These are delicious for breakfast along with a scramble egg or just for snacking.


Try them and see!


Digg This
Reddit This
Stumble Now!
Buzz This
Vote on DZone
Share on Facebook
Bookmark this on Delicious
Kick It on DotNetKicks.com
Shout it
Share on LinkedIn
Bookmark this on Technorati
Post on Twitter
Google Buzz (aka. Google Reader)

Be the first to comment - What do you think?
Posted by sylveee - 2012/06/01 at 12:25 AM

Categories: Baking, Bread, Breakfast Ideas, Dessert Ideas, Main, National Food Days   Tags: