Cooking for Kids

Thanksgiving Countdown

If you are doing the Thanksgiving Dinner at your home or even if you are invited elsewhere you may need some help in finding recipes to complete your tasks.  If you type Thanksgiving into the Search Box you will come up with many recipes.  Listed below are some of the recipes you will find.


Curried Fruit Stuffing is one of my favorites.  It provides a nice flavorful twist to  traditional stuffing recipes.   (Sorry, no photo of the stuffing but the link will provide the recipe and photos of some of the ingredients.


             Creamed Spinach


                Mashed Potatoes


Roasted Asparagus can be made with Green, White or Purple Asparagus or a medley of each.  The taste will be pretty much the same no matter which color you used.

                 Green Asparagus


The above links will all take you to the same article – in which you may find more recipes for ‘After Thanksgiving’ to use up the leftover Turkey.

Digg This
Reddit This
Stumble Now!
Buzz This
Vote on DZone
Share on Facebook
Bookmark this on Delicious
Kick It on DotNetKicks.com
Shout it
Share on LinkedIn
Bookmark this on Technorati
Post on Twitter
Google Buzz (aka. Google Reader)

Be the first to comment - What do you think?
Posted by Admin Test - 2021/11/08 at 5:28 PM

Categories: Dinner Ideas, Holiday Ideas, Holiday Meals, Holiday Tidbits, Leftovers   Tags: , , , ,

MY ADVENTURES WITH LIONS MANE MUSHROOMS

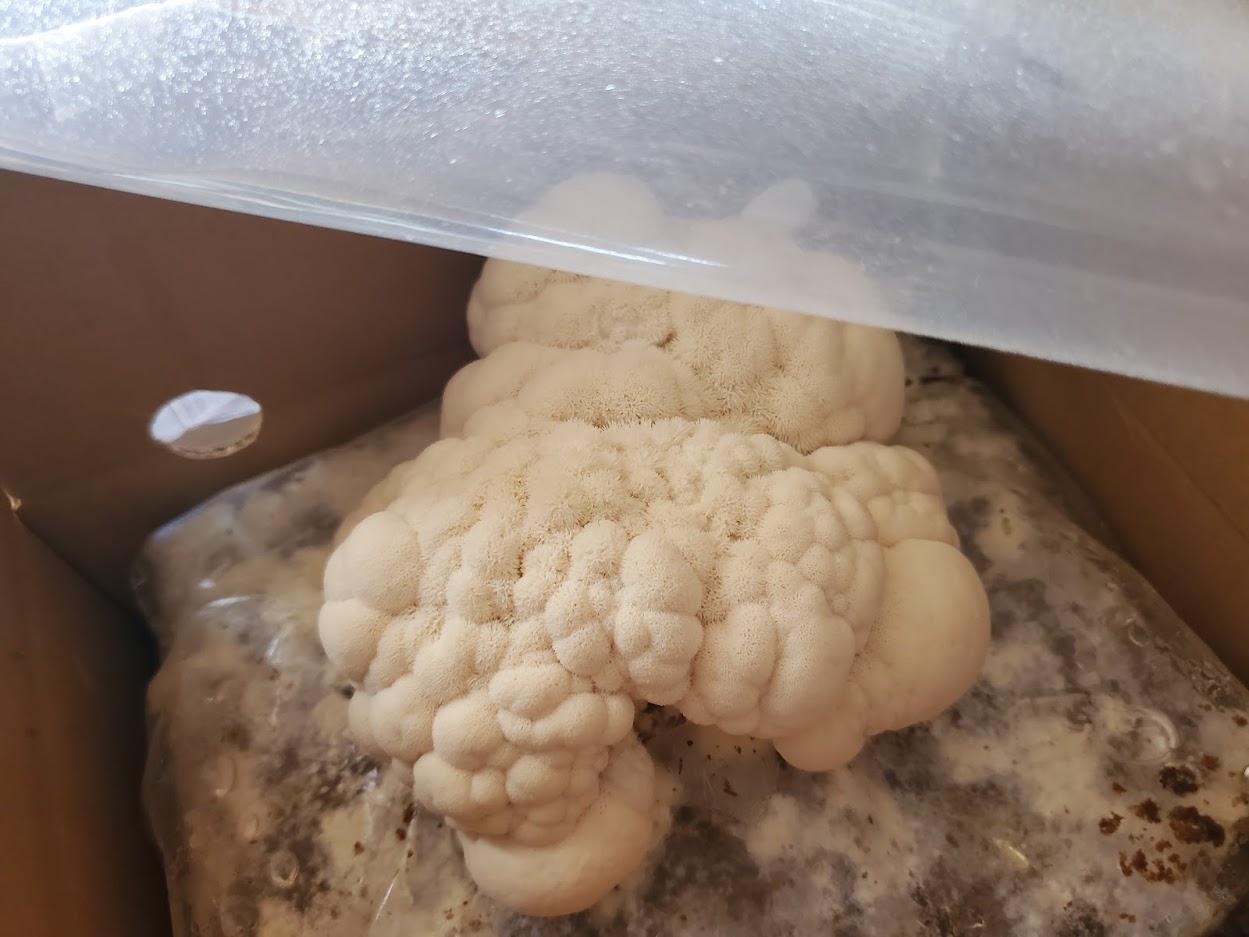
On a whim (almost) I decided to try out Nearby Naturals Mushroom Grow Kit.  They have a monthly plan that I decided to try.  Not knowing that you could choose which type of mushroom you wished to receive I just went with the plan and hoped that what I got wouldn’t be Lions Mane because of all the Mushrooms I have ever eaten, this one is the first that I have not actually liked.  They have sort of a mealy taste if you slice it and cook like a normal mushroom.  They can also be torn apart and cooked like noodles but they are too soft in this form for my taste.  The reason they are called Lions Mane is because when they are pulled apart the individual spores look like lions mane.

Well, my Lions Mane grew to full size from nothing in less than two weeks and here is where my adventures start.  In trying to figure out what to do with them, I went on line to see what other people were doing with them.

The first thing I tried doing was to slice and fry them.  I served them with Spinach, Asparagus and sliced Tomato.   This was okay but not something I would want to do again.  The on-line video showed the chef just loving this sliced mushroom?


Sliced and Fried Lions Mane Mushrooms


Sliced Lions Mane Served with Spinach, Asparagus and Tomatoes


Another instance was ‘Egg Drop Soup’.  The on-line video used only water and corn starch as a thickener.  I decided to go the traditional ‘Chinese Way’ and use Chicken Broth along with some other vegetables.  This was okay and palatable but still something I would not do again.  With this recipe you pull apart the individual  spores and they look like noodles.  They were somewhat soft though and did not taste like noodles.


Lions Mane torn apart into individual spores


          Egg Drop Soup Cooking


                                   Finished Egg Drop Soup


For the recipe for the soup go to https://www.sylveeeskitchen.com/egg-drop-soup-with-lions-mane-mushrooms/


My final recipe for this crop of Lions Mane Mushrooms is ‘Fried Rice’ Lions Mane.  I took the remaining Lions Mane and extruded them through the medium shredding blade of my Food Processor.  I also shredded some Carrots and slivered some Green Onions.  I then proceeded to fry the ingredients as I would have for Fried Rice.


For the complete recipe go to https://www.sylveeeskitchen.com/recipes/dinner/vegetable-fried-rice/ and substitute the Rice with the shredded Lions Mane Mushrooms.  For a photo of the Rice please go to https://www.facebook.com/photo.php?fbid=4166532770023611&set=p.4166532770023611&type=3


Digg This
Reddit This
Stumble Now!
Buzz This
Vote on DZone
Share on Facebook
Bookmark this on Delicious
Kick It on DotNetKicks.com
Shout it
Share on LinkedIn
Bookmark this on Technorati
Post on Twitter
Google Buzz (aka. Google Reader)

Be the first to comment - What do you think?
Posted by sylveee - 2021/03/05 at 12:09 PM

Categories: Dinner Ideas, Main, Soup, Soup   Tags:

CULINARY MAKEOVER #22 – FROM BROWNIES TO FUDGE BROWNIES


 Old Brownies – dried out


For those of you who have been reading my ‘Makeover’ Articles, you probably know by now that I love to recreate new dishes from old leftover (yet viable) ones.  This addiction started when I purchased my first Blender many years ago.  The Blender of course, then advanced to the Food Processor which has been a ‘must have’ in my kitchen almost ever since it hit the U.S. market.

Our household now consists of only two people and our appetites aren’t what they used to be and even if they were, we would be pounds overweight if we consumed everything that I baked (let alone cook) and since I hate to throw away good food (especially when i created it), I have the fun of turning these dishes into new ones.

This weeks was turning my Husband’s Brownies into new Fudge Brownies.  Ev is supposed to watch his sugar content but he still loves his chocolate and has to have his fix every night after dinner (even if it is smaller than what he had been used to in previous years.)  Sometime I manage to remember to divide the batter in half and freeze one and bake the other one.  Of course, this takes smaller pans to do so and it isn’t always feasible.

So I took the leftover Brownies which were dried out but still good and cut them up into small pieces which I then put into the Food Processor with the Chopping Blade.  I pulsed the Brownies pieces until they were broken up into much smaller pieces.  I then turned the Processor on full speed and chopped up the small pieces to resemble a coarse flour or meal.  Next step was to measure the resulting Chocolate Crumb.

The ingredients including the Chocolate Crumb are listed below:

2 cups Brownie Crumbs

1 cup All-Purpose Flour

1/4 cup Cocoa Powder

1/4 cup Sugar

2 Eggs

1 cup Sour Cream (1/2 cup Butter can be used instead)

1 cup Chocolate Chips

1 cup Marshmallows (quartered)


DIRECTIONS ARE AS FOLLOWS:

1.  Return the Chocolate Crumb to the Food Processor.


 Measured Crumbs in Processor


2.  Add the Flower, Cocoa Powder and the Sugar.


Remade Batter 


3.  Pulse, just to combine the ingredients.

4.  Add the Eggs and Sour Cream (or melted or softened Butter) and Pulse, just until the   

     ingredients are combined.

5.  Stir in the Chocolate Chips.

6.  Butter or Spray a 9 x9″ baking dish;  add the quartered Marshmallows to the bottom of the       dish.


Cut Up Marshmallows


7.  Spread the Batter evenly over the Marshmallows.

8.  Bake in a preheat (350 degree) oven for 25-30 minutes or until a cake tester comes out             clean.

9.  The Brownies may be served warm or cooled.  And they are delicious served with Vanilla           Ice Cream.

  Remade Fudge Brownies

Digg This
Reddit This
Stumble Now!
Buzz This
Vote on DZone
Share on Facebook
Bookmark this on Delicious
Kick It on DotNetKicks.com
Shout it
Share on LinkedIn
Bookmark this on Technorati
Post on Twitter
Google Buzz (aka. Google Reader)

Be the first to comment - What do you think?
Posted by sylveee - 2020/07/19 at 4:40 PM

Categories: Cales, Cookies, Cooking for Kids, Culinary Makeovers, Dessert Ideas, Family Fun, Leftovers, Main, Quarantine Cuisine   Tags: , , , , , , ,

Culinary Makeover #21 – Trickle Down Leftover Recycling (Burger Buns from Cheesy Cauliflower)


In my previous post I mentioned that I was going to try and use up all the food in my freezer and/or refrigerator.  I have made pretty good progress but have not got around to posting it.  This post will be sort of fun because as the title suggests, it is a ‘trickle-down’ recycle or in other words, recycling the recycled.  Now, it is not really like it sounds.  The main ingredients are recycled only once and the twice recycled is just sort of using the leftovers as you will see when you read the rest of the post.


My husband Everett, loves Mac and Cheese.  I sometimes make it but he wants it so often, that I tried resorting to purchasing small portions of it from Trader Joe’s and/or Bob Evans Mac and Cheese from the local market.  While these are fairly good products, the Mac and Cheese that I make is so much better that I decided to make a large portion of it – having it for dinner one night and then packaging the rest in lunch size container and freezing it for use when needed.  I made so much sauce that there was actually some leftover.  You can put a lot of Cheese Sauce in the Macaroni but only so much!

So, the first recycled product was Cauliflower made with the leftover Cheese Sauce.  Cauliflower is good for you but taste wise, just so so.  But I couldn’t resist the pretty heads that had at our local Farmer’s Market so of course I purchased one.

Before I continue with the recycling portion of this post listed below are the nutritional benefits of cauliflower.


Calories per serving        25

Fiber                             3 grams

Vitamin C                      77% of the RDI

Vitamin K                      20% of the RDI

Vitaming B6                  11%

Folate                           14%

Pantothenic Acid              7%

Potassium                       9%

Manganese                     8%

Magnesuim                     4%

Phosphorus                     4%


So, as you can see whether or not you specifically love or don’t love cauliflower, it is beneficial to eat it.  So, with this in mind I did cook the Cauliflower by separating the segments and washing it thoroughly and then cooking it in the microwave.  Vegetables are about the only thing that I will cook in the microwave and cauliflower cooks up in a manner of a few minutes.  When we were ready to eat dinner, I just put the covered dish of cauliflower into the microwave for about 2-3 minutes depending on the quantity and your microwave.  Then I removed it from the microwave and topped it with the leftover Cheese Sauce from the Mac and Cheese.  Voila!  Cauliflower with a Cheesy Sauce tastes quite good.

But we are only two people who can eat just so much cauliflower at one time and since I don’t like using leftovers without doing something to change them I did do something quite unusual to recycle the Cheesy Cauliflower and this was to make Hamburger Buns!  Yes!  Hamburger Buns made from Cauliflower.  Now, these are not Buns for people who want gluten-free bread products as there is definitely wheat flour in these buns.

Here is the procedure for making the Buns! (Or go to recipes (bread) for more concise directions.


  •  I had approximately 1 cup of Cheesy Cauliflower segments left over which I pulverized in the       Food Processor.


Cheesy Cauliflower


Cauliflower in Processor Workbowl


  •     I added 1 cup of warm water to the pulverized Cheesy Cauliflower along with 1 tablespoon of      Active Dry Yeast and 1 Tbsp. of Sugar.


 Yeast and Sugar Added


  •      Next I added 2 cups All-Purpose Flour to the mixture and ran the processor just long enough       to mix the ingredients together.


2 cups Flour Added


  •    Once the foregoing ingredients were well-blended I changed the chopping blade to the dough       blade and added more Flour to the mixture as needed.  I ended up adding an additional 2 cups       of flour so that there 4 cups used altogether.


  Dough Blade


  • I ran all the ingredients together for one minute and then transferred the dough to a greased and floured bowl and covered it with plastic wrap.


 Dough in bowl Rising


  • Once the Dough had doubled in size (approximately 1 hour depending on the warmth of the room) I punched the Dough down and formed it into buns.
  • I shaped the buns two different ways:
  •         a.  I rolled out the Dough and cut circle with a large round cutter.


     Dough Rolled and Cut


  •         b.  I then kneaded the scraps together and divided them into segments which I rolled into                     balls  and then flattened them.
  •         c.  The second method yielded small buns which would be ideal for children or those with                      small  appetites..  For those with  large appetites, the first method would be more                            appropriate.


   Cauliflower Buns Formed


  •  The shaped buns were placed on greased baking sheets which had been sprinkled with cornmeal       and  then covered.  Once the buns had risen to double their size, I placed them in a cold oven and   turned the heat on to 375 degrees.  Placing the buns in a cold oven gives them a little more raising          time and gives a lighter product.


 Baked Buns


Buns in Oven Baking


  • Baking time was approximately 20 minutes or until they are nicely browned on top and on the          bottom as well.  You can lift one up with a metal spatula to check the bottom.


We used the buns for Burgers and had quite a few leftover for other sandwiches as well.  We used the larger buns for Steak and Mushroom Sandwiches the following night.  Nope – not leftover Steak although there was some leftover from this dinner for lunch the following day.


Burger on Cauliflower Bun

Digg This
Reddit This
Stumble Now!
Buzz This
Vote on DZone
Share on Facebook
Bookmark this on Delicious
Kick It on DotNetKicks.com
Shout it
Share on LinkedIn
Bookmark this on Technorati
Post on Twitter
Google Buzz (aka. Google Reader)

Be the first to comment - What do you think?
Posted by Admin Test - 2020/01/28 at 11:16 AM

Categories: Baking, Bread, Cheese, Cooking for Everyone, Cooking for Kids, Culinary Makeovers, Dairy, Dinner Ideas, Family Fun, Leftovers, Main, One Dish Meals   Tags: , , ,

THANKSGIVING FAVORITES – DISHES TO CREATE FOR YOUR FAMILY DINNER

Here we are in November and Thanksgiving is right around the corner.  If you haven’t planned your complete Thanksgiving Dinner Menu yet here are some suggestions.  For the Stuffing, your Side Dishes, Desserts and leftovers for the days following Thanksgiving.


Thanksgiving is on the horizon and many families will be busy preparing food and enjoying it with their loved ones.  If you love to cook and even if you don’t but are going to be cooking listed below are the links to some delicious recipes that you may enjoy for your Thanksgiving Meal.  Take a look at them and then try out one or two or three or all.  When you do, please let me know how you, your family and friends enjoyed them.


CURRIED FRUIT STUFFING – a little different twist on Thanksgiving Stuffing – the Curry and Fruit give your stuffing additional flavor in a delicious way.  This recipe uses Traditional Stuffing Ingredients with the addition of Apple, Apricots and Golden Raisins or whatever you wish to use plus Curry Powder.  It is delicious and quite tasty with the addition of the fruit.


Juilienned Apples

Juilienned Apples


Dried Apricots


        Golden Raisins


GOLDEN SQUASH JUBILEE – is a simple Vegetable Dish made with only 4 ingredients:

2 lbs. Banana Squash – shredded

1 cup dried Apricots – chopped

½ Cup firmly packed Brown Sugar

¼ cup Butter


This dish can be cooked in the Microwave or baked in the Oven.


CREAMED SPINACH  –  Spinach is one of my favorite Vegetables and this version is delicious, even for non-Spinach lovers.  It is also versatile and can be turned into a Creamed Spinach Soup just by adding some Vegetable Stock and a little more Cream or Milk.  A great recipe for Thanksgiving and the days beyond.


Creamed Spinach

           Creamed Spinach


MASHED POTATOES – be sure to use Russet Potatoes, the baking variety. (you need to use a Potato that will crumble when baked so that they will mash easily)  DO NOT USE WAXY POTATOES as they will not mash properly.


Mashed Potatoes

                                                   Mashed Potatoes


ROASTED ASPARAGUS


Green Asparagus

Green Asparagus


TURKEY FRITTATA – this is a great dish to use with most any kind of leftover – it is an omelet made with Onions, Potatoes, Tomatoes and Cheese as well as the leftover Turkey.  A Frittata is good for Breakfast, Lunch or Dinner.


TURKEY CROQUETTES – these are made with leftover Turkey, Onions and a smattering of other Vegetables – they are breaded and then fried and served with Remoulade Sauce.


TURKEY POT PIE – made with leftover Turkey, Vegetables and a Rough Puff Pastry or purchased Puff Pastry if you prefer.  Great for leftover Turkey, Chicken or whatever else you have.  Serve with a Salad and you have a complete meal.


So, here we have a variety of recipes, some of which you can use for your Thanksgiving Dinner and beyond with the leftovers.


Digg This
Reddit This
Stumble Now!
Buzz This
Vote on DZone
Share on Facebook
Bookmark this on Delicious
Kick It on DotNetKicks.com
Shout it
Share on LinkedIn
Bookmark this on Technorati
Post on Twitter
Google Buzz (aka. Google Reader)

Be the first to comment - What do you think?
Posted by Admin Test - 2019/11/08 at 10:22 AM

Categories: Culinary Makeovers, Dinner Ideas, Holiday Ideas, Holiday Meals, Leftovers, Main   Tags: , , , , , , ,

OVER THE TOP HALLOWEEN SPOOKY BROWNIES


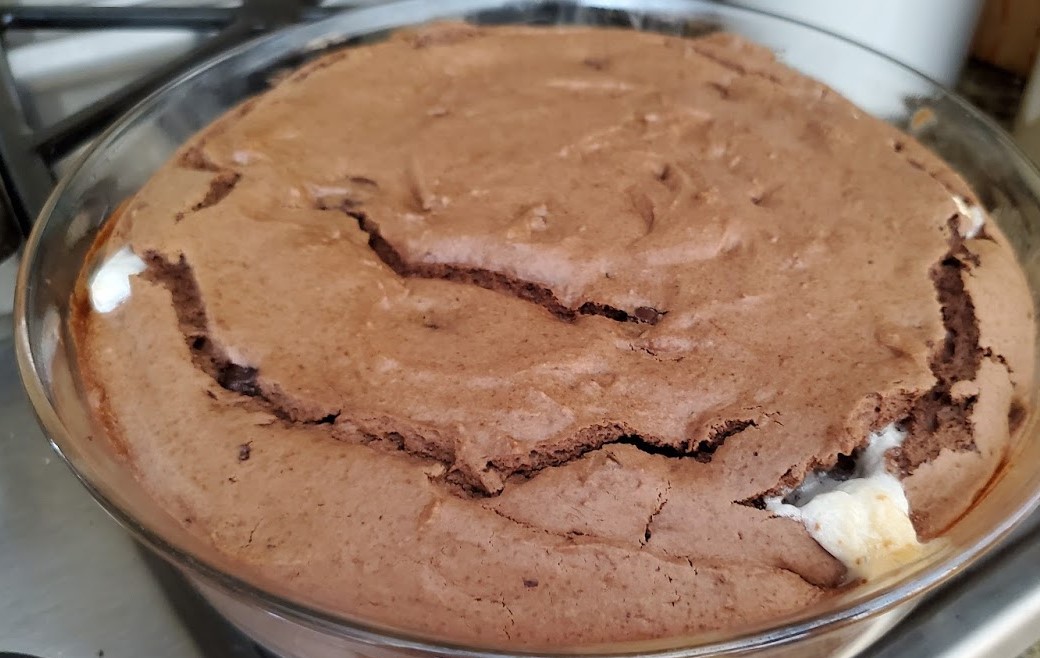
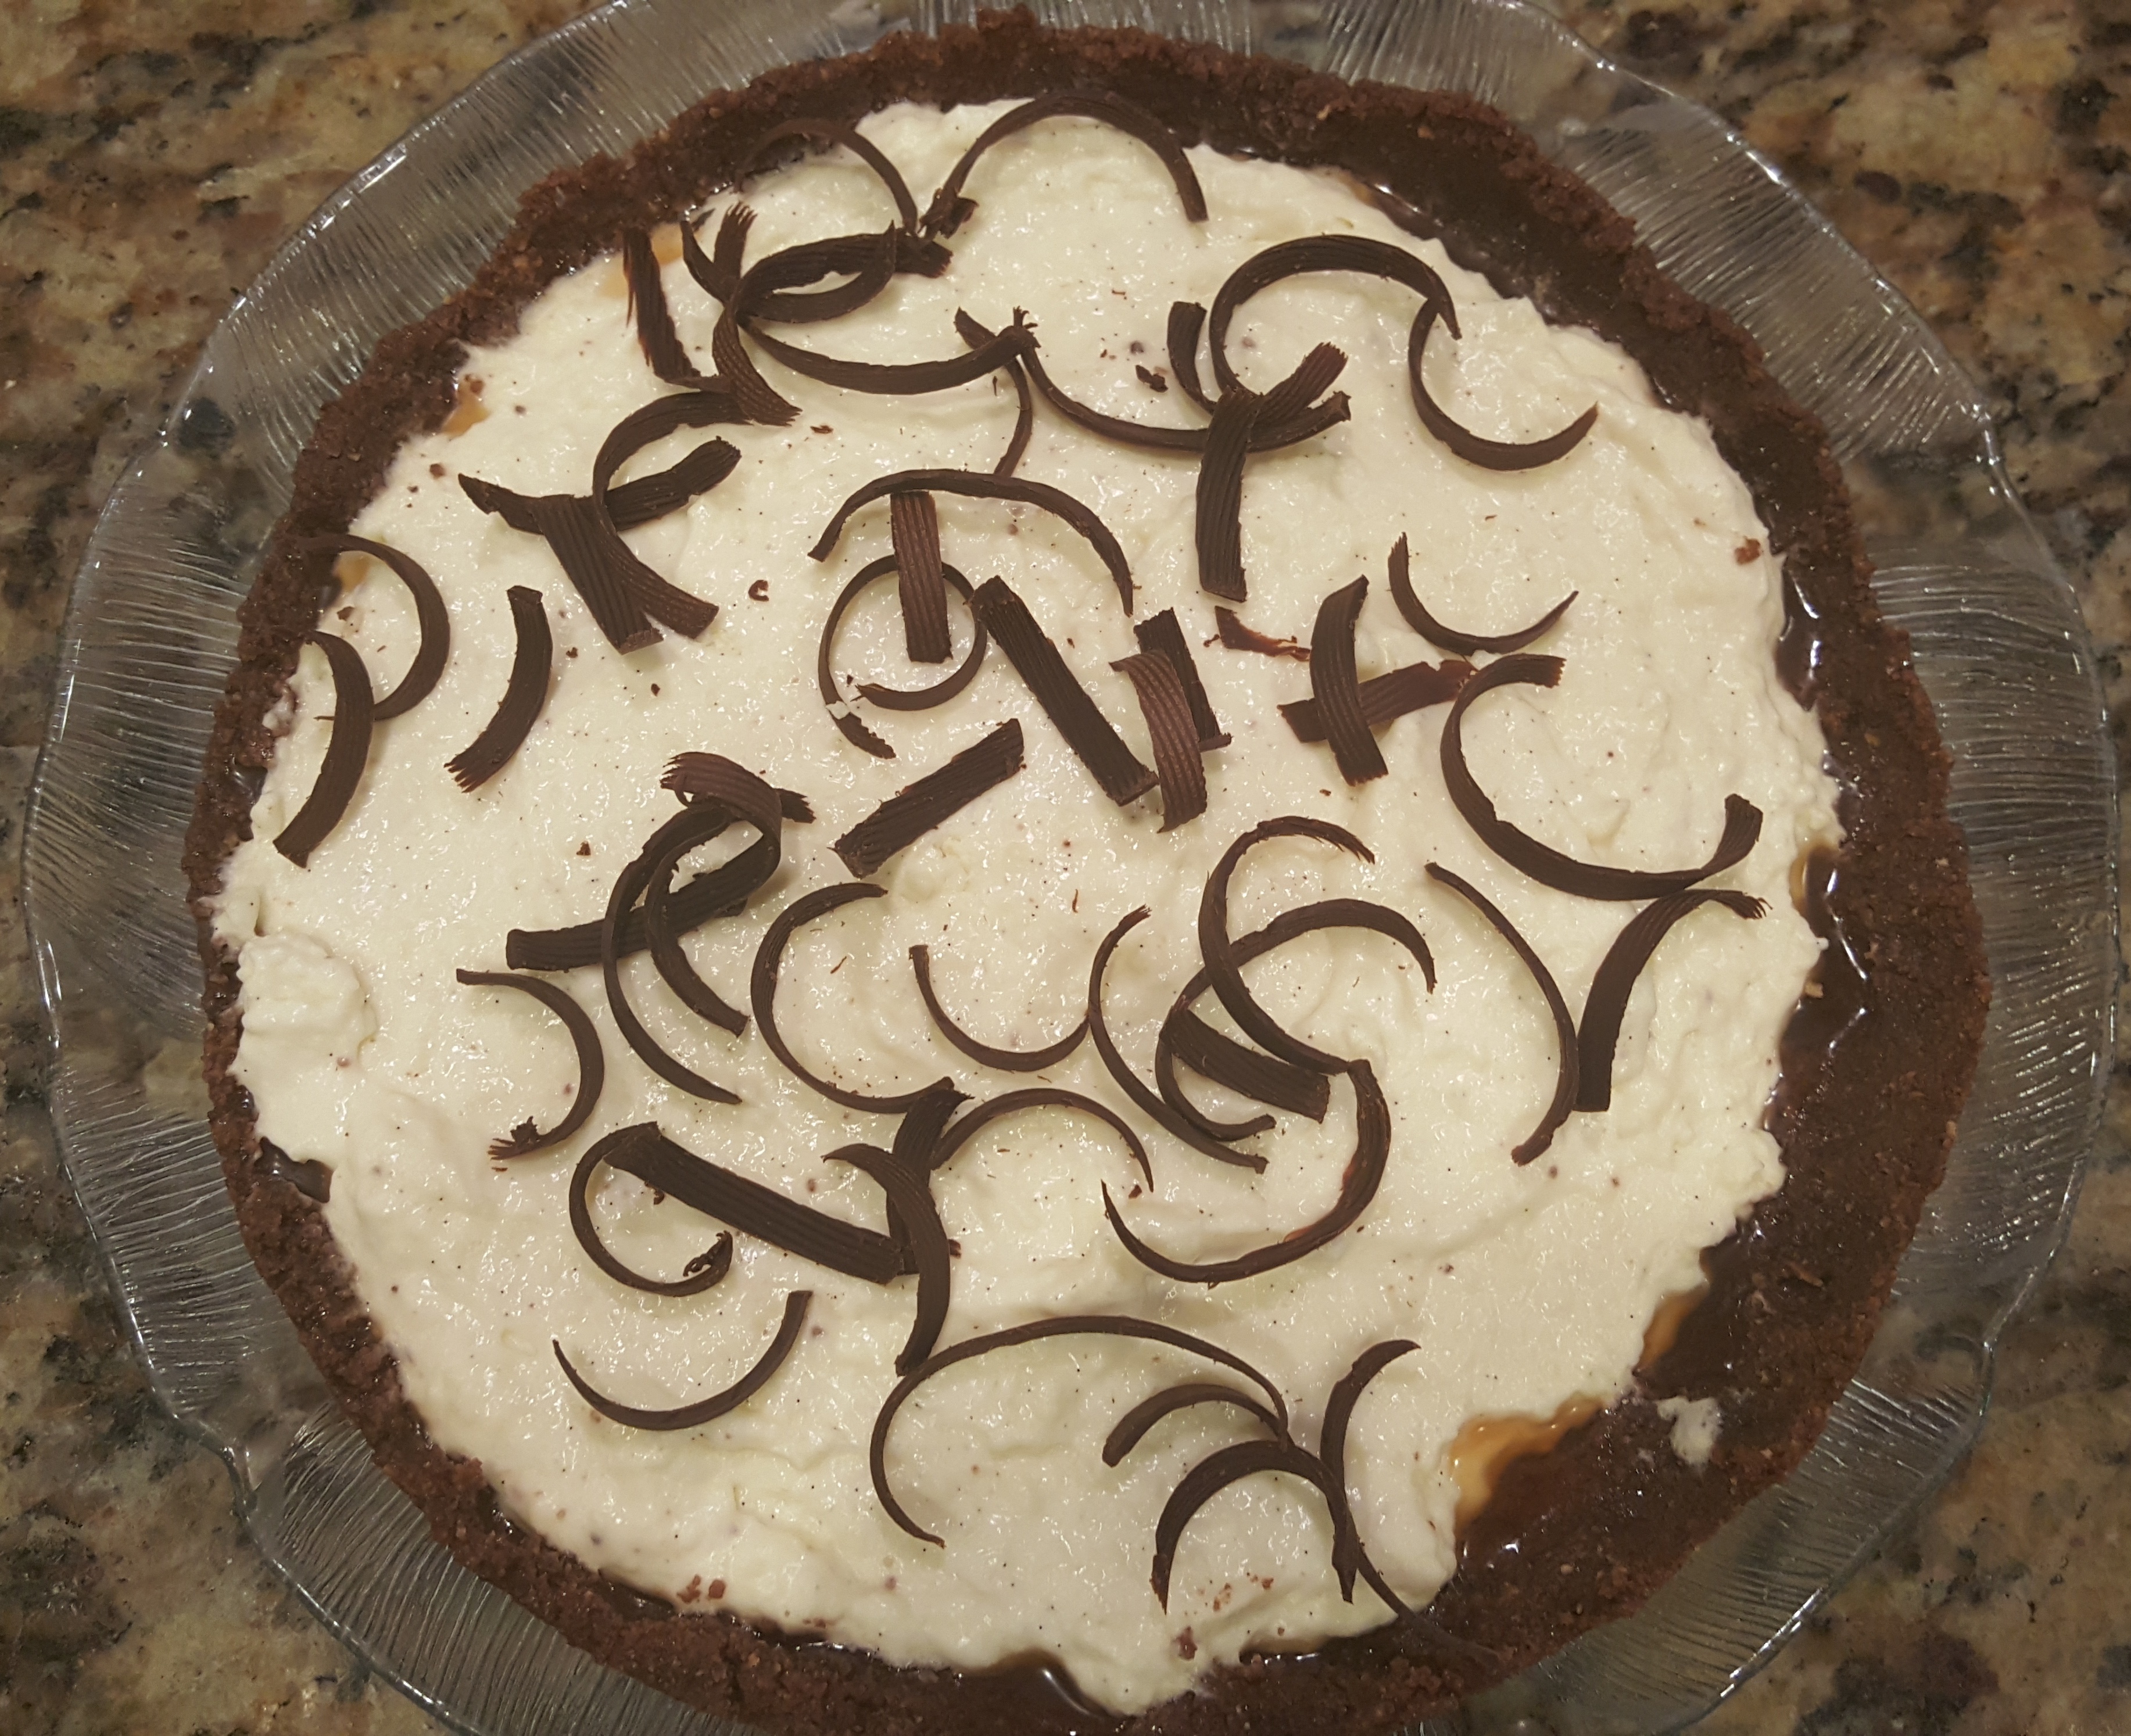
Here is a recipe that is fun to make and delicious to eat and is good for any time of the year – especially for all Chocolate Lovers.  This is a multi-layered Brownie that is composed of a layer of Chocolate Chip Cookie Dough, a layer of Oreos, a layer of Fudge Brownies and interspersed with Caramel Corn and Mini-Marshmallows.  When I made this recipe I used Oreo Thins but soon found out that the White ‘Stuff’ Icing in the middle wasn’t thick enough to show up in the ‘Over the Top Brownies’ when they were cut so we switched to Double Stuff Brownies.


Here is what you will need to make this delectable Chocolate Treat:

1 batch of Chocolate Chip Cookie Dough

16 Double Stuff Oreos

1 Batch of Fudge Brownies

Caramel Corn*

Mini-Marshmallows*


DIRECTIONS:


  1. Make your Chocolate Chip Cookie Dough and spread on the bottom of a greased  9 x 9 x 2 Inch Baking Pan.  (Deeper is fine too)


Chocolate-Chip-Cookie Dough-in-Pan


2.  Layer the Oreos evenly over the Chocolate Chip Cookie Dough.

Oreos Added


3.  Scatter some Candy Corn over the Cookies.  (optional)


Candy Corn on top of Oreos


4.  Next make the Fudge Brownie Batter and spread over the Oreos.


Brownie layer with                  Marshmallows on top


5.  The photo above shows the Mini-Marshmallows scattered over the Brownie Batter.  Before I baked it I had a change of heart and mixed the Marshmallows into the Brownie mixture so they wouldn’t burn.  My student who made this same recipe with me on Saturday decided to put the Candy Corn and the Marshmallows on top during the last 5 minutes of baking.  While this gives a nice browned Marshmallow finish, she did not scatter the marshmallows over the whole dish.  Doing so would have given the whole thing a much nicer appearance.


Mayas Version

Cut Brownies with Oreo Thins


Digg This
Reddit This
Stumble Now!
Buzz This
Vote on DZone
Share on Facebook
Bookmark this on Delicious
Kick It on DotNetKicks.com
Shout it
Share on LinkedIn
Bookmark this on Technorati
Post on Twitter
Google Buzz (aka. Google Reader)

Be the first to comment - What do you think?
Posted by Admin Test - 2019/10/28 at 10:06 PM

Categories: Baking, Cookies, Cooking for Kids, Dessert Ideas, Family Fun, Halloween, Main, Private Cooking Lessons   Tags:

MAKING STOCK

It is now that time of year when many of us have a Turkey Carcass left from the Family Holiday Dinners. What do we do with this?

  1.  We throw it away.
  2. We try to take off as much of the meat that is sticking to the bones
  3. We make Stock out of it which we can use for Soup, Stews or Gravy.
  4. Take that carcass and put it into your largest pot along with an Onion (with the peel on), Some freshly washed Carrots, (unpeeled) and the top of a (washed) Celery Stalk which usually has plenty of leaves on it.  Put that leafy Celery along with a couple of stalks which have also been washed and cut up.
  5. Add some herbs such as Parsley, fresh Bail and Oregano and whatever else you like.
  6. Cover everything with Cold Water up to within a couple of inches of the top of the pot.
  7. Set on a medium/high flame until the liquid starts simmering, then turn down the flame to low.
  8. Allow this mixture to simmer all day or until you have the desired strength of flavor that you want.
  9. Once the cooking period over, move the pot to a cold burner and allow it to cool until you feel that you can handle it safely.  Place a large Colander over a large Vessel (large pot or huge bowl and pour the cooked stock through the Colander into the Vessel.
  10. Use the finished stock for Soup right away or pour into smaller containers and freeze until you are ready to use.  This stock will be great for Soups, Stews or Poultry Gravy.

I usually use the stock to make a superb Vegetable Soup which is great for Cold Weather Dining.  Your needs and taste buds will direct to use this Stock for your own special purposes.


When I was teaching Foods Classes in High School, the students didn’t mind stripping off the meat from the carcass which we then used to make Turkey Ala King or Turkey Salad or Mac and Cheese with Turkey.  Stripping off the meat takes a little bit of patience which probably most of us don’t have but if you have a couple of Kids around (over the age of 10) who wouldn’t doing it you can stretch that turkey even further you could have imaged.


Sorry there is no photo here – for some reason I was not able to post a new one.  Will render the situation as soon as possible.

Digg This
Reddit This
Stumble Now!
Buzz This
Vote on DZone
Share on Facebook
Bookmark this on Delicious
Kick It on DotNetKicks.com
Shout it
Share on LinkedIn
Bookmark this on Technorati
Post on Twitter
Google Buzz (aka. Google Reader)

Be the first to comment - What do you think?
Posted by sylveee - 2018/12/02 at 12:03 PM

Categories: Dinner Ideas, Holiday Meals, Leftovers, Main   Tags: , , , , ,

Sunday Baking Project – Week #10 – Outrageous Pretzel Bars Reinvented

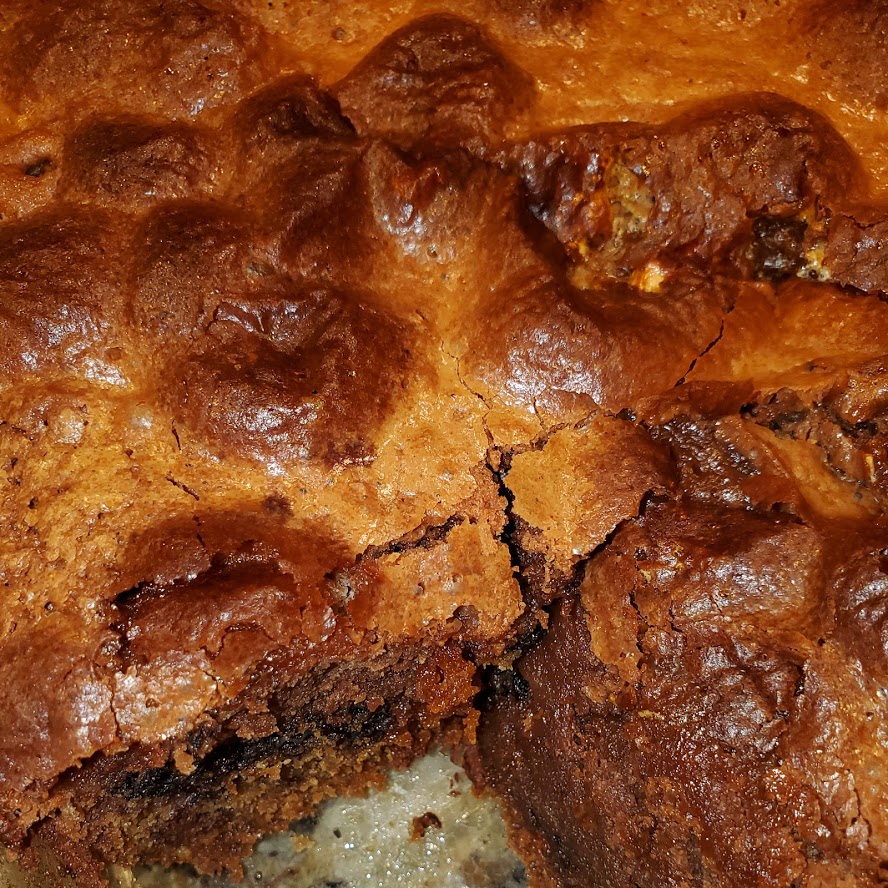
It seems that I have skipped Week 9 – will maybe get back to it sometime.  And this week I am taking the recipe a bit further.  The Outrageous Pretzel Bars are really that!  They consist of a Brown Sugar Cake (Brownie-like) and are topped with a Chocolate Fudge made with Sweetened Condensed Milk and Chocolate Chips.  More Chocolate Chips are put on top along with crushed Pretzels.  And the recipe is huge – they were cut into 24 Bars but maybe should have been cut into 36.  The bars are very chocolaty and filling and one cannot really eat much at a time.  That being said, my Husband loved the Bars!  He is an avid Chocolate Lover whereas I am not.  But they were good, especially the next day after they had time to dry out a little.

I took one-third to my Mahjong Group, froze one-third for one of my sons and we tried to eat the other third.  Since my husband is very reserved as to how much he eats and I am only an occasional chocolate consumer, we did have some left over.  After a week, the leftovers were thoroughly dried out and of course impossible to eat, but being the improvisor that I am, I just couldn’t throw them away.

My Food Reinvention skills came about when my Sons were small and I got my first Blender.  I started using leftovers to make other things.  The first was gravy that I turned into soup and so on.  I have a really yard time throwing food out so the Outrageous Pretzel Bars were the perfect thing to turn into something else.


         Outrageous Pretzel Bars

I broke up the leftover bars and put them into my Food Processor and chopped them up into as fine a crumb as I could.  Then I added about 1/3 cup of melted Butter and 1/4 cup Granulated Sugar.  (One could just use a Graham Cracker Crust Recipe for this Chocolate Bar Crust)  I did use it as a guide but the Butter called for was too much so I only used about 1/3 as stated above.


Next I pressed the Crumb Mixture into the bottom of my 9″ Springform Pan and baked it for about 5 minutes.  You could actually make the pie without baking the crust but the oven was already on for something else, so I did bake it.  The problem with baking is that it releases some of the butter and then you have to blot it off.


         Crumb Mixture in Pan


Next I made the Bavarian Creme.  I started out by making a Vanilla Soft Custard which is the base for all Bavarian Cremes.  Next I incorporated a cup of Whipped Creme into the Custard.  Recipe will be found in the recipe section of this blog.


Once the Creme chilled sufficiently I poured it into the Crust and then chilled the whole thing.  When it was ready to serve I took off the sides of the Springform and placed the whole thing, (bottom of pan included) on a serving plate and topped with Chocolate Curls.  Next I cut it into moderate portions.  The Bavarian Creme was actually much less filling than the original Pretzel Bars themselves.

      Bavarian Creme in Shell


         Chocolate Curls Added


                Single Portion

Digg This
Reddit This
Stumble Now!
Buzz This
Vote on DZone
Share on Facebook
Bookmark this on Delicious
Kick It on DotNetKicks.com
Shout it
Share on LinkedIn
Bookmark this on Technorati
Post on Twitter
Google Buzz (aka. Google Reader)

Be the first to comment - What do you think?
Posted by sylveee - 2018/07/11 at 4:51 PM

Categories: Baking, Dairy, Dessert Ideas, Eggs, Leftovers, Main, Pastry, Sunday Baking Project   Tags: , , , ,

CULINARY MAKEOVERS – # 20 – Pancake and Egg Breakfast

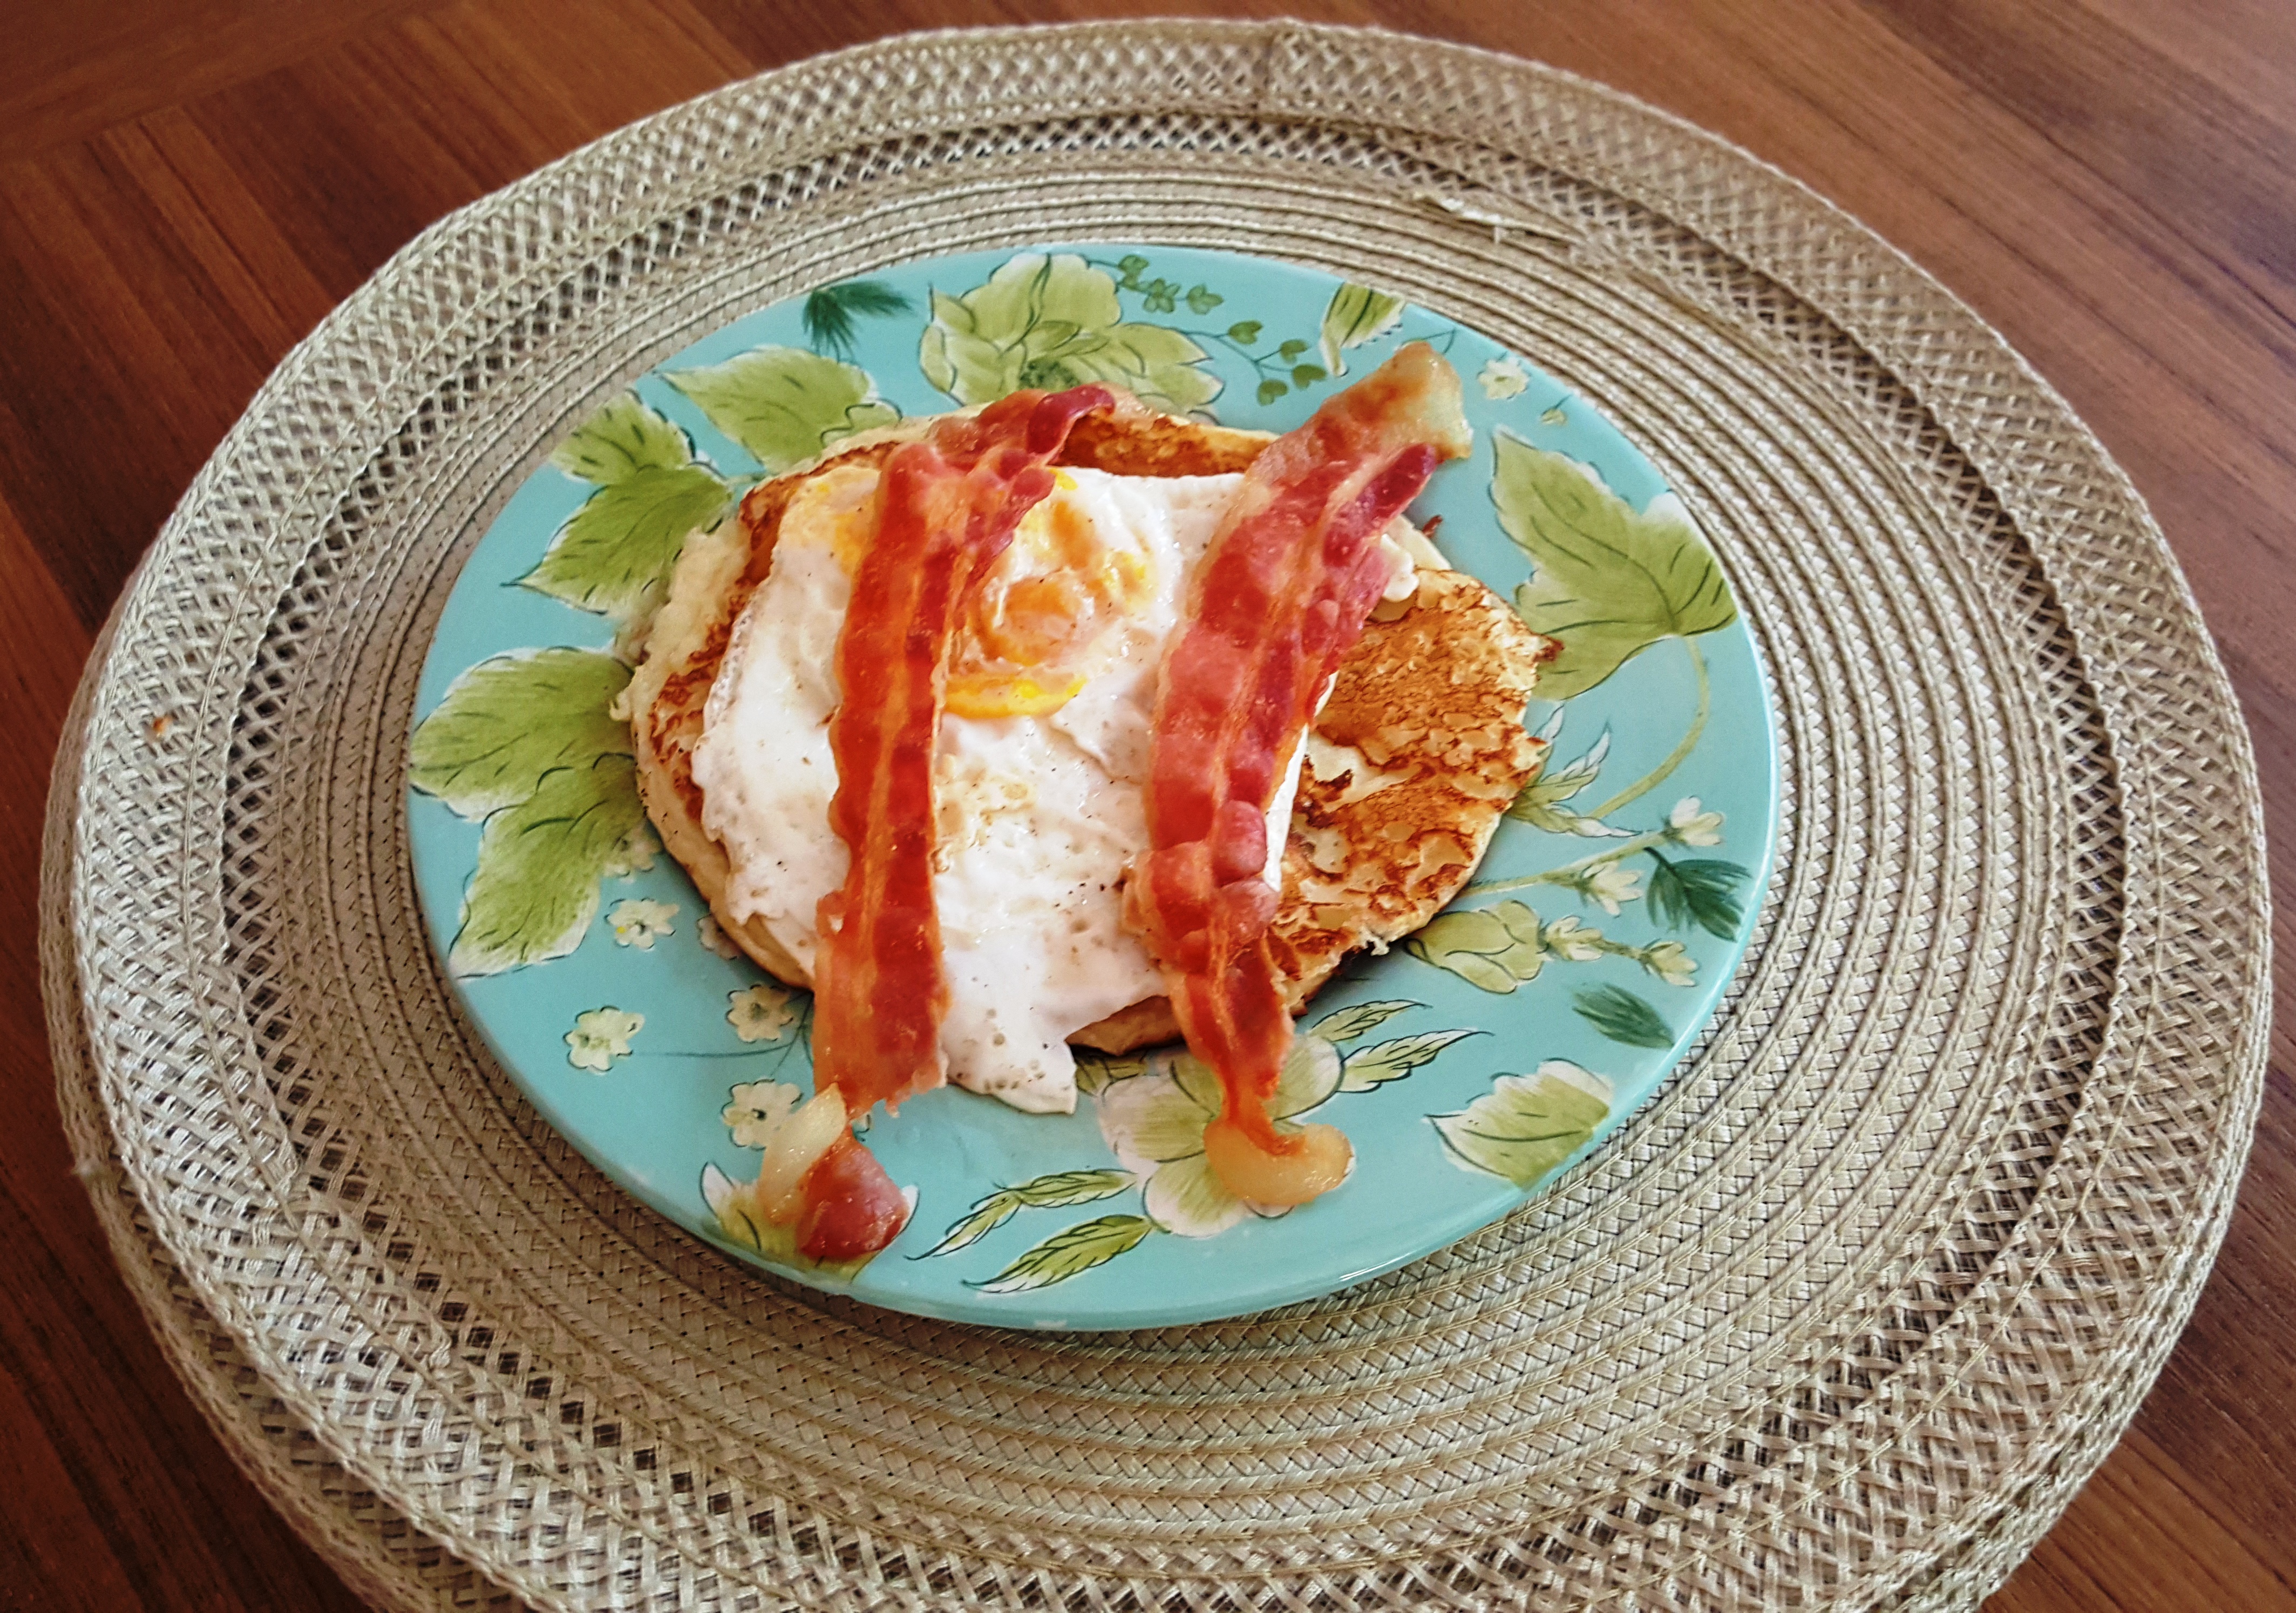
We love Pancakes as I assume most people do.  When I was cooking for 7 or 6 or 5 and so on – there were not usually any leftovers when I made Pancakes or Waffles.  Now that we are only 2, making a small batch of Pancake or Waffle Batter is almost impossible and rather useless.  You can always use the leftover Waffle Batter to make Pancakes or more Waffles the following day or two and you can always use the leftover Pancake Batter for more Pancakes.  Unless you make your Pancake Batter somewhat thick, you’d better not use it for Waffles the next day.  I like my Pancakes on the thin and light side, so the leftover batter does not do well in the waffle iron.  So this morning for Breakfast, I took yesterday’s leftover Pancake Batter and made Pancakes and Eggs with it.  A very simple thing to do.

I used my Omelet Pan and made two  Pancakes, one for my Husband and one for myself.  Next I made Easy-Over Eggs and put one on top of each Pancake.  Add a couple of strips of Bacon, a glass of Juice and a cup of Coffee or a glass of Milk and Voila, you have Breakfast.  Easy, Simple and Fast and no wasted Pancake Batter.  The Pancakes take the place of Bread.  Very simple, like 1 – 2 – 3 and you are done!


  Pancake Side One

                             Pancake Flipped

                                       Egg Cooking

                               Egg Flipped

                                            Pancakes and Bacon

Digg This
Reddit This
Stumble Now!
Buzz This
Vote on DZone
Share on Facebook
Bookmark this on Delicious
Kick It on DotNetKicks.com
Shout it
Share on LinkedIn
Bookmark this on Technorati
Post on Twitter
Google Buzz (aka. Google Reader)

Be the first to comment - What do you think?
Posted by sylveee - 2018/06/10 at 9:32 AM

Categories: Breakfast Ideas, Cooking for Everyone, Cooking with Children, Culinary Makeovers, Dairy, Eggs, Leftovers, Main   Tags: , , , , ,

WINTER COMFORT FOOD – VEGETABLE SOUP

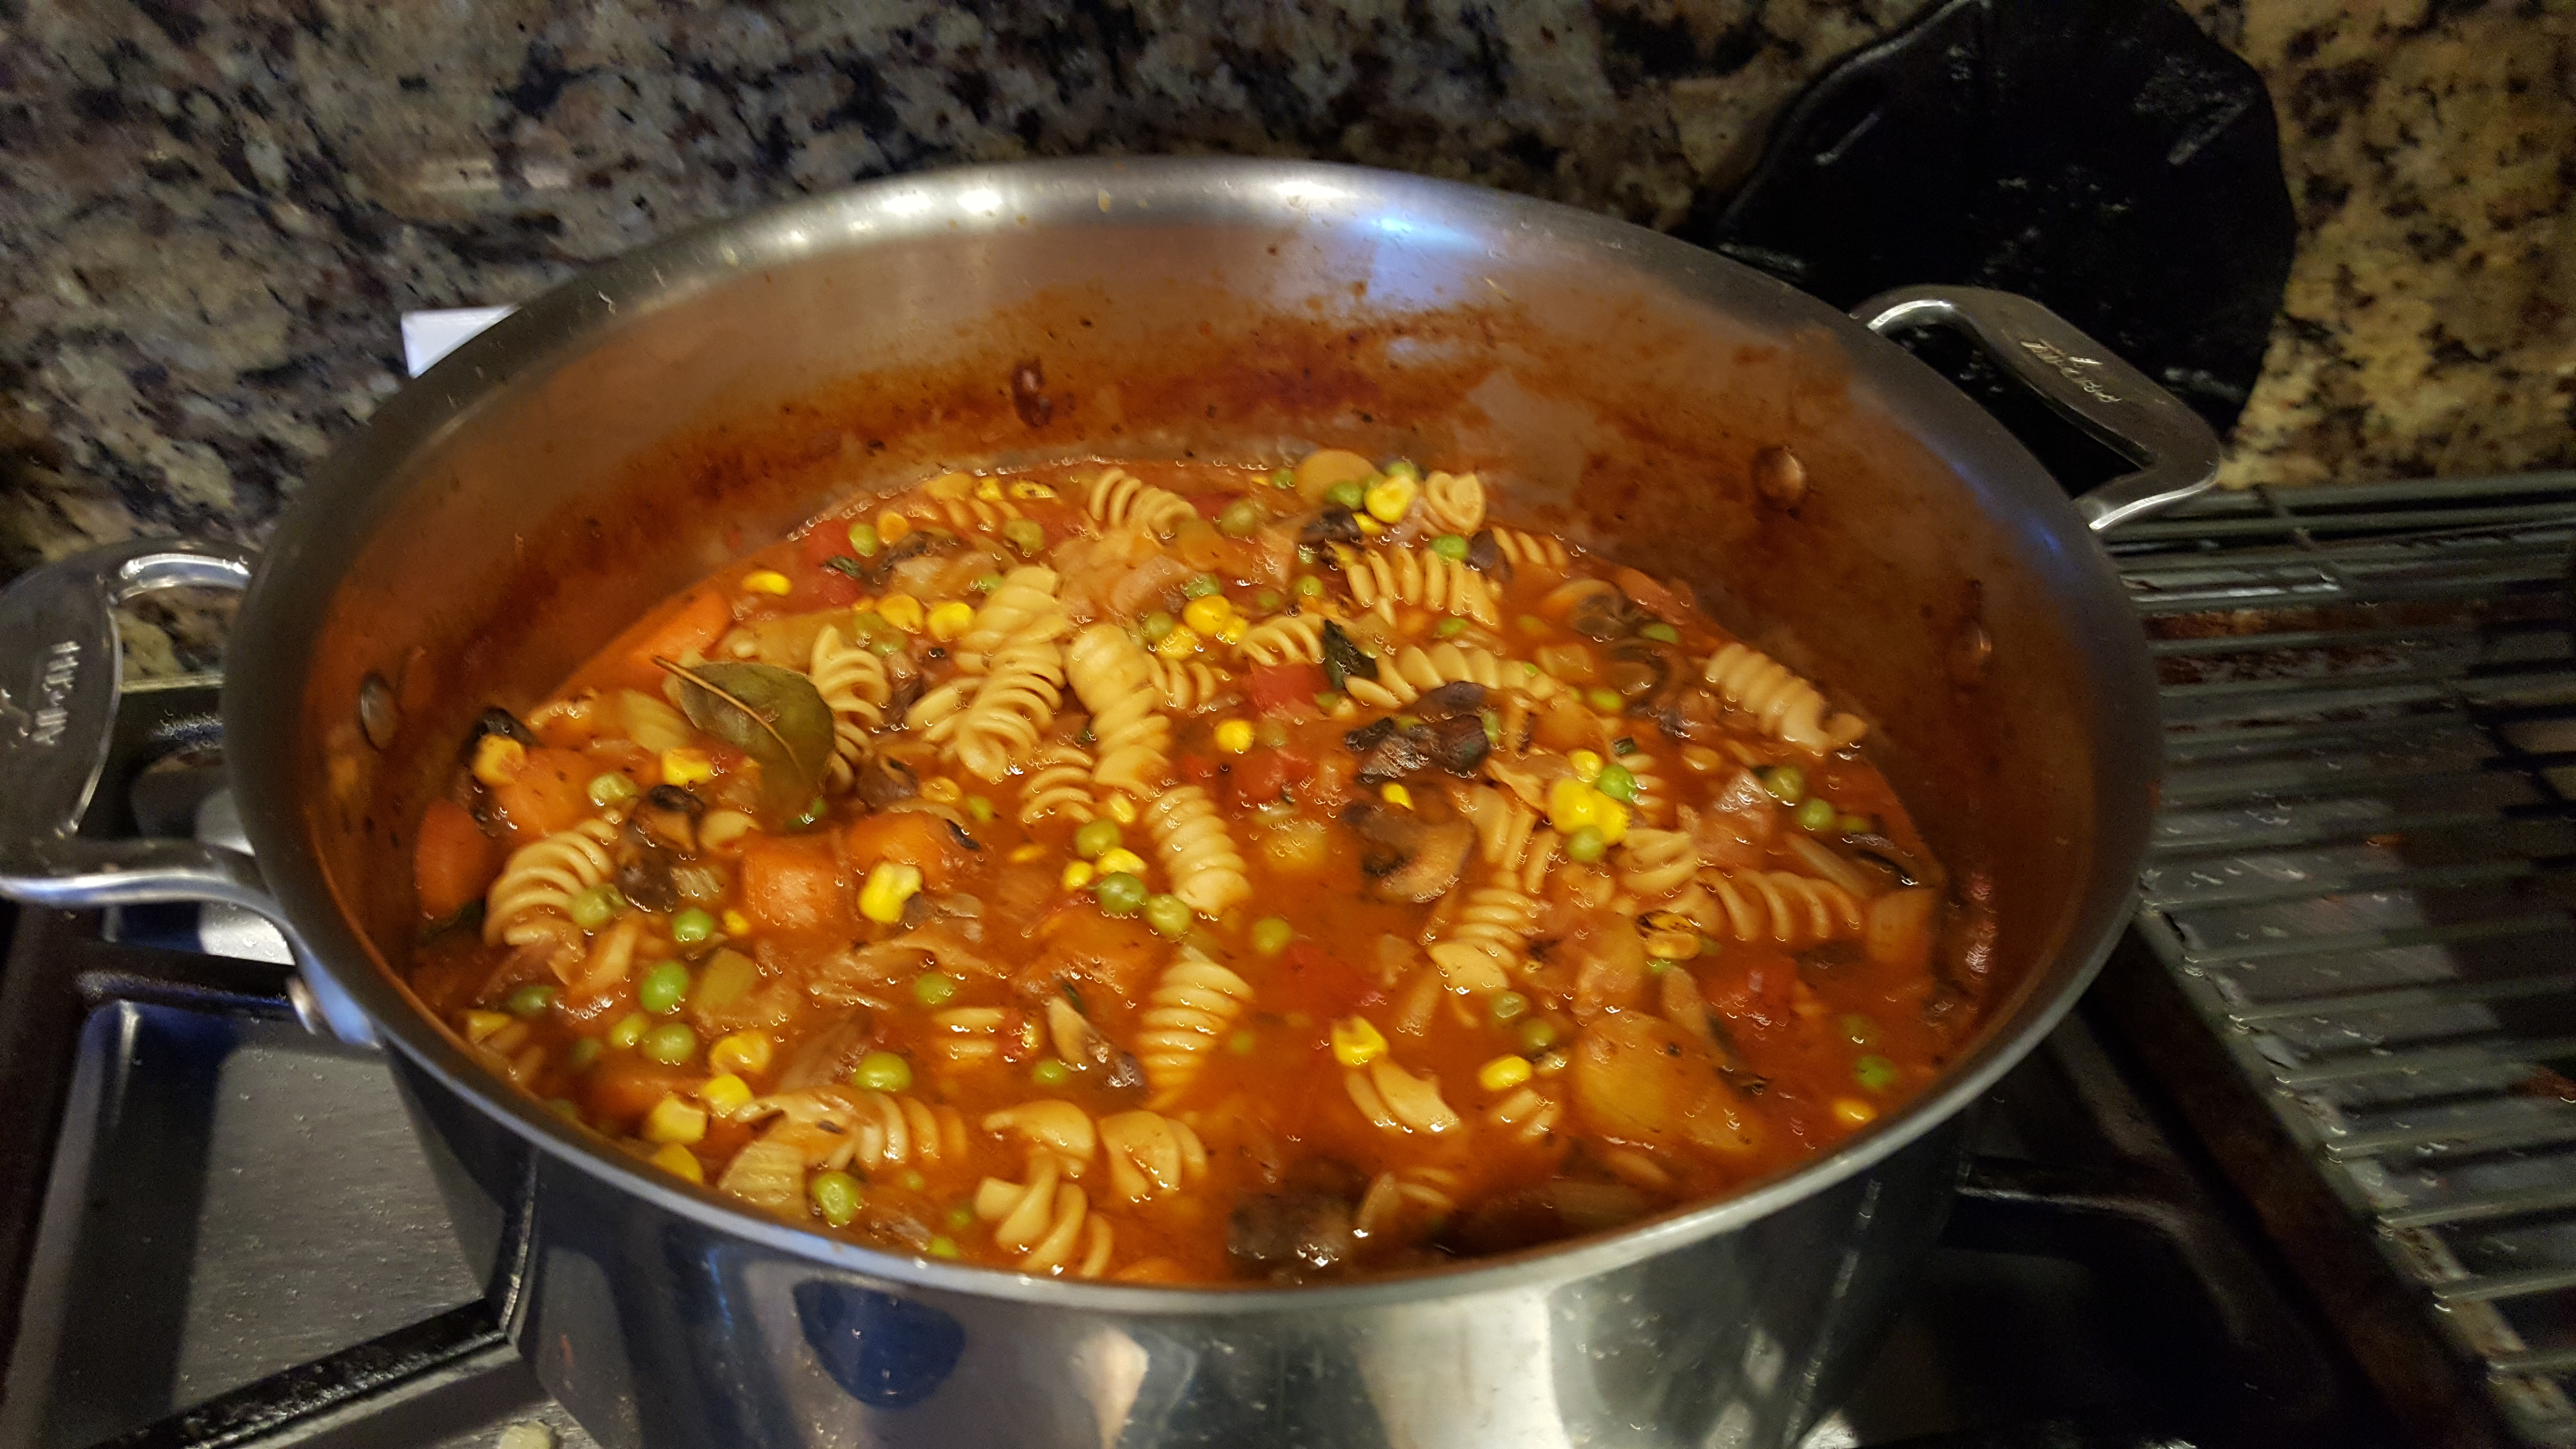
Comfort Food is Food that warms the body and the soul.  It makes you feel good and satisfied after eating it.  I think Comfort Food is different for different cultures and different people but there are variations within the dishes that we call ‘Comfort Food’.  The differences are not so much in the main ingredients but in the preparation techniques and the seasonings used.  Here is another great Comfort Food that really warms you inside – Vegetable Soup – it can be served as a complete meal with the addition of some protein and delicious fresh bread.  It can also be served as a first course and the leftovers are great for lunch.


I love to make Vegetable and it is one of my favorite ways of cleaning out the Vegetable in my refrigerator. If you have ever wondered what you are going to do with all those vegetables that you just can’t seem to getting around to use or even if like I do, you have little bits and little bits of that, Vegetable Soup is the perfect vehicle for using up those items.  So when I taught school, I taught my students how to make ‘Clean Out the Refrigerator’ Vegetable Soup.


What you will need is a large pot and some Olive Oil and whatever you can forage from your refrigerator.  If you don’t have items in your refrigerator that you can use, you can always visit your local Farmer’s Market or Grocery Store to pick up whatever you wish to put in your soup.  For the last batch I made, I used Onions, (a must), Celery, Carrots, Mushrooms, Tomatoes and Tomato Paste, Frozen Peas and Corn.  For the batch before this one I used a Sweet Potato and Spinach.  Visit vegetable-soup for the complete recipe.


Saute your Vegetables (starting with the Onion and Mushrooms)  in Olive Oil. I always salt the Mushrooms as they do need and it helps to leech out some of the water in their pores.  Once they have cooked and started caramelizing add the remaining fresh Vegetables and dried herbs.  For the liquid I use either de-fatted Turkey, Chicken or Beef Broth, depending on what is in my freezer.  Vegetable Soup does not need to cook for a long time – you do not want really mush vegetables.  It is much better to have some texture left to bite into. About 10 minutes before serving bring the soup up to boiling and add about 1 cup uncooked Pasta.   Once the Pasta is ‘al dente’ add fresh Herbs  (in this case two kinds of Basil), and frozen Peas and/or Corn if you are going to use them.  A couple of minutes is all you need for these frozen Vegetables.


To make a complete meal out of your Vegetable Soup, add some Protein such as Tofu (for Vegans), Chicken, Sliced Hot Dogs or Sausage or Turkey.  Any one of the above make a great addition to your soup which is also delicious without it.  Just serve it with some Hot Fresh Bread.


                                Fresh Vegetable Soup with Pasta


Digg This
Reddit This
Stumble Now!
Buzz This
Vote on DZone
Share on Facebook
Bookmark this on Delicious
Kick It on DotNetKicks.com
Shout it
Share on LinkedIn
Bookmark this on Technorati
Post on Twitter
Google Buzz (aka. Google Reader)

Be the first to comment - What do you think?
Posted by sylveee - 2017/01/18 at 7:59 PM

Categories: Cooking for Everyone, Dinner Ideas, Farm Markets, Leftovers, Lunch Ideas, Main, One Dish Meals   Tags: , , , , , , ,

Next Page »